Chronicling my Long EZ construction (and a few other things).
Disclaimer
This blog is for entertainment purposes only, and is not meant to teach you how to build anything. The author is not responsible for any accident, injury, or loss that occurs as a result of reading this blog. Read this blog at your own risk.
With the modification to the instrument panel completed, the time has come for this bulkhead to be permanently installed in the fuselage.
Nothing new here, once again I floxed the edges, located the panel, smoothed the corners with more flox, applied BID tape and peel-ply, and let it cure.
The next morning I removed the peel-ply (and F-22) and took some finished photos.
Flox applied to instrument panel edge
Instrument panel in position
Extra flox smoothing the corner
Extra flox on all 3 other intersections, of course.
BID tape in place
Back side taped as well
BID on opposite corner
Peel-plied and curing overnight
Same thing from the back side
BID tape cured and peel-ply removed
A little sanding was necessary to remove leftover peel-ply strands
Back of instrument panel, right side.
Back of instrument panel, left side.
Instrument panel permanently installed (minus F-22, and F-28)
Something happened today that prompted me to want to discuss epoxy ratio checking.
In the past I have mentioned that testing the “hardener to resin” ratio, as delivered by the pump, is very important, but I thought that there was no way anything could change this ratio, once the pump lever was bolted down tight.
I was wrong!
Today, as I nearly always do before a job, I checked the pump ratio again expecting it to be pretty close to the usual 44 parts of hardener to 100 parts of resin. Four attempts later, I was still getting fluctuating results from 27 to 100, to 35 to 100.
The pump lever, it seemed solidly attached in the usual position (I had marked it). So, what could cause this issue?
Opening the hardener lid, I could not see any problem. Until I drained the canister to clean the valve, that is, and what I found near the bottom was a bit shocking.
Hardener reservoir bottom after draining
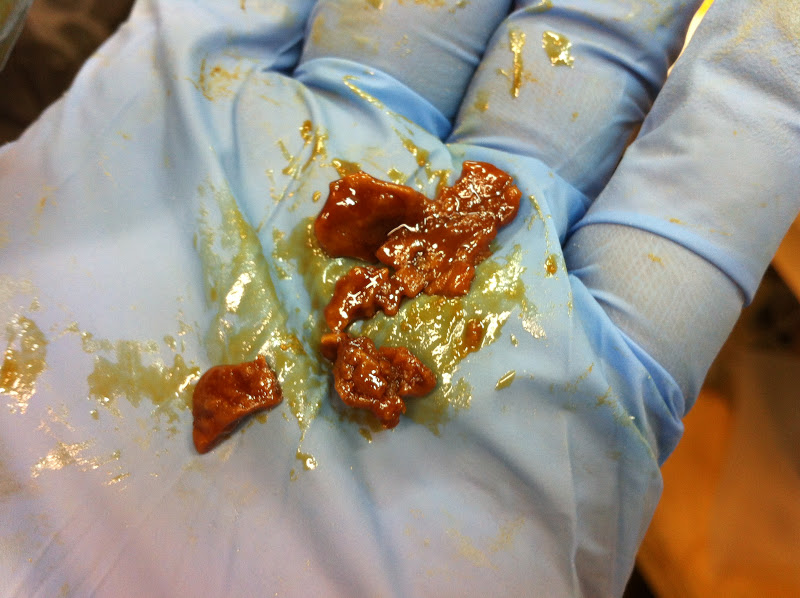
Material collected from epoxy pump
I am not quite sure what the stuff is, and how long it has been building up in there. This material has the consistency of warm toffee.
Looks like a pecan, but it's not!
"Pecan" smushed with my thumb. It felt pretty firm, but not hard.
I have always done the “scratch test” on the cup I used to mix the epoxy, the day after construction, to test for hardness of the cured material. I did in this case as well, with satisfactory results, so this has obviously had no ill effects so far, except from clogging up the valve today.
Scratching last week hardened epoxy with scissor. "Ops check OK!"
I cleaned up both the canister and the valve with Acetone, and put everything back in as it was.
I sure hope this is the last time I have to clean that mess!
Valve in place, and reservoir mounted back on the pump.
Doing another ratio test I finally got good numbers, 43.5 to 100.
Good test (bottom right) after cleaning
This time around, I decided to strain the hardener while pouring it in the pump reservoir, and I trapped more gunk straight from the can.
Kitchen strainer sacrificed for a worthy cause.
I will resolve to be even more religious about ratio testing from now on.
UPDATE:
While rereading the whole CP set (1398 pages), I ran into 2 vital entries I must have missed before...
CP 32 page 6
CP 29 page 5
So, I now have more guidance on what is going on with my epoxy, and what not to do.
Luckily for me, the situation above happened with the last few ounces of hardener left in the can, and because I always do the scratch test to make sure the epoxy hardened as intended, I know my last few layups have not been affected.
It is worth repeating that the presence of lumps, nuggets, crystals, or just a cloudy appearance in the hardener, is ground for work stoppage, and performing the reheating procedure highlighted above. This procedure reaches a much higher temperature (160℉ to 190℉ or 71℃ to 88℃) than suggested to me by Aircraft Spruce's customer service (120℉ - 49℃).
I thought I was done with chapter 4, but there was still one last issue I had identified early on, that I wanted to take care of before permanently installing the instrument panel.
I debated over the necessity of the modification, but in the end I decided that postponing it would have just complicated the procedure, or might have never gotten done at all.
I first noticed the problem when trying to get in and out of the wooden mock-up I had previously built. I found it difficult getting my legs past the instrument panel without leaving some skin on it, particularly since moving the seat forward by 2” further reduced the space available to maneuver about.
While that might be a slight over-dramatization, I was concerned about banging my flash on such a thin bulkhead in case of strong turbulence or, God forbid, a forced landing.
In the motorcycle design industry, this area of interest is known as “passive safety”, or a design feature intended to reduce the risk of injury, as opposed to “active safety”, such as an ABS breaking system, for example.
Not convinced? Need more examples of passive safety? Ok, how about the round metal balls at the end of motorcycles' brake and clutch levers? Those are designed to not penetrate a thigh during a crash. How about the smooth transition from the motorcycle seat to the fuel tank, or the below-surface fuel tank cap? Those designs are intended to prevent you from leaving your “family jewels” behind, as the force of the accident propels you sliding forward over the gas tank.
Yeah, I thought that would strike a nerve!
So... back to my concern.
As you can tell from the next photo, my friend Steve has given some thought to the issue, no doubt as a result of some scraping incident. His idea was to cover the sharp edge with some fuel line slit down the middle. Effective perhaps, and easier to do after the plane was built.
Since I am far from completion, I decided to go the more difficult, and permanent route, and modify the instrument panel now, while I could still flip it whichever way I needed. Below you will find pictures showing the complete sequence of how I accomplished that, keeping in mind that a little more integration with the nose structure components will have to be accomplished in a later chapter.
"Necessary roughness"
Removing foam
Foam and dried micro removed from fiberglass
Flox in place of foam (I used West epoxy since this is not a structural feature)
Glueing leftover foam to the front side of the instrument panel
Excess foam was later removed with a hot-wire cutter
Foam leveled with the hot-wire cutter, and sanded to the desired shape
Scraps of BID at 45˚ reused here
Dried glass protruding into the cockpit (back) side
Glass trimmed on the back side. You can start to see the much thicker profile.
Removing all the foam from the instrument panel
Foam removed and fiberglass trimmed
Glue removed and fiberglass sanded
Applying flox
Smoothing the transition
New fiberglass tying the front of the instrument panel to the new structure
Right side (as seen by the pilot) done
Side view of the "channel"
Both sides done and peel-plied
Opposite view
Curing overnight
Finished product after some sanding
Instrument panel forward face
Leg cutout details, as seen by the pilot.
Instrument panel walk-around
One added benefit is that, should a wire ever come loose and dangle, it might get cradled by the structure, thus avoiding being ripped by one of my boots while getting in or out of the cockpit.
Attendance was down a bit due to the weather, still a couple of dozen airplanes made it, and the fly-in was as good as always.
Sadly, for the third year in a row, neither myself nor any of my builder friends got to ride a Long EZ.
An outsider might think flyers enjoyed taking builders up for short rides around the airport. That alone would really go a long way toward keeping them motivated to continue building, especially since only 1 in 10 ever finishes a plans built aircraft.
As far as I could tell, that didn't happen, and it left me wondering about it during my 15 hours drive back home :-(
I suppose I can resolve to make a difference once my airplane flies, and offer rides myself.
Regardless, it was fun to see how people built and modified their creations, and a number of fly-bys livened up the get-together a bit.
Eyes on the prize!
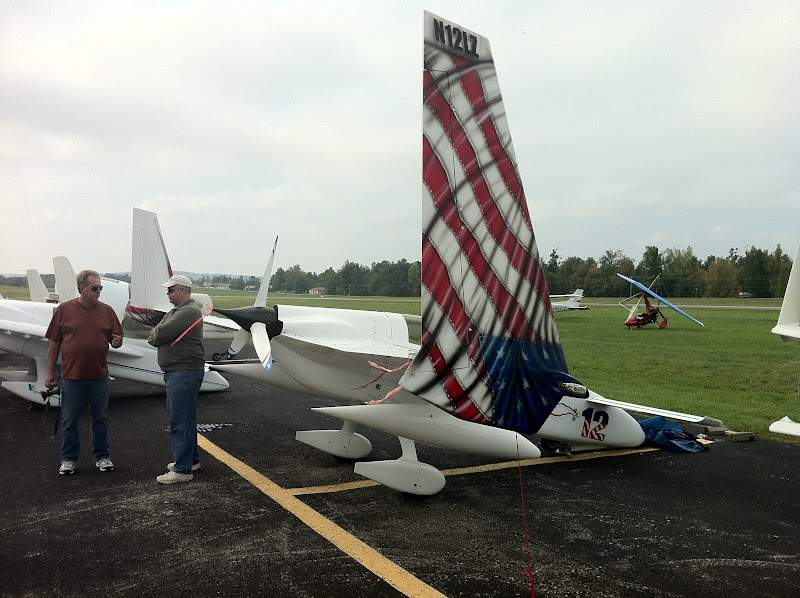
The view driving up to the flight line
New and old friends
UPDATE:
One week after Rough River was over, I found out that one Long EZ did give a few rides. I suppose timing and knowledge were of the essence.
Next year we'll have to come up with a better plan for connecting supply with demand, andyou all really need to consider coming, or "yours truly" might just have to get back in line over and over again, just to make sure that the increased supply does not go to waste, you know! :-)