Disclaimer

This blog is for entertainment purposes only, and is not meant to teach you how to build anything. The author is not responsible for any accident, injury, or loss that occurs as a result of reading this blog. Read this blog at your own risk.

Sunday, November 17, 2019

Shop preparation - Part 7

Large parts storage

Thinking too far down the road can occasionally have negative consequences, and being emotionally ok with not doing so can prove to have some advantages. 

Getting overwhelmed by future details will definitely put a chill on one’s aspirations, and I’m pretty sure I would have never started this project had I required all the answers ahead of time. 

One needs to allow for the vagaries of life to do their thing, and not get too wrapped around possible future events.

One item I had not given a lot of thought in the past was large parts storage, and with the canard sitting unfinished on my table for the past three years, this subject became unavoidable.


Running out of space fast

In case you wondered, I did pitch the typical “May I store it in the house?” cry for help to my wife, even though I was fully aware of the impossibility of maneuvering the 11 foot long canard through the small corridors of the house.

After the millisecond it took her to decide against it, I resigned myself to building some kind of storage solution in my already overcrowded shop, and I immediately identified a pretty large area of untapped potential above the garage door.


Promising new storage prospect

Before even thinking about storing the canard though, I needed to finish the post-glassing cleanup that was so rudely interrupted when JT’s avionics wizardry got delivered in the summer of 2017.


Gotta get rid of the Bondo blobs, the red tape, the fiberglass over it, then sand the transition smooth.


A razor knife and a sharp chisel work best

Sanding the transition smooth

Now, let’s get back to the storage…

Though I needed to store large parts, weight would not be substantial. This allowed me to design a shelf with only two heavy duty metal brackets solidly attached to the garage door posts with lag screws.


1000 lbs heavy duty shelf bracket

Shelf coming together

I did recycle two 10 foot beams used in the building of the straight tower of Pisa to span the brackets, and because weight was not an issue (but maximizing available volume was), I laid them on their wider side, accepting that they might sag slightly if too much weight was to be applied.


Second crossmember attached

Before going too far with this design though, I decided to stress test the structure to higher than intended rating.


Good enough for me, good enough for the canard.

I then finished up the shelf by covering the span with pine plywood screwed to the crossmembers.


Adding a floor

But the more I looked at the shelf, the more I wished I had added a center support. So, I went back to the store and picked up some more hardware to take care of this issue.


Jacking up the center section

Third member reporting for duty!

Installing the center support

With the canard cleaned up and the shelf completed, I reused the foam the canard was cut out of, as a base for long term storage.


Taking no chances with this baby

Storing the canard leading edge down will prevent any warping

That's one out of the way storage. Love it!

Next thing you know, other items cluttering the shop ended up filling the unused portion of the new shelf.


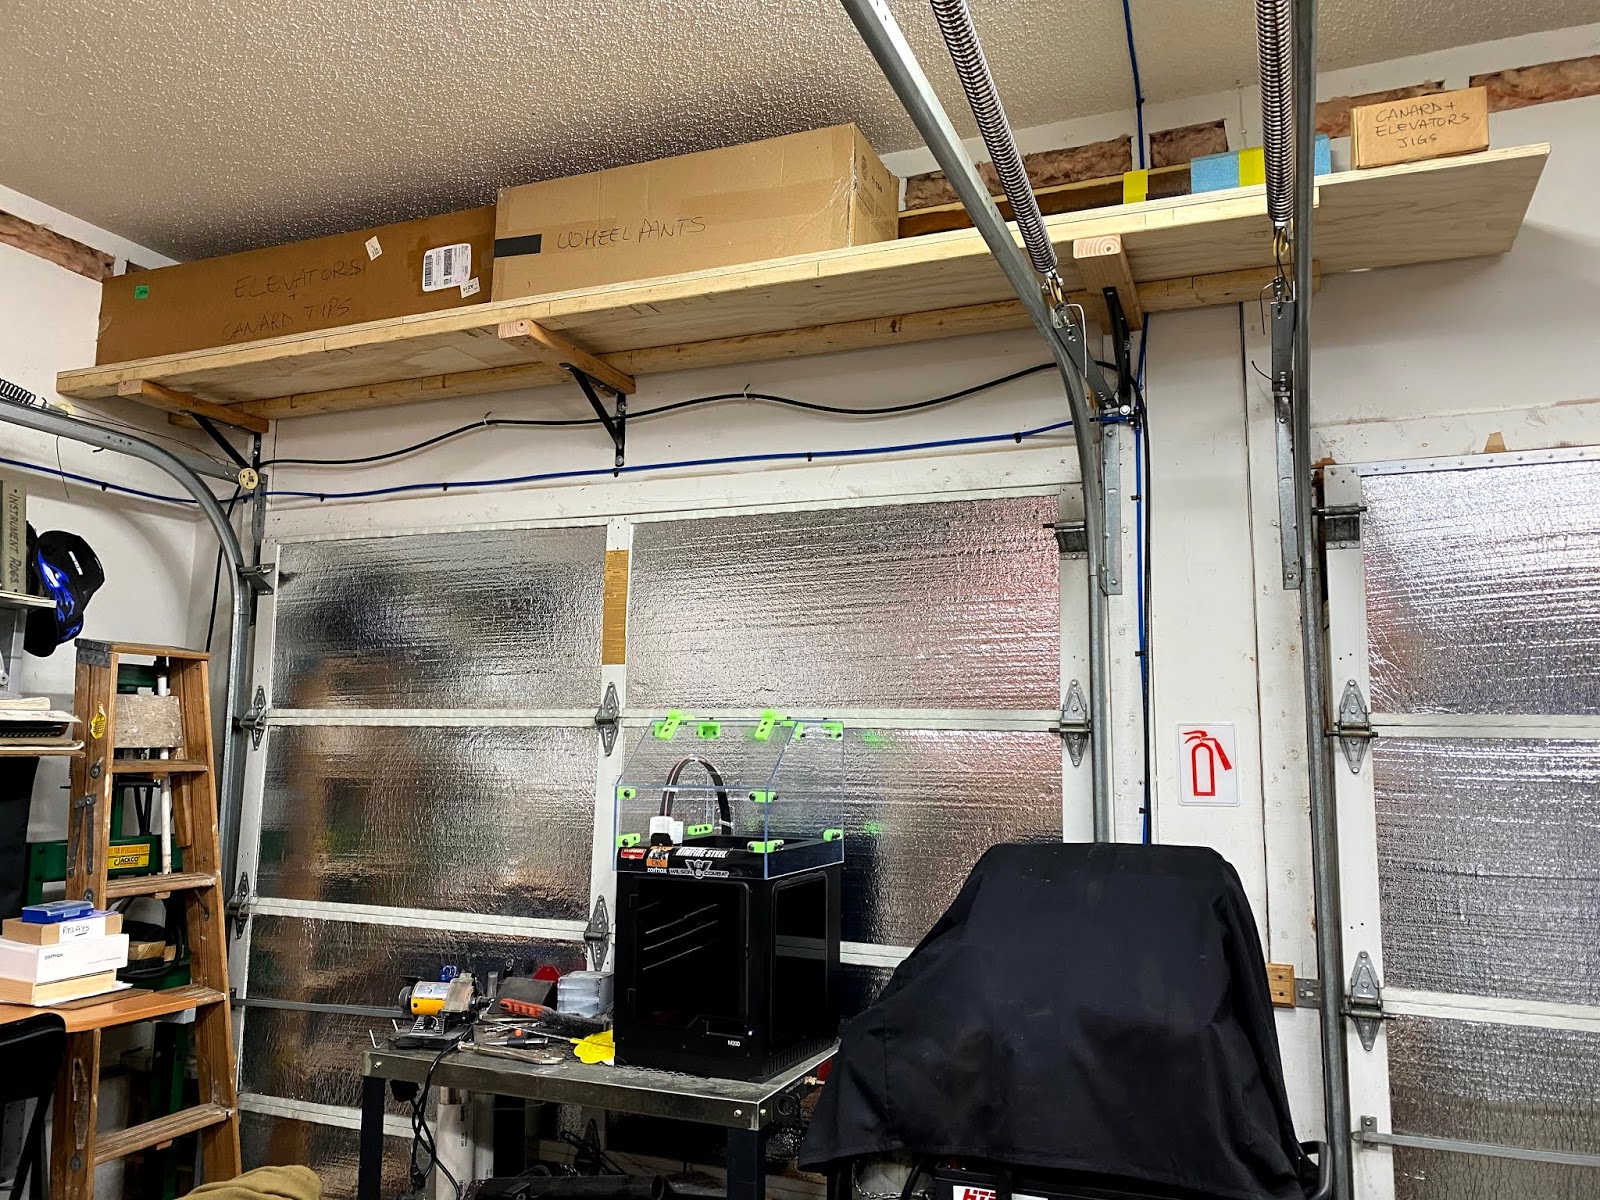
New storage is getting popular already

Crap! It already looks like I might need to build more shelving in the future. 

Good thing I never plan that far ahead. 


Monday, November 11, 2019

Two small batteries or one big one?

Big changes up front

ODYSSEY Extreme Series batteries employ dry cell Absorbed Glass Mat (AGM) technology to contain acid, allowing the battery to be installed even on its side (but not upside down).

But, are two AGM small batteries better than one bigger one?


Two Odyssey PC680 taking up all of the nose space

One Odyssey PC925 on its side taking up less room

First of all, an original per-plans Long EZ does not need two batteries, but offsetting the bigger, heavier engine JT has in the back requires a certain additional amount of weight in the front to keep things in balance. Now, this can be useless weight like bags of lead shots, or useful weight like an extra battery.

Which one would you choose?

Yeah, I thought so!

Switching to the bigger battery removed 5.2 lb (2.4 kg) from the nose, and created some space for carrying a small toolkit. 


Small but heavy

Lighter but of equal capacity

Because I do need the weight up front, I will create a toolkit that will put back at least 5 lb in the nose of the plane. 

Did I really change anything then?

You see, while it would appear like an overall wash, those tools will come from the toolkit I normally carry in the passenger compartment when I go on trips, so this mod will save actual weight, and create a little more comfort for the back seater who won’t have to deal with a bag between his feet.

Had this been the only reason for the change, it would not have been very high on my priority list. Truth is, two batteries have a few drawbacks as well, and after killing one of my PC680s early in my JT experience, I was schooled by the Odyssey engineers on the proper way to charge a two-battery setup… which is across the two batteries


Note how the charger leads connect to separate batteries

In theory when you parallel two batteries (same kind and brand new) and your charging point is on the first battery, the charge would go to both, but apparently minor differences in the internal resistance of the batteries and cables used, will create a situation where the second (and third, and fourth) battery charges less over time, and its usefulness is reduced. 


In reality, the battery connected directly to your charger will draw more amperage than the battery furthest down the bank, as the current is reduced through each interconnecting lead.


When this happens, the downstream battery is always less charged, and starts to “go bad” beginning to act like a vampire or black hole on the electrical system, sucking precious charge from the good one. This creates a situation where the two-battery setup is never fully charged, and two small batteries become less effective than even a single small battery. 

Next thing you know, over time the engine becomes harder to start, and that’s because your one good battery is not only carrying starting loads, but it is actually fighting battery #2 at the same time. 

Ask me how I found that out!

Once again, the proper way to charge two batteries is across them.

Both batteries drawing equal current

But even then, your results might vary based on the age of each battery, whether it is of the same kind, etc.


Because of the extra attention one has to pay to the second battery, I decided to move away from the dual setup, and simplify my installation by using just one big battery.


Using duct tape to protect the battery, and adding some clearance to the battery tray-to-be.

Using Bid leftovers for this project

Glassed and peel-plied

Tray removed

Turns out the tray was a bit flimsy, so I added a few more plies to stiffen it up.


Thicker tray fits perfectly over the battery

This battery can be installed in any orientation but upside down

Light and sturdy, but how to attach it to the plane?
The new battery fits great on its side

Some of the old tie-down hardware will have to be removed

I decided to keep the front fiberglass tab as it's in the perfect spot to help me glass the tray
This is where I'll mount the tray

Having decided where to mount the tray, the next step was deciding how attach it to the floor of the nose, and how to hold the battery down.

Initially I leaned toward glassing the whole interior of the tray directly to the floor...


Initial glassing plan

... and make some sort of integral fiberglass hold down, with aluminum hinges, pins, etc...


Tie-down ideas from my buddy Wade

... but then I ran into a battery tie-down strap from a local boating accessories store for only $5!!!


3" by 36" nylon strap and buckle are resistant to acid spills and corrosion

Less glass, less weight, less money, less... work!

I had to make this happen!

The plan changed slightly to leave a fiberglass-free zone in the middle for the strap to pass through.


New glassing plan

Checking for clearance

$5 battery hold down strap from West Marine (boating accessories)
Gaining any amount of space in such a tight plane is akin to finding gold!

Too tight for power tools in here, all sanding had to be done the old fashioned way.

"No, I never throw away old newspapers!"

Battery tray glassed and peel-plied curing under the heat lamp
Temperature was closely monitored at all times
Plastic sheet under aluminum tape to minimize difficult cleanup 

Peel ply, tape, and plastic removed.
Passthrough channel for strap remained clear of glass and epoxy 👍🏻

After a little cleanup

Perfect fit!

Job's done!

Much simpler battery wiring 

New found space put to good use

Nothing left to do now but to test it.

😉

Let's go flying!