Chronicling my Long EZ construction (and a few other things).
Disclaimer
This blog is for entertainment purposes only, and is not meant to teach you how to build anything. The author is not responsible for any accident, injury, or loss that occurs as a result of reading this blog. Read this blog at your own risk.
I realize that talking about engine-stands might not be as exciting a topic as some previous ones, but if you think you will ever find yourself needing to rotate or transport a Lycoming engine, this episode will give you a quick and efficient way of doing so (some fabrication required), and if you were also so inclined as to endure the headaches of a new fuel injection installation (I'd suggest bringing your fuselage home), then this homemade "accessory" would prove itself a real life saver.
Last time, we abandoned JT's engine at the hangar on a wooden 2×4 support structure suspended from two sawhorses. This is okay temporarily, but definitely not ideal for many reasons.
We might, for example, want to be able to transport this engine home, and wouldn't wanna to lose it down the highway, or have it come crashing through the rear window because it is not securely bolted down.
We might also need to rotate the heavy engine every so often in order to flow engine oil to the top of the crankcase, where the delicate camshaft lives, thus staving off internal rust in the very hot and humid coastal climate.
To make the latter happen, I borrowed intake and exhaust covers from my buddy Mike Beasley, purchased six gallons of inexpensive automotive oil, and poured it in the oil filler port until it started leaking out somewhere. Five gallons is all I could get into it, so I poured the rest of it into the spark plug holes, filling up all cylinders with motor oil (wouldn't recommend this last part since it multiplied the leaks I would be cleaning up for the next 12 months).
Intake and exhaust covers
By this point the vast majority of the engine's internal components was completely submerged in oil, all except the critical camshaft at the highest point of a Lycoming. Rotating the engine often is the solution for this, but first I had to mount the engine on a borrowed automotive engine-stand that, while capable to support this type of a load, was never designed to accept the Lycoming bolt pattern.
A three legged engine-stand is about as good an idea as an offroad three-wheel ATV
Much more stable. Ditch the supplied handle for a much longer lever.
This folding crane is definitely a must-have
As you might imagine, this was a pretty high priority sub-project, because delay would spell corrosion, and corrosion inexorably leads to premature engine failure, and expensive engine tear-down and overhaul.
Still scratching my head on how to mate the two incompatible structures, I got a good tip on how to do it from my friend Wade Parton. Some fabri-cobbling would be required, but I saw it as a vindication of my foresight in purchasing and learning how to use a welder a few years back.
“I knew that would have come in handy one day!” 😁
So, I purchased some angle iron from Home Depot, sanded the mill scale off of it for better welding performance, and cut it into two main sections, and four small angle pieces.
Making EZ work out of cutting steel
The two angles will make up the body of the interface
The latter would be welded to the former in order to capture JT’s engine-mount geometry. Let me show you how I did that...
Long angles and small angle pieces capturing the lower mount geometry
A few tack-welds
Double checking the fit before full welding
One side finished
Other side
Back for a final fit
Finished lower interface
Doing the same for the top side of the engine-mount
All angles tightly held
I skipped to the end here, after welding and drilling the angles.
Because of the hole locations, this interface will only fit JT, and will be forever paired with her.
A little primer and some galvanized hardware from Lowes, and I had a working prototype.
Time for a test fit to adjust the movable arms of the stand to match the engine-mount.
Getting the stand and mount to match
Next time it would be for real.
Angles and engine-mount securely attached to the engine
Lifting the ensemble off the temporary wooden structure
Finally on a "proper" stand
Oil leaks were a constant companion
Rotation problem solved!
Here’s how (please excuse the terrible audio)…
Rotating the engine
With the magnitude of work I had planned for JT, there was no way I’d travel 40 minutes one way to the hangar every day during a pandemic, so I decided to bring JT home once again.
JT headed home again for the long surgery
This was just as COVID started becoming a problem
Unfortunately for the wing that I was building in the garage for my other LongEZ project (aka #2), JT’s sudden arrival meant a mad scramble to find a new temporary storage location for the delicate foam wing. My uber-understanding wife allowed me to bring it in the house. She’s definitely a keeper!
Chris excited to help with #2's right wing
I'm calling this an "objet d'art"
The garage doors had to be slightly modified to allow JT in, which barely slipped in sideways, after receiving the usual blood sacrifice from my battered right hand used as a human shield against the wood trim.
How I wish I had one big garage door right now
Having JT at the house is sooo convenient
The important thing was that JT was inside, finally safe, and without a scratch. Flesh wounds heal anyway 🩸 🏥 😖.
Eventually, even driving to the hangar every few days to rotate the engine started to become a real chore, so the decision was made to create some more room in the garage, and bring JT’s engine home as well.
Cutting recesses for the bolt heads
Bolt heads have to be countersunk for this to work
Engine is ready for the trailer now
JT's engine looks ready for some trick skiing 😂
Anyway😒...lowering the engine onto the trailer.
I added wood screw to attach it to the trailer so that it wouldn't slip
Then added a bunch of straps to inhibit tilting
Engine made it home unscathed
New crane handled it all easily
Chris removing the "skis"
Finally ready to rest this case
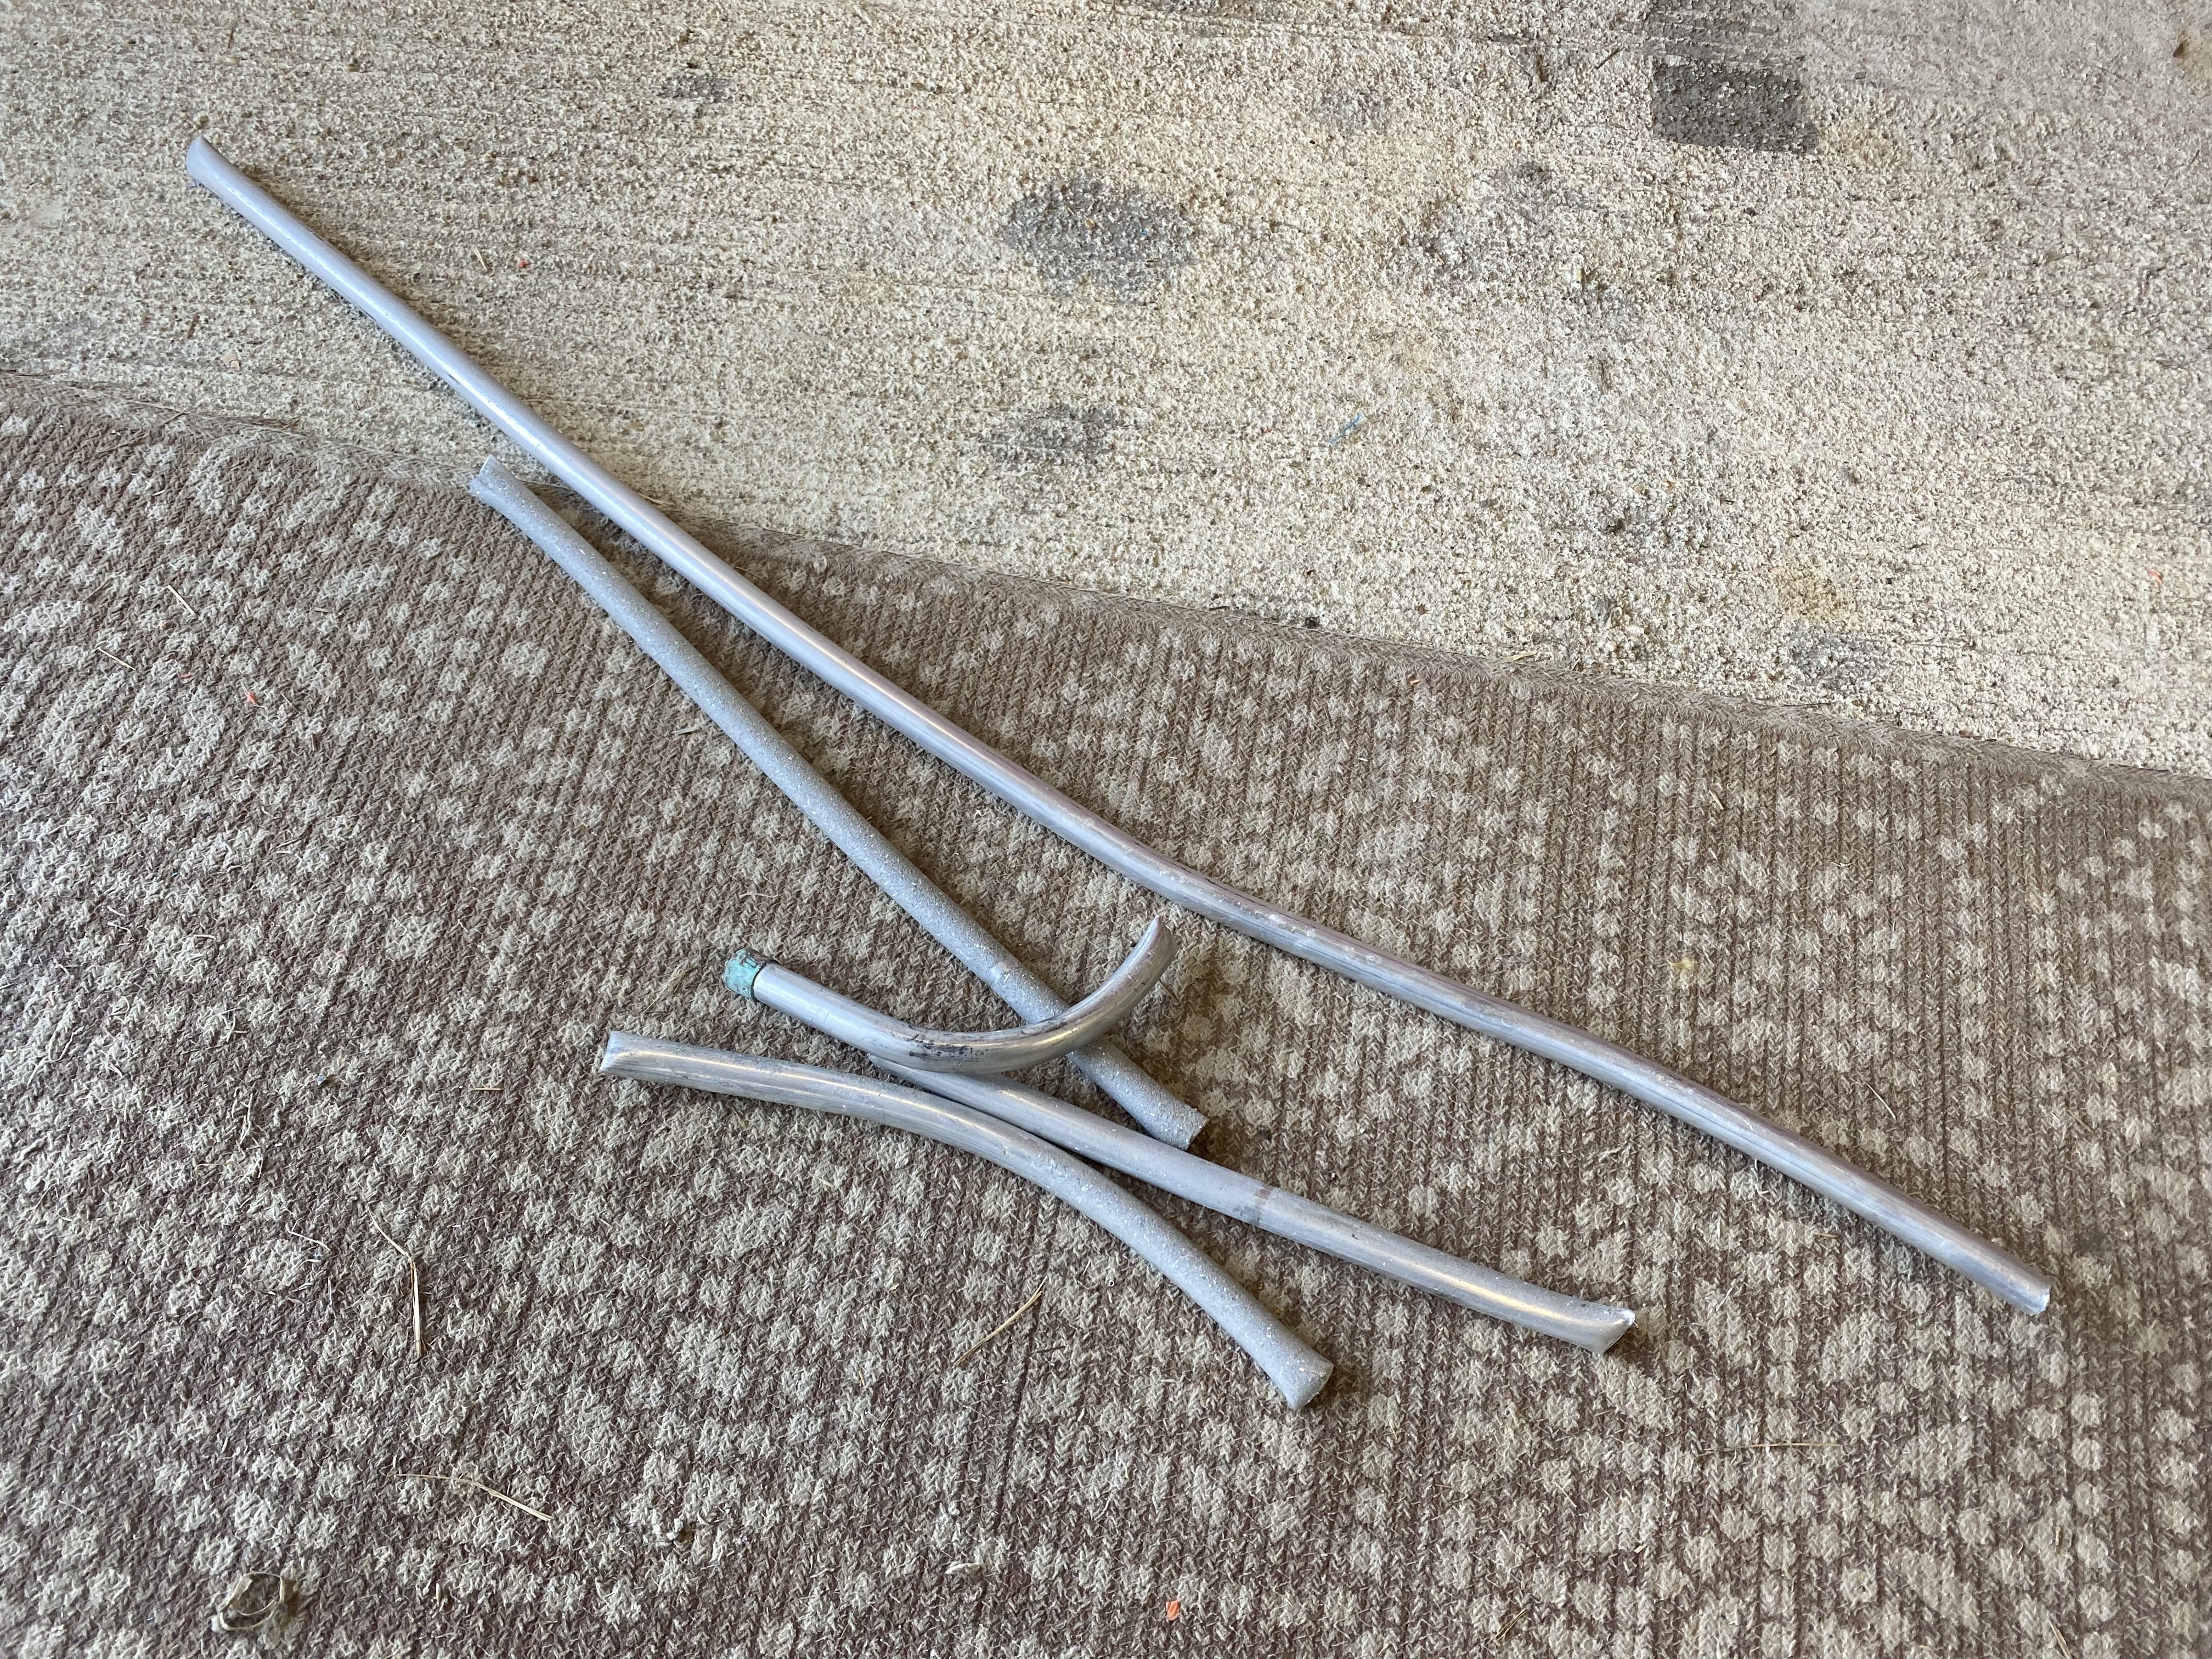
Note the long steel bar used to flip the engine after ditching the short one.
I eventually moved the engine to the new stand
With JT’s engine now sitting in my heated and air conditioned garage, I would have complete control over the environment, and rotating it would be done more frequently, and with less effort.
Engine Removal Time to get started with one of the least glamorous, but as you'll see not less dramatic part of this fuel injection conversion.
Removing JT's engine turned out to be quite an ordeal, but not because I had never done it before, so I thought you might find my experience to be a bit… refreshing. The short of it is that the engine attaches to the engine-mount with four huge bolts, and the engine-mount in turn attaches to four aluminum extrusions using eight smaller bolts, but this fact alone doesn’t do justice to the complexity of the endeavor.
One O-320 ready for travel
When the Rutan Aircraft Factory closed its doors in the early 2000s, it left everyone to their own ingenuity and resourcefulness in dealing with the challenges that inevitably crop up during a build as involved as this, and over the years standardization morphed into a four letter word whose original positive connotation was lost to time. That “no two Long-EZs are ever the same” is such an understatement to anyone who has seen more than one example, that you would be excused for thinking that factory options must have been numerous, when in fact there was only one set of plans ever published (albeit with many corrections). In spite of that, anytime you get a chance to encounter one of these incredible machines, the marks of individualism and personalization are always in full display, and customization is a point of great pride achieved at very high cost in both time and effort.
These planes could hardly be any more different up close
Knowing that every other Long-EZ will be somewhat different, sometimes significantly, I will concentrate on JT’s hardware only, and what it took to get her stripped… of its power-plant.
Right off the bat one has to decide whether he wants to remove just the engine, or the entire engine and engine-mount assembly. The difference is not trivial, and it highly depends on the type of maintenance you are looking to perform.
If you had to remove the engine to do a complete overhaul, you would probably elect to remove only the engine, and leave as many of the subsystems untouched as possible, like fuel and oil lines, starter relays, electronic ignition computers, engine monitor computers, etc.
On the other hand, if you needed to do a more thorough job, like replacing the firewall, upgrading the fuel system, replacing the engine monitoring system, etc. you might want to remove both, possibly together, to facilitate doing the work.
In JT’s case, the changes would be massive, so all of it had to come off.
But, why?
You see, one of the issues I had been living with since the beginning, was that the aluminum firewall’s protective coating had been slowly flaking off for the past two decades. The exposed bare aluminum was ill equipped to withstand the heat of a gasoline flame, leaving the prospect of an engine fire even more dreadful than it already was.
Heat resistant coating has seen better days
To remedy this drawback, I wanted to manufacture a new firewall out of stainless steel, or perhaps titanium, but replacing the firewall meant that everything had to go, and I mean EVERYTHING.
All of the engine temperature and pressure sensors interfacing with the VM-1000 engine monitor, including the Engine Computer, and the Instrument Panel Display would be removed and sold, and a new modern GRT-Mini Engine Monitor system would be installed in its place. This will allow for software updates, audio alerts, recordings, easier leaning, PFD backup, better readability in direct sunlight, customization, multiple pages, technical support, repairs, etc. No, it wouldn’t be cheap to buy, nor easy to install, but in a now signature move, I’d kick this issue down the road for later-solving like so many others.
The VM-1000 engine monitor is a quarter of a century old
There's nothing like the smell of new avionics in the morning 👃🏼
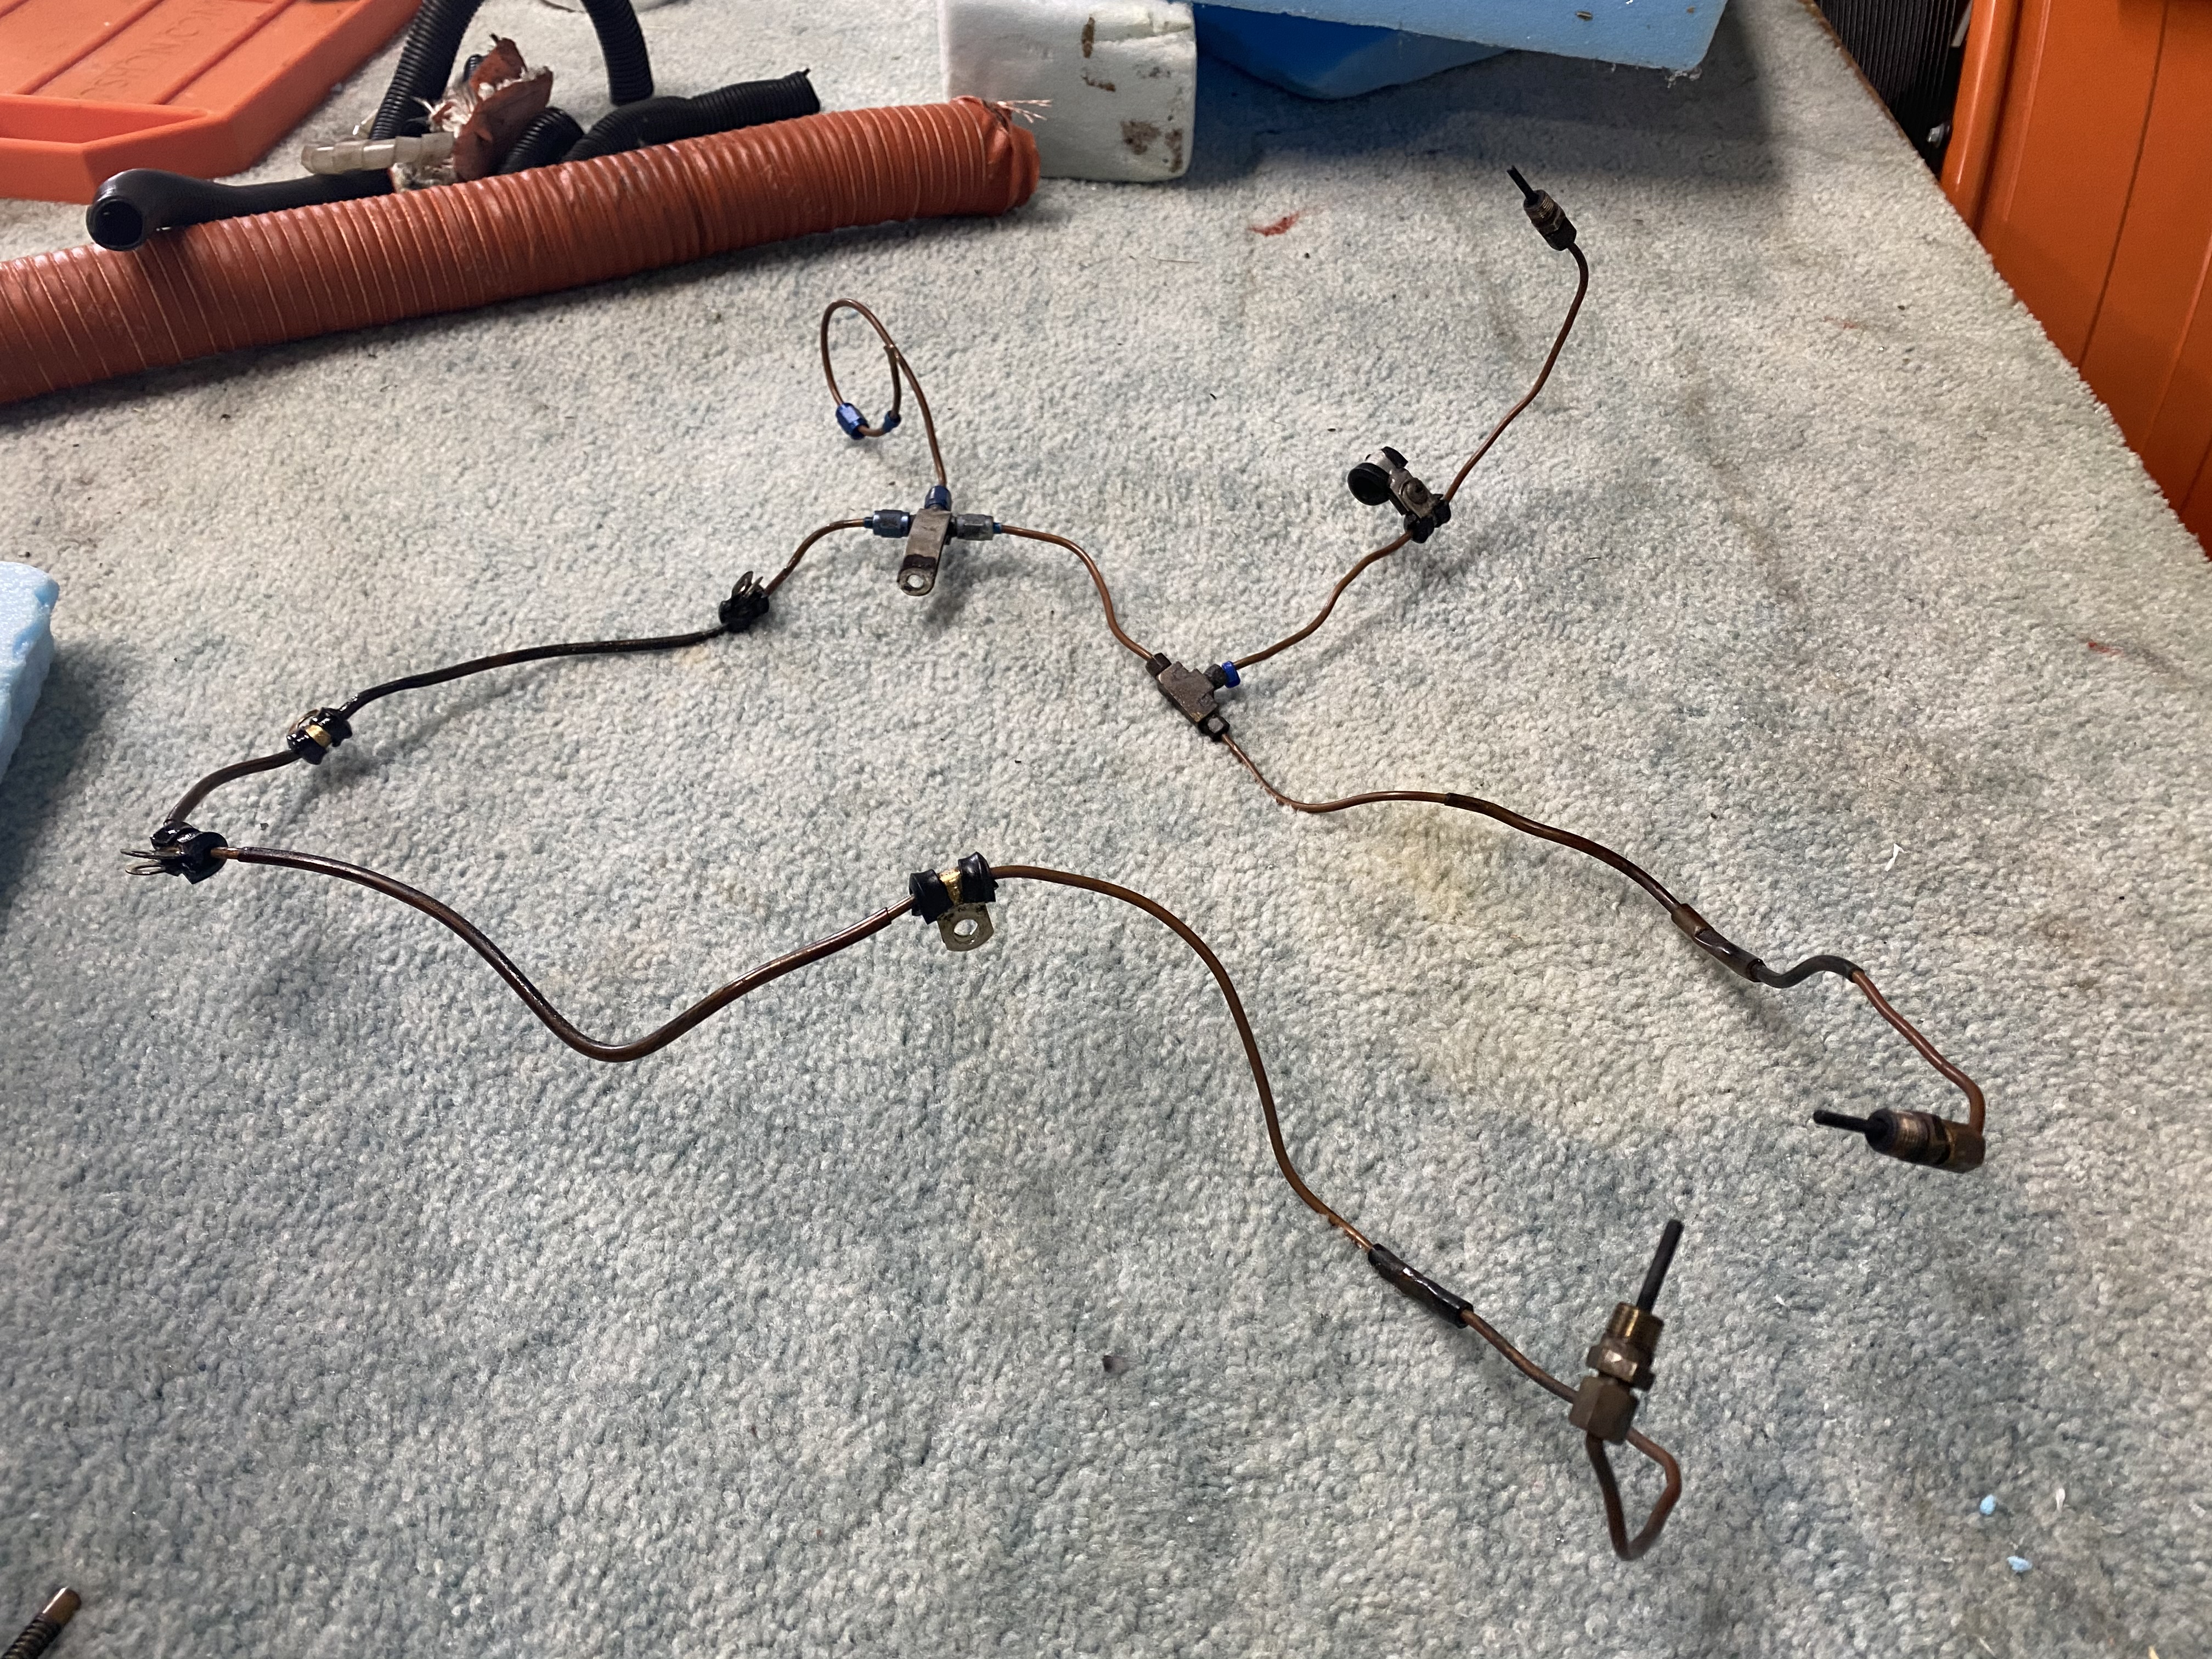
Removing the engine began with disconnecting everything that went from the engine to the firewall, such as throttle/mixture/carb-heat cables, alternator and starter cables, numerous fuel lines, quite a few oil lines, primer lines, EGT probes, CHT probes, electronic ignition leads, Manifold Pressure hose, magneto leads, and a few more I cannot think of right now.
Demolition day
CHT and EGT probes
Fuel primer lines
Chris and I supported the engine with a crane while removing the four bolts connecting it to the engine-mount, then we slowly pulled it back while checking for other tethers. Pretty soon we reached the point of no return, and the first time we saw the engine dangling from the hoist was pretty dramatic.
No turning back now
The scary side of commitment
With the engine out of the way, I was impressed at the amount of hardware still connected to the firewall, and made a mental note to relocate them and simplify the firewall as much as possible during a future reassembly.
Effective, but way too busy for my liking.
"What's all of this stuff anyway?!"
Took me a while to map it all out
Until I could remove the engine-mount off the plane (more on that in a moment), and fabricate a custom engine-mount to automotive engine-stand interface, I rested the power-plant on a thrown together temporary structure made out of 2x4s I had in the hangar, and called it done for the time being, kicking another can into my distant future.
Improvised engine stand
It would be a little while before I can use a real engine stand
Removing the engine-mount turned out to be very troublesome. While seven of the eight nuts and bolts were easily removed, number eight (there’s always one) proved to be a major pain in my ass. Let’s take a look at the bolts so you can understand.
Lower left engine-mount to extrusion interface
Top left engine-mount to extrusion interface
Top right engine-mount to extrusion interface
Lower right engine-mount to extrusion interface
In the last photo you can see that the aileron control-rod pivot-plate (aka CS124) has a special shape that allows for left and right movement near the bottom right engine-mount. Unfortunately the proximity to the aluminum extrusion prevents the horizontal bolt from being removed, even when turning the control stick fully left, or even disconnecting the control linkages altogether. No amount of counterclockwise rotation will allow for enough clearance to remove that bolt.
Highlighting the lack of space to remove the horizontal bolt
Blue color highlights the lack of available space
Even with the plate rotated 90º the bolt cannot be removed
The antidote to this dilemma is swapping the horizontal and vertical bolt positions, but this can only be done during the initial build, the way Mike Toomey did on Chris’ plane… Smart!
The horizontal and vertical bolt hole locations were swapped here
My idea was to pull the pivoting plate backward about 1" from the firewall, then remove the bolt by sliding it between the firewall and the newly repositioned plate.
Looking in the plans this seemed possible after first removing the bolt that fastened the swiveling plate to the control rod. Unfortunately this bolt lived on the other side of the firewall, in one of the least accessible locations on the plane, up high in the aptly named Hell Hole.
Even finding this bolt proved to be challenging
The bolt from Hell
Not only is this bolt impossible to reach, but it is also impossible to see. The photo above was taken by sticking an iPhone through the hole in the passenger’s seat-back.
Hell Hole is behind this top hinged Engine Monitor computer (location of the bolt highlighted)
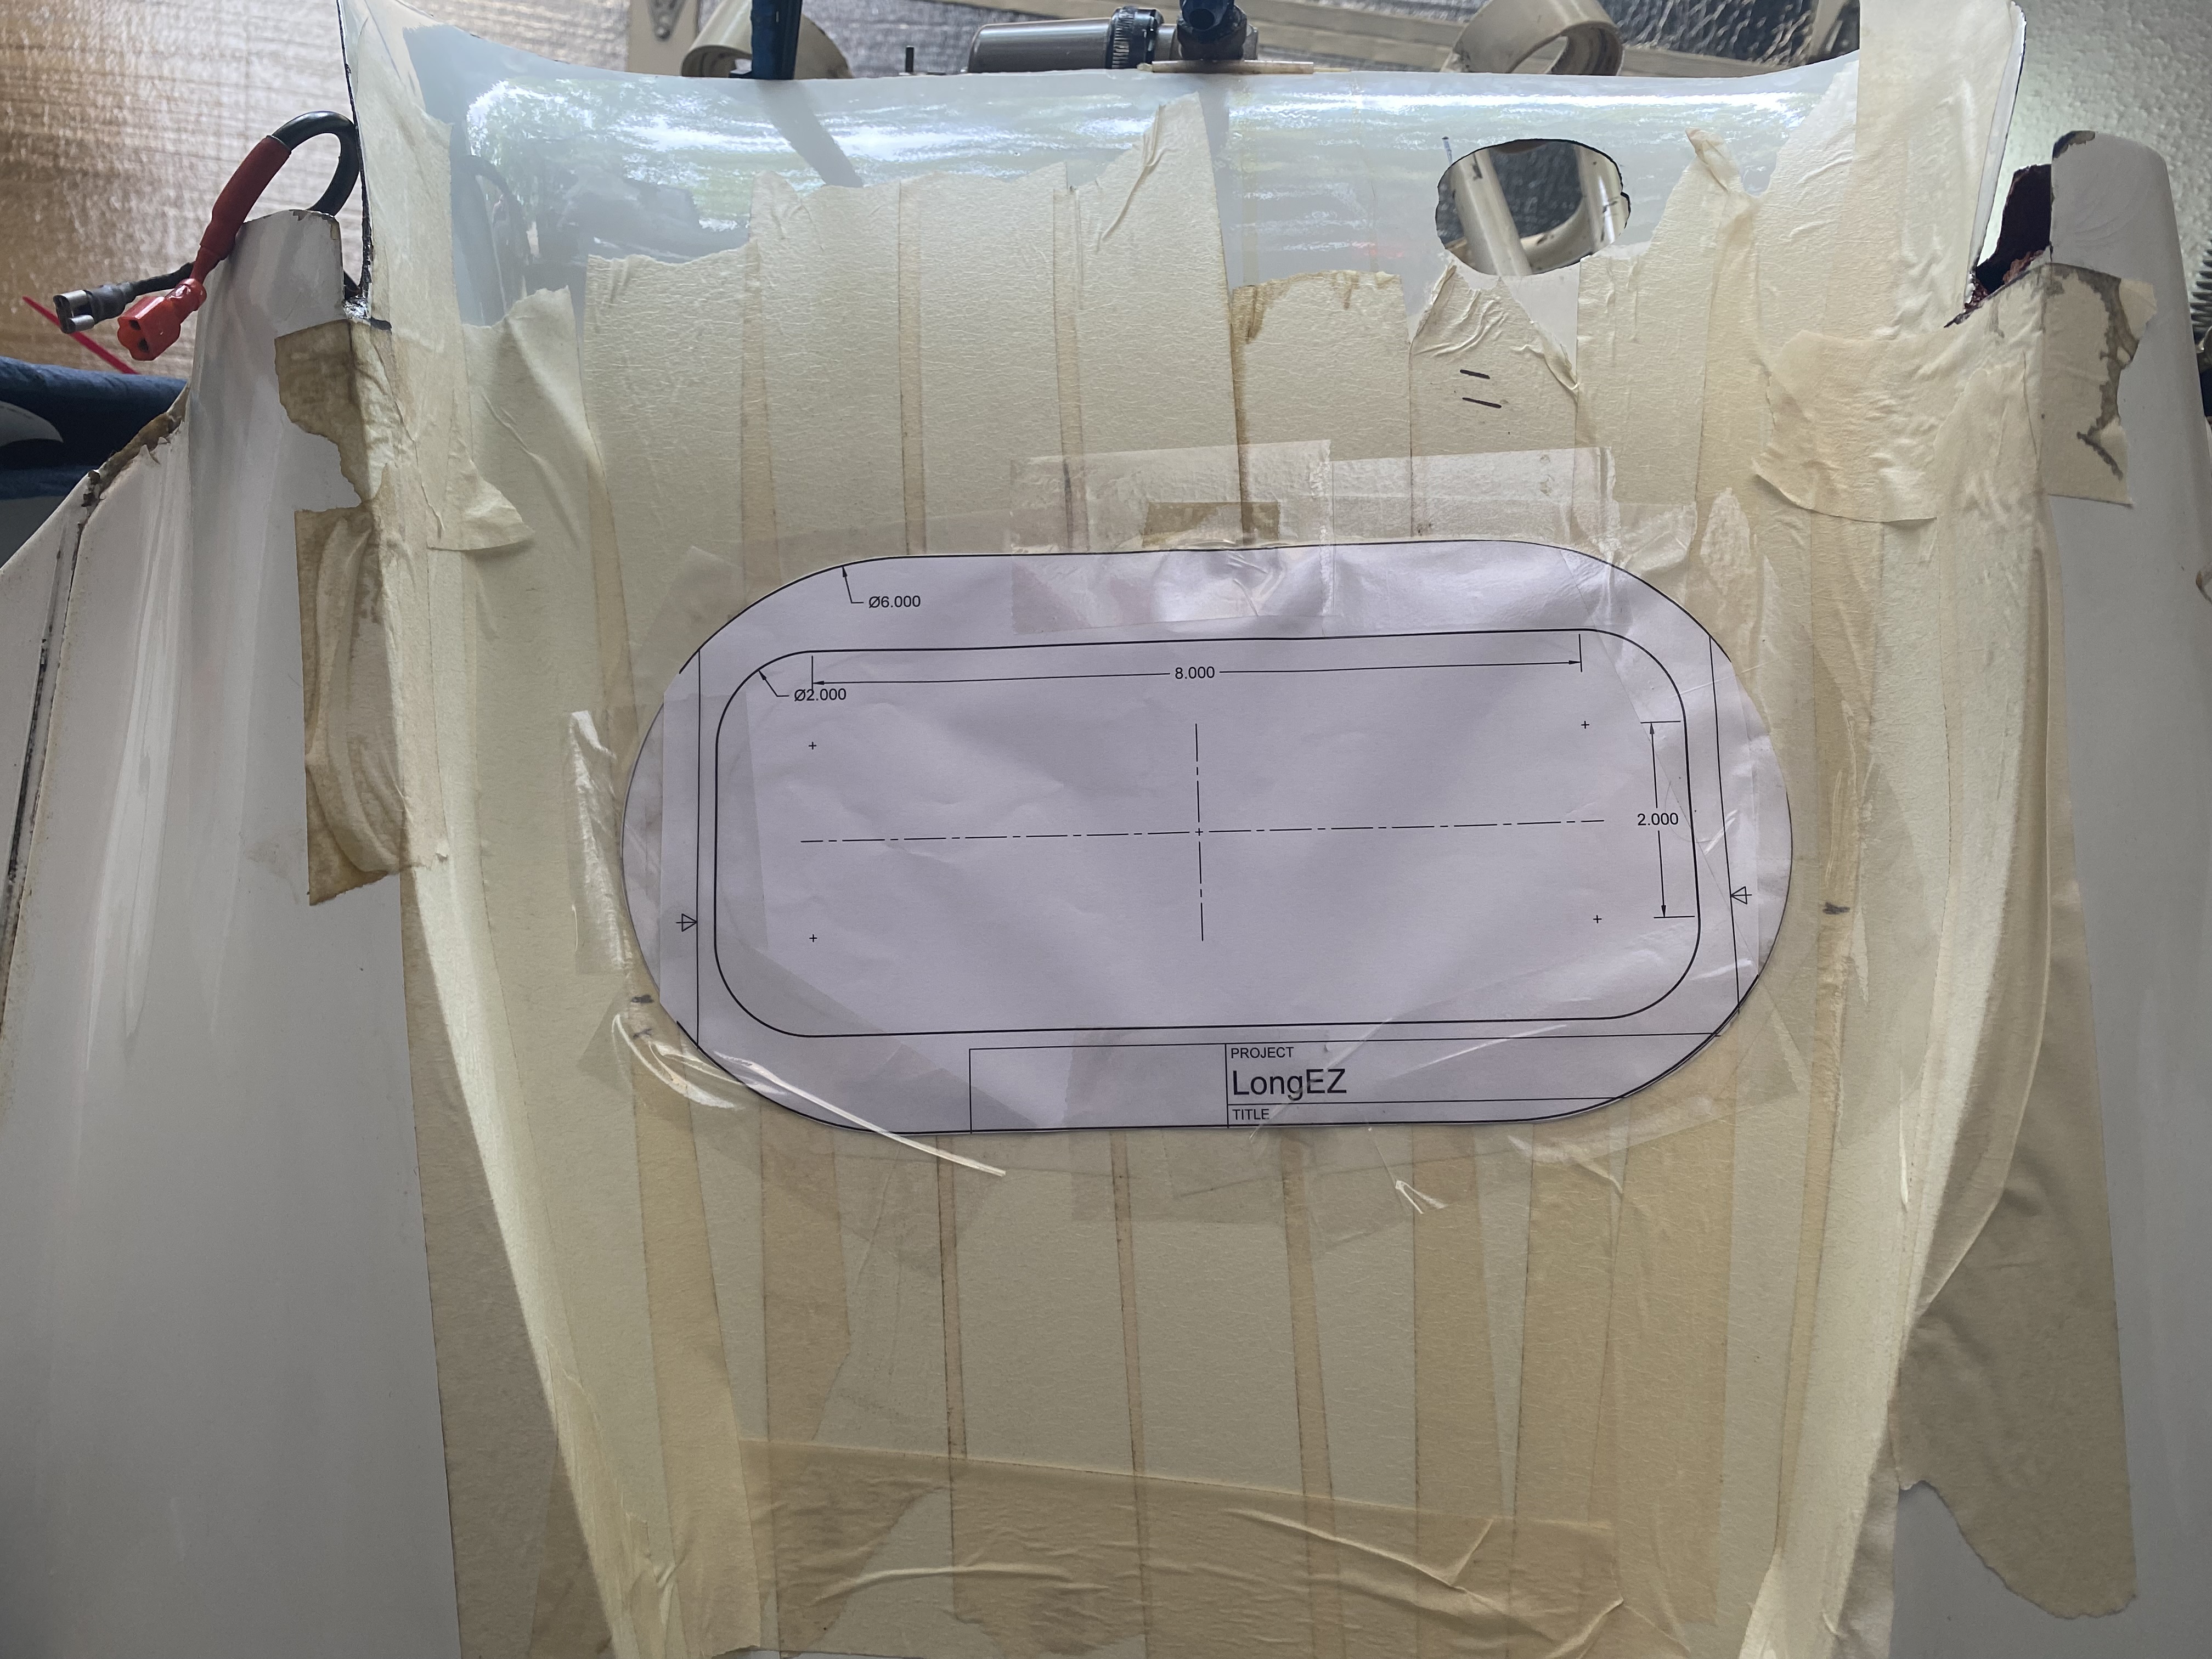
What I really needed was an access panel on the bottom of the plane, below the Hell Hole, that would allow for direct access. The access panel would end up right in the middle of the engine NACA air intake, a super thin molded carbon fiber piece epoxied to JT's bottom. To make a long story short, NACA ducts are notoriously difficult to make work as any irregularities in the surface smoothness would trip the air into avoiding the duct altogether, compromising JT’s cooling airflow. So, cutting a hole in the middle of one, especially a very thin one, is not to be taken lightly, and great care must be taken to prevent warpage of the carbon fiber, and restore surface continuity and smoothness of the finished cover plate. But the cover plate is a problem for future Marco. Let’s cut some Carbon!
A template for cutting will allow for precision should I need to machine the new cover
Testing the location of the new access panel
I wanted the hole to be in the flat surface of the NACA to make the cover easier to produce
Just another frightening moment
Main drilling is over
Now, buzz saw all pencil lines.
The plan was easy to execute. The harder part was choosing where to put the hole.
A little sanding later
There it is
I wish I could say that this alone did the trick, but there was one last wrinkle in this plan. Once I unscrewed the nut, and pushed the bolt up to remove it from the control rod, the bolt hit the fiberglass ceiling (bottom of the Center Section Spar), and couldn’t be removed.
"Well, F@#% me!"
Ended up building myself an improvised bushing puller, and disconnected the rear Joystick from the control torque tube, rotated the tube sideways, and was finally able to remove the blasted bolt.
Using a long bolt and a few washers to remove a pressed bushing
This bushing will have to be pressed into the torque tube by reversing the puller action
Success at last!
This allowed me to push the aileron pivot plate backward about an inch, which in turn allowed me to remove the last bolt from the engine-mount, and remove the bloody mount.
Pivot plate pushed back leaving enough room to remove the last engine-mount bolt
Engine-mount removed
After that it was just a matter of removing the rudder pulleys, electrical fuel pump, oil and fuel lines, aileron servo, and a few more odds and ends.
Removing an oil pressure manifold
Some wires had to be harmed in the process
Rudder cable pulley removal
Andair gasculator, and old gyro vacuum pipe (capped) were discarded.
This pipe fed vacuum all the way to the original instrument panel #1
I eventually repurposed the vacuum pipe hole for the new throttle push pull cable
The aluminum firewall came off with little effort, but harbored a terrifying surprise.
Aluminum firewall removed and flipped over for inspection
Looking at the picture above, you can see a whitish cloth-like material attached to the back of the firewall. That is a ceramic heat rejecting mat called FiberFrax, and it’s supposed to be completely white. Note how the further down you look the darker it gets? What happened throughout 20 years of flying was that engine oil, spilled at every oil filter replacement, dripped to the top of the NACA diffuser (the part of the NACA duct entering the engine compartment) and collected there. Because of the many systems attached to the firewall, detection and cleanup were impossible (I tried many times), and the spilled oil slowly wicked its way up the porous ceramic mat by capillary action. The big question in my mind at this point was… is this FiberFrax still able to reject heat, or would it go up in flames while in contact with the structural fiberglass spar? Only one way to find out…
Flammable Firewall?
That was one scary finding in my book, and one more reason to dig this deep into JT's subsystems.
Alright, we finally got to the bottom of this engine removal post. Time to get started with the real work now.