Aileron woes
I really didn’t see this coming, but I could no longer ignore reality… the right aileron wasn't moving anymore, except in very rough jerks. Had I not been on the ground, examining the wing on a stand, I would have crapped the proverbial brick.
This discovery came about while removing the right aileron control pushrod (CS126) for an upgrade. This pushrod moves parallel to the firewall, and connects the control stick to the left wing’s bellcrank, and eventually the left aileron.
 |
| Left aileron control pushrod before removing the wings |
 |
You can see both aileron control pushrods in this picture
|
 |
| Right wing root pocket seen from above |
|
 |
| Right wing on a rack with the CS126 pushrod removed, looking at the bellcrank in the wing root. |
With the wings on a stand in the hangar, and the fuselage at home in my garage, I was getting ready to wrap up a four month upgrade program that included splitting the ailerons control rods, and installing quick disconnects per plans (plans' page 16-3).
 |
Left aileron CS126 pushrod after being split in the middle to comply with the quick disconnect plans
|
 |
| Left aileron CS126 pushrod and quick disconnect hardware |
That’s when I discovered that moving the right aileron had become very difficult. Increasing amounts of force applied to the control rod generated no movement until such time when something gave and the aileron jumped to a new position with a loud creaking noise. Manipulating the aileron directly yielded the same result, making even Gina cringe at the noise. Needless to say, solving this issue had become the new priority.
 |
| Disconnecting all pushrods isolated the problem to the spherical bearing interface |
Thinking back in time, I don’t remember ever feeling any resistance in the control stick while flying, but I did notice that it would sometimes hang momentarily when pushed to the far right during preflight. Because it always returned back to center when touched, I never thought much about it, except to secretly blame some phantom friction in the newly installed GRT aileron servo for this sticky conduct.
 |
| Roll servo arm connecting to the right CS126 aileron pushrod |
You can see a video of this behavior here...
Digging deeper into the flight control system, I learned that the torque tube connecting to the aileron via a universal joint, is actually made up of two parts, a long ¾” OD aluminum torque tube (CS151), and a much shorter ⅝” OD 4130 steel tube (CS152) inserted and bolted directly to it (see image below). The latter emerges at the wing root, where it connects via a separate control rod to the aforementioned bellcrank.
 |
| Section view of the right wing root pocket at the aileron torque tube station (seen from the rear) |
|
 |
| Left wing root pocket |
Due to the slight built-in misalignment present between the aileron and the aluminum torque tube (CS151), the 4130 steel tube (CS152) doesn’t just rotate, but it also translates back and forth ever so slightly.
Now, as the steel tube (CS152) rotates and slides in and out of the wing root, it rides on a phenolic block (CS150), which in my case was substituted by an Infinity Aerospace wing root spherical bearing in order to reduce friction in the control system.
 |
| Infinity Aerospace spherical bearings |
Due to the metal on metal sliding motion, it is imperative that this location be lubricated and inspected regularly if the aileron is to swing unimpeded.
As you might have guessed by now, JT must have been missing out on this treatment, probably ever since it was sold the first time over a decade ago. As years of neglect added up, CS152 developed a rust coating that eventually prevented the smooth movement within the tight tolerance spherical bearing.
 |
| 17 years old spherical bearing on right wing |
 |
| You can start to see some of the problem (rust) |
Removing the bearing required a puller to get it past the rust ring, after which it easily came off by hand.
 |
| My friend Nick let me borrow this puller. Dunno what it costs but it's definitely worth every penny. |
 |
| No way in hell this bearing would have ever come out without Nick's puller. "Thanks again Nick!" |
 |
Finally getting eyes on the problem
|
 |
Aileron and torque tube removed from the wing
|
 |
"Yeah, that's gotta go!"
|
 |
Aileron, universal joint, torque tube, and spherical bering.
|
 |
A better look at the aileron, universal joint, and torque tube assembly.
|
 |
| Universal joint (brown) allows the slight offset between the aileron and the torque tube (CS151) |
 |
Torque tube and associated hardware
|
 |
Some light rust on the stainless surface as well
|
Inspecting the left wing revealed a similar pattern in the works.
 |
Left wing root
|
 |
Harder to see the issue on the left wing
|
 |
Rust much easier to see with the bearing removed
|
 |
Aileron and torque tube removed from wing
|
 |
Left wing missing the aileron
|
 |
Here's what the left CS152 looked like
|
 |
Left wing hardware
|
 |
Both CS152s
|
The parts were a bit too far gone for my liking, so I decided to remake them from scratch.
I did flirt with the idea of using stainless, doubling the wall thickness to make up for the lesser strength, but with the right size 4130 steel tube already on hand, I was able to complete this job in just a day, save a few bucks, and spare JT the indignity of the extra weight.
The job was easy, basically cut the new tube to length, match drill the holes, then reinstall in the wings.
 |
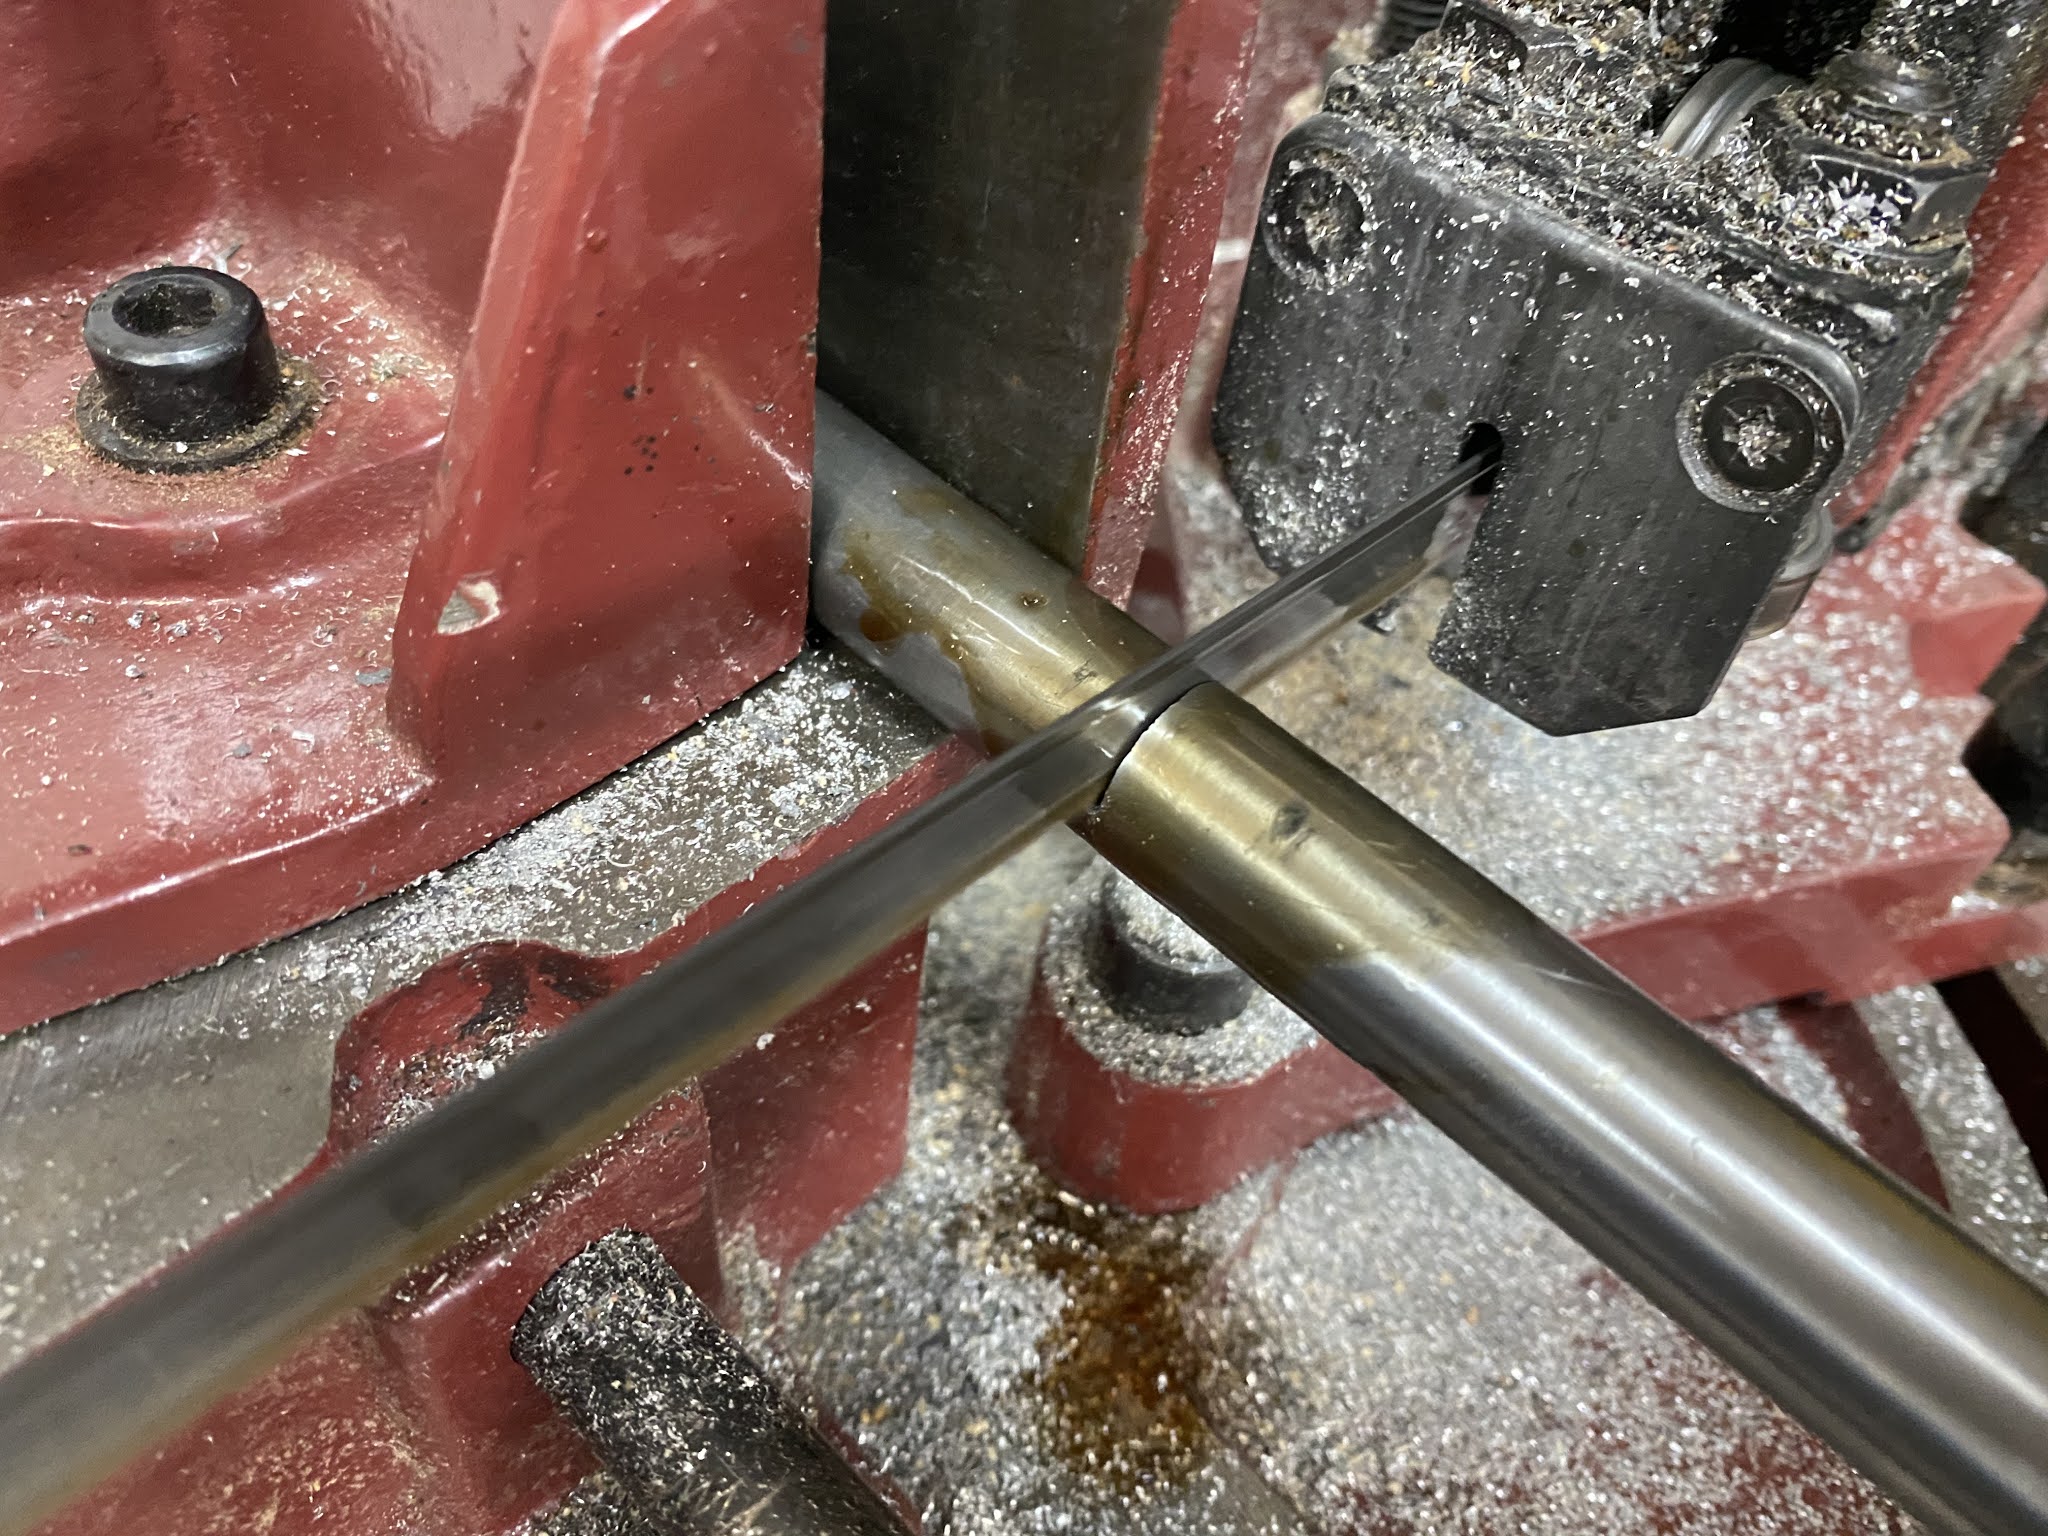
| Setting CS152 length on the bandsaw with a stop |
 |
Cutting a new 4130 steel CS152
|
 |
Cleaning the inner bearing by hand this way did not work
|
 |
Spinning the ScotchBrite at 1500rpm while holding the bearing by hand worked great 😁
|
 |
| I'm calling this clean enough |
 |
Outer surface still looked good
|
 |
Match-drilling CS152 to CS151 (torque tube)
|
Looking to avoid a repeat of this issue, I used Birchwood Super Blue gun blueing compound on both CS152 as an extra layer of protection against corrosion. It was quite amazing seeing them promptly turn blue/black right before my eyes. I then soaked them in Birchwood Barricade for twelve hours to complete the treatment.
 |
| Gun Blue turns metal black right in front of your eyes. Barricade finishes the treatment. |
 |
| After brushing on Gun Blue |
 |
After spraying with Barricade
|
 |
Left overnight
|
 |
| Finished CS151s |
The long aluminum torque tubes needed to be lightly scuffed back to shiny metal as they were showing some early signs of corrosion. I did this by chucking them up in my lathe, and sanding them gently. Later, I primed them twice (inside and out) before putting them back into service.
 |
Cleaning up some superficial corrosion
|
 |
| You are going to want to use a respirator with this primer (even outdoors) |
 |
| Dries up very quickly. |
 |
| Finally putting everything back |
CS152s are unfortunately buried quite deep in the plane, and unless your A&P knows to look for them come Condition Inspection time, they can easily escape any lubrication efforts.
From now on I will make it a point to dig deep enough to uncover them at least once a year, and make sure they remain well lubricated and rust free.


Nice work and write up Marco....
ReplyDeleteThank you big T
Delete