Having already made the decision to bring JT home for the instrument panel upgrade, I needed to figure out the logistics.
Objective #1 wasn't “getting JT into my shop” (that was #2), objective #1 was “not to scratch or damage JT in any way”, thus, a much higher level of care would be necessary.
Renting a 6'x12' utility trailer from uHaul was doable and cheap, but they wanted a bit too much information on what I was carrying, had to submit to a vehicle inspection, and their website was frustratingly designed to up-sell you all kinds of services. Furthermore, I would have to push and pull a thousand pound airplane up and down the ramp on my own, or depend on others to help.
I looked into a flatbed tow truck service, but it was $125 each way, so $500 total for swapping my project with JT.
I needed something I could use whenever I wanted, to carry whatever I wanted, and not have to rely on others, so I decided to buy a used trailer.
Luckily for me after a frustrating, though educational web search, I found a nice 7'x14' trailer on Craig’s List.
 |
| I really like this trailer a lot |
Loading my project on it was a piece of cake, and I was easily able to push it up the ramp on my own.
 |
| My project is still very light compared to a finished airframe. |
Arriving at the airport with my project felt a bit weird since it had never been to one.
 |
| The fuselage looks a little out of place near all these flying airplanes |
Another first was the meeting between my project and JT.
 |
| Hard to tell from this angle that my project's fuselage is 2" (5 cm) wider than JT |
It’s amazing to see how much more work there is still to be done, and the weight difference between the two. The plan for loading/unloading JT solo was to permanently install an electric winch on the trailer. I needed it to have a remote, so that I could be at JT’s side during the process rather that at the trailer’s other end, and it needed to lock in place in either direction when not powered, but have a way to unwind the spool quickly.
Perhaps they are all like that nowadays, but the cheapest winch I found at Harbor Freight ticked all those boxes, so I snatched it up and got a mounting plate as well.
 |
| Cheapest winch I could find |
 |
| Badland winch mounting plate |
As soon as I got it home I started playing with it to verify it would work for the intended purpose.
 |
| Figuring out how it works |
I installed the winch on a flat plate that is part of the spare tire carrier, used a battery box I purchased accidentally a few years back, bolted it to the wood floor and the metal riser, and a battery JT used until the one battery mod I made a few months ago.
 |
| Drilled and mounted the plate behind the spare tire |
 |
| Bolted the winch to both plates at once |
 |
| Old battery box fastened to wooden bed and metal riser |
 |
| Perhaps I will shorten those wires if the battery location doesn't change. |
 |
| Wiring details |
 |
| Winch fully functional. Battery will be removed from box unless winching is required. |
The winch had no trouble pulling the nearly 1000 lb fuselage up the ramp.
 |
| This went down as in my mental "best case scenario" |
Next, I strapped JT down at a number of locations, and built some wooden chocks out of 2"x4" leftover lumber.
 |
| I was a bit worried about the nose moving about, but it never happened. |
 |
| Soft straps (in orange) connect to the engine mounts |
|
 |
| Perhaps I went a little overboard, but wood is cheap and LongEZs are not! |
 |
| Enough to keep the nose wheel from pivoting. |
 |
| Snug as a bug in a rug |
 |
| The truck pulled this load just fine, but lost about 4 mpg. |
The 45 minute move was done at dusk, with Chris in trail with his car, to minimize gawkers tailgating me on the highway. It was pretty stressful, although it turned out uneventful. JT was solid all the way home.
 |
| Fortunately the HOA doesn't have anything written against parking airplanes in front of one's house. |
The next morning work started to unload JT, and to get it indoors.
 |
| Remote winching allowed me to more around making sure the nose wheel remained straight |
 |
| This was an easy one-man-and-a-winch job |
The idea was to use three auto dollies, and to slide the 9’ wide fuselage backward and sideways through the 8’ door, then straighten it out and bring the nose in, a bit like a boomerang.
 |
| Ironically the hardest part was yet to come |
Unfortunately, no matter how much we tried, we were always a couple of inches short in order to perform the pivot, and in the process got pretty close to losing objective #1.
 |
| "Time to go for the pivot move!" |
 |
| "Sorry, no joy on this side!" |
 |
| So close, yet so far away. |
I was starting to feel like this was not going to happen anymore, and that I’d have to take JT back to the airport, sell the trailer, and do the work in the hangar, when Gina had the idea to try nose first. I have to say I resisted the proposal, but with nothing left to lose we tried that too.
Incredibly that got us even closer to getting in, yet still no cigar.
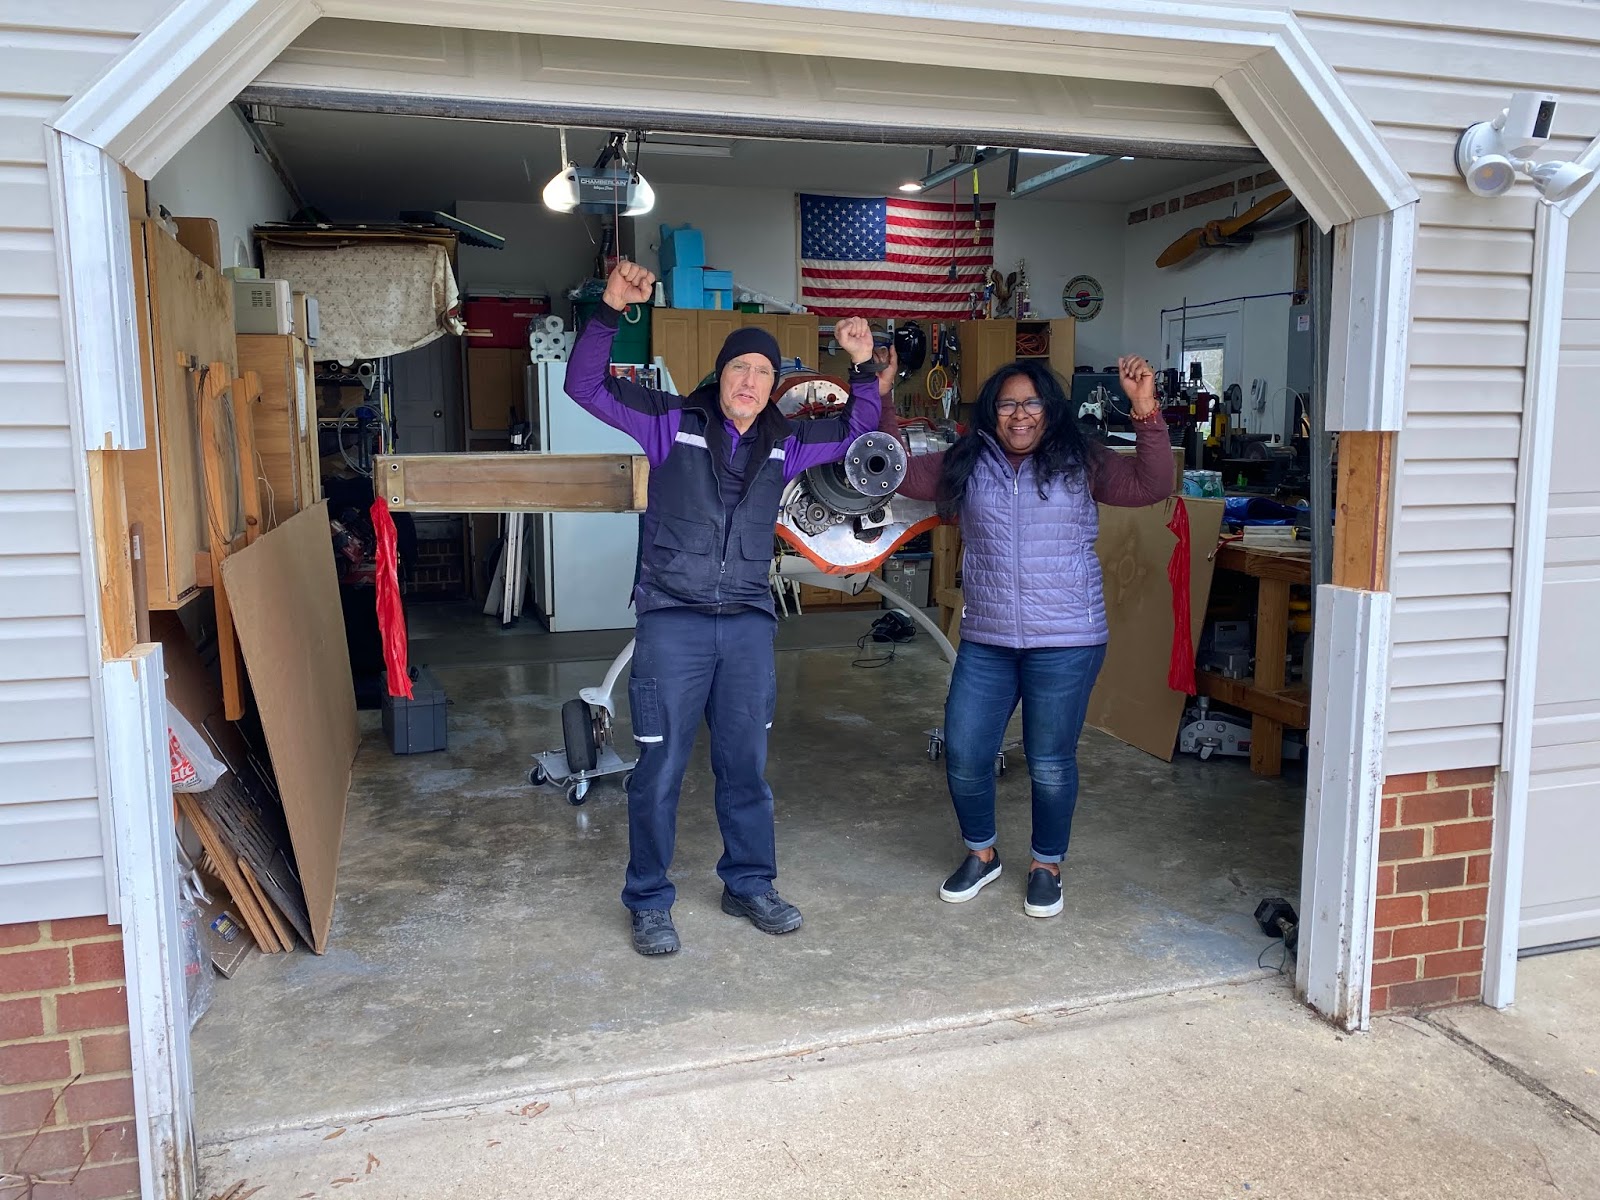
Then my neighbor Lou had the bright idea of cutting some of the door trim on both sides. With Gina’s blessings the trim was cut, and JT made it in the shop just as the rain started dropping.
 |
| An extreme display of love! |
 |
| Well, that's worth a good inch! |
 |
| Or two! |
 |
| Rain drops are starting to fall... |
 |
| ...but JT makes it in! |
 |
| Because it's not truly home-building unless you also do some home-repairing. |
An hour later one couldn’t tell anything had happened there.
 |
| All is well again (until we need to get JT out) |
With the big table pushed over a couple of feet, JT happily fits in the shop, and there is just enough room to walk all the way around it now.
 |
| JT in the surgery room |
The best part of this move is that my 45 minute commute has now shrunk to 5 seconds tops. There is definitely something heartwarming about opening the garage door in the morning and seeing JT there.
“Good morning JT!”
 |
| Now, if I could only get a runway built outside... |