Glassing the fuselage bottom (12.3 hrs)
I have been thinking for sometime how to best utilize the last yard or so of my leftover Kevlar. After seeing pictures where the fuselage broke in front of the pilot seat, as a result of a serious accident, I knew I would be using it to put more space between myself and the pavement. Sure it would add a little weight, but so do most safety devices, such as a roll bar that everyone agrees is a good idea, and this could literally “save my butt”.
With the decision made against some of my more purist friends’ objections, I spent the best part of the morning cutting Kevlar with big scissors. The key to making the whole operation even possible is taping over the cut line, so that the scissors won’t pull the fibers out of the weave turning the cloth into a useless mess.
If you have never tried it before, it’s an unbelievable experience. The most you can hope to cut is at best 1/4” (6.4 mm) at a time, then as you progress, your scissors will become dull requiring occasional sharpening, and constant tightening. Your hands will become sore and go numb, and you’ll start questioning why you are doing it in the first place, who’s bright idea this was, and whether it was really necessary.
Eventually though, if you are persistent enough, you’ll be rewarded with a nicely fitting cloth pattern that is unfortunately a real bitch to wet with epoxy. But let’s not get ourselves too far ahead of the story.
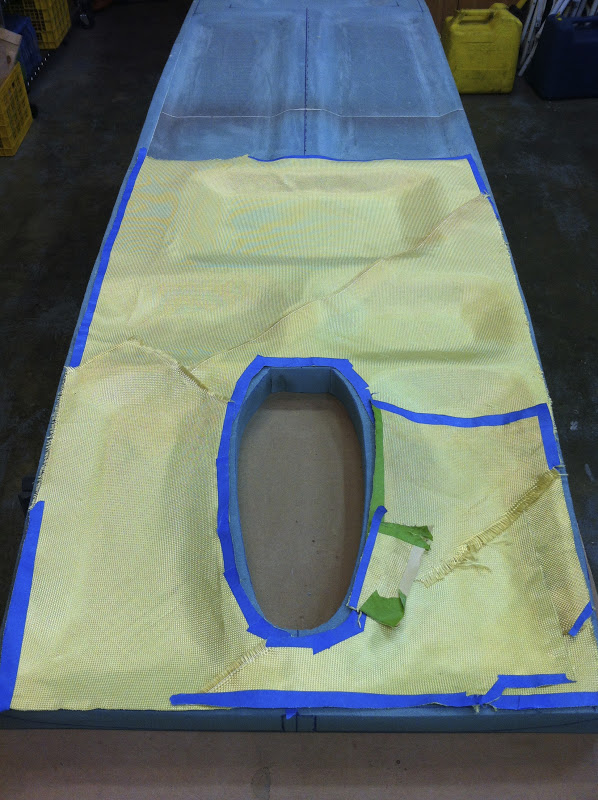 |
| Test fitting Kevlar addition in the front half of the fuselage floor |
Before I could even consider glassing the bottom, I needed to secure it in position using 2x4s and Bondo. With the fuselage floor in its final position, I Bondoed 5 wood pieces across the foam, and two 8 foot pieces (2.4 m) over them.
 |
| Rail in place |
In a few minutes the rig was solid enough that it could be moved to the work table, while it retained the fuselage curvature.
 |
| In position for glassing |
Then the process of filling cuts and scrapes with dry micro could begin.
 |
| Patching the holes |
The only thing worse than cutting Kevlar, is laying it on a contoured surface, all the while trying to convince it that epoxy is good, and air bubbles are not. What a pain!
This little patch covering from the front seat to the canard bulkheads, took 2 full hours to finish. Between cutting it and laying it, working on this mod wasted most of the morning and some of the afternoon, and the original plans’ schedule layup hadn’t even started yet.
 |
| Kevlar ply wetted with epoxy |
The next item I worked on was a reinforcement in front of the passenger seat, where the passenger stands getting in and out.
 |
| Passenger extra ply in position |
With that done, I started applying the two layers of BID at 45˚ over the whole surface. After all the difficulties I encountered working with the Kevlar, laying fiberglass seemed so easy.
 |
| First fiberglass ply covering most of the kevlar |
 |
| Locating the first ply in the passenger area |
 |
| First full layer completed |
After adding the second ply, I peel-plied anywhere I thought I might attach something later.
 |
| Second ply in place and peel-plied |
The original plan was to leave a 2” (5.08 cm) BID overhang behind the rear seat. After a partial cure I would have floxed the bottom of the fuselage, and flipped the floor over it, attaching this flap of BID to the rear face of the rear seat, finishing the installation.
 |
Upside down fuselage - rear seat to floor juncture detail |
But after 12 hrs standing up working on this piece, I just couldn’t take it anymore, and I cut the flap off, peel-plied along all edges, and went to sleep.
 |
| BID flap removed from the back of the foam. BID now flush with foam back. |
The next day I woke up with a slight headache that I could not get rid of, no doubt from breathing in EZ-Poxy fumes all day. So, I decided to rely on a respirator from now on, anytime I have to do a big layup.
No comments:
Post a Comment