Disclaimer

This blog is for entertainment purposes only, and is not meant to teach you how to build anything. The author is not responsible for any accident, injury, or loss that occurs as a result of reading this blog. Read this blog at your own risk.

Saturday, December 29, 2018

"Tooling up" - CNC plasma cutter update #2

Adding a 220V 50A circuit

As in 11 KiloWatts!!! 

I am not an electrician, and this amount of electricity can kill you many times over if you approach it carelessly.  So, don't misunderstand this post as a tutorial, I am just sharing with you what I did to get my machine up and running.

To tell you the truth I was a little intimidated by this circuit, mostly because it is nearly twice as big as the biggest circuit currently in my house (30a - Main Air Conditioning). The mechanics of the installation however were identical to a 110v/10a line, only with thicker wires and bigger plugs. 

No big deal, right?!

I went down to Lowes with the male plug cover, and searched for the equivalent receptacle. I suppose they must not be selling these that often, because it took a long time to find them in an unopened box way in the back of everything else.


Utilitech flush mount power outlet model #2102S

Consulting the Hypertherm’s own manual, it called for a #8 gauge wire up to 50 feet of length, and #6 gauge beyond that. 


Hypertherm's wiring instructions


I chose to install the thicker wire even though I needed slightly less than 40 feet of it.

Moving on to the actual installation, it became painfully obvious that I would not be able to thread this thick wire into the walls without major surgery, so I ended up reopening the wall above the CB panel as I did in preparation of the LongEZ build in 2010.


It just had to be done!

I was hoping not to have to do this again, but it couldn’t be avoided. The wide opening in the wall allowed me to easily drill a 2” (5.1 cm) hole into the top beam, which I then used to feed the heavy duty conduit from above.


The electrician wanted $500 to string this circuit. Crawling in insulation on my belly, it started to seem cheap.

Thick gauge wire coming down from the attic


What #6 wires look like

I carefully removed the cover of the new CB panel, and identified a location for the plasma cutter circuit breaker.


Deciding on the next step

Lowes item #94470

Location chosen for the new circuit

The CB snapped right in place.


New 50 amps CB inserted into the panel


Meanwhile at the far end of the garage, right between the garage doors, I cut a hole for a new receptacle, and pushed the insulation aside.


Cellulose insulation in the garage wall

I installed the new box.


Retrofit box installed in the wall

The thick wires were easily pushed through from the attic.


Gina helped get the wires from below as I pushed them from above

The new outlet was wired up and installed in the box.


Adding a little info on each outlet can help troubleshooting in the future

Back at the breaker box, the big wires were inserted into the 50 amps breaker case, and the “skinny” copper ground connected to the ground bar. With all screws tightened up the supply end was ready.


Wires connected

CB cover plate reinstalled

My dual voltage welder can now run on 220v, and maxes out at 250 welding amps. 

Plasma cutter powered up for the first time.

Next step in the saga will be to hook up compressed air to the plasma cutter and give it a try. Air must be as dry as possible in order to extend the life of the consumables inside the torchFinally, the connection to the plasma table will need to be made via the CPC port in the back of the cutter. 

As you can see, there's still quite a bit to go.

Better get busy...


Monday, December 10, 2018

"Tooling up" - CNC plasma cutter update #1

Assembling the CNC table

Can’t believe it’s been that long since my last post. 

In the past few months there have been many developments behind the scenes with JT (the flying EZ), but that story will require many posts to unravel, hopefully very soon. 

Today, I’d like to give you an update on the CNC plasma cutter.

Because I purchased the table from a startup company (after a successful kickstarter campaign), I wasn’t really expecting the table to arrive on time. So, when it arrived a couple of months late, I was not upset over the small delay.

Shortly after receiving it, I decided to put the table together to make sure there were no mechanical issue, and run a few tests to tease out any possible electrical gremlins.

I have to say that I have been very impressed with the quality of the components, the attention to detail in the packaging, and completely blown away from the video instructions on how to put it together.


Don't you just love it when you return from a trip and find boxes waiting for you in the garage? 

Taking stock of what was in the box

This massive gantry piece was already "tuned-up" at the factory

Powder coated frame members

Stepper motors and other stuff

Water table, controller box, and hardware.

All the pieces

This is the third CNC machine I build/assemble, but never before has the task been as easy as this time. Langmuir deserves an A+ for their effort in making the assembly of this complicated piece of machinery a piece of cake. All one has to do is watch the videos and replicate the steps. 

Done! 

The table building part at least. 

Interfacing the electronics with the actual plasma cutter, depends on which cutter one purchased. I splurged a bit on a Hypermax Powermax 45 XP with a CPC port, which in theory should make connecting it to the controller box simpler and cutting better, though that still remains to be seen at this point.


Hyperthem Powermax 45 XP with CPC port (#088113)

But enough with talking! 

Let's look at some photos of the build, and a short video of the first “cutting” test…


Main frame

Gantry installed

Water table added

Motors and lead-screws

Controller box

Controller box attached to table

Plasma cutter hose holder attached to right leg

Controller and motors all hooked up

Computer stand installed, CNC table completed.


Pretend-cut a metal plate


Thursday, August 02, 2018

Shop preparation - Part 6

200a circuit braker panel & new tool preview

All the work I put forth in getting my garage updated has paid off many times over. I have been able to work during the most inclement of weather, from snow to high heat, in relative comfort. 

After so many years of good service, I am starting to run against the limitations of my electrical system. I find myself in need of at least one new 220v 50a circuit, and my 150a panel has limited capacity left, and only room for one more 110v breaker.

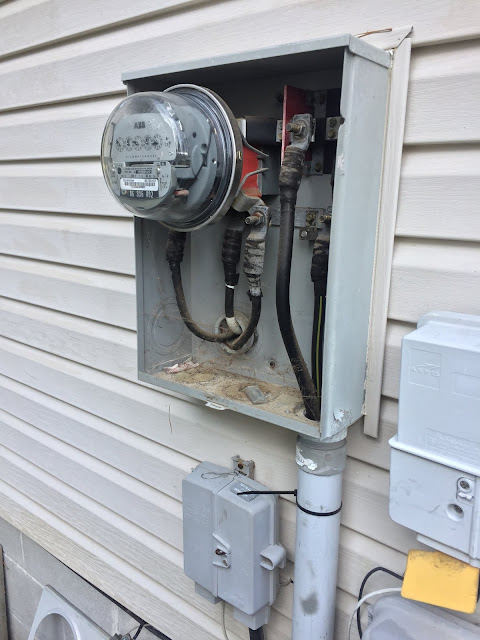
I would have loved to being able to do the upgrade myself, but I didn’t feel comfortable removing the meter, and I had no ability to replace the tamperproof seal. Because there is no electrical shutoff switch outside (besides removing the meter), I would have had to replace the circuit breaker panel with live main wires.

Even I can see that that is not such a great idea!

So, I got the professionals to do it instead, and as you might have already guessed it wasn't cheap, but I didn't electrocute myself (a definite plus), and it was done right the first time. 

I resolved to add the needed circuits myself at a later date.


Here are a few pictures of the install…


Original circuit breaker panel

Only a single CB space is left (bottom left)

This counter has to be pulled to shut off the electricity to the house. Wires on the right are always on.  
New code requires two 8' (2.4m) grounding rods

New 200a panel

New vs old

New panel is taller

This insulation has served me well

Two grounding rods going in

Old panel is out!

New panel was a very tight fit

Panel is in, rewiring next.

Meter is out in this picture, grounding wire being installed on the rods.

Copper wire is the new ground

All circuit connected to the new panel. I now have more room for new circuits. 

Cover over the new panel

The finished project

What do I need more panel space for? One might wonder. 

First item to receive its dose of 220v 50a will be my dual voltage TIG welder. Yes of course, it's dual voltage, and I've been running it on 110v all this time. However, it won't reach full power on 110v, not that this has been a big issue so far.

The main reason for the upgrade is for items that won't work on 110v like... I suppose I might as well make it official now... I have put money down on a low cost 2x2 CNC plasma table.

There you go, "the cat is out of the bag" now!

The Crossfire by Langmuir Systems


Yes, I could have built my own. No, I didn't need another project at this time. 

Much like with my 3D printer, I need something that would work right away, without spending months hunting down components, building it, then more time troubleshooting it. One still has to put it all together, but it doesn't look too complicated. 

Why 2x2 (61x61cm)? 

Lack of space.

Even that size will be hard to fit in my shop, with all the airplane stuff laying around. Langmuir has plans to be able to go 2x4 in the future, by just adding on to it, but I don't envision needing to anytime soon anyway.

I am betting my money on being able to cut newer versions of my instrument panel (and other stuff) in minutes, versus days. 

It should be here in September/October 2018. 

Stay tuned...