Wrapping the spar (17.0 hrs)
I had been itching to complete this step for quite some time, all the while gathering as much intel online as possible, but it just seemed like a pretty straight forward process, a bit of grunt work perhaps with nothing really standing out as a possible issue. I figured I could knock this out in 4 to 6 hours tops.
Boy was I wrong!
Let me tell you what happened…
Sometimes, when I haven't done a big layup in a month or so, I find it easy to forget some steps and end up running like a chicken with the head cut off at crunch time. Working solo most of the times, I occasionally write down a “battle plan”, basically a list of the things I need to do in the right order. This gives me a chance to chair-fly the operation doing the thinking ahead of time, before the epoxy starts gelling in the cup.
 |
| What was I supposed to do next? |
One thing that didn’t make the list, is an item Wade alerted me to. Apparently there have been a few instances where the top front corner of the spar lays proud of the wing skin at BL55.5, causing a weird looking step at assembly time.
This is one of those things that is better checked, and fixed, before laying the fiberglass, so I traced the wing profile from at BL55.5 on paper, then taped it to the spar.
 |
| Front half of the wing at BL55.5 |
 |
| Mocking up the spar to wing joint |
Had any of the spar foam stood outside of the A9 wing profile, I could have easily sanded it back into submission at this stage, but luckily for me it turned out to be not necessary.
Back to the story…
The night prior to layup #6 I cut all the UNI I would need the next day.
 |
| No BID was harmed during the production of this layup |
You might remember I decided to go with the modified layup highlighted in LPC#26, this meant I had to use 4 plies of UNI cut at a ±45º bias, and it looked like 3 pieces butted to each other would be enough to cover the entire spar.
 |
| 3 pieces butted end to end proved to be more than enough |
Still deluded it would be a quick job, I began taping the spar at 12 noon. I wouldn't stop fiberglassing until 1 am the next day, 13 hours later.
 |
| Taping where I didn't want the micro-slurry to go |
 |
| More taping |
 |
| Finally some slurrying action! |
After spreading slurry over the foam, I flipped the spar over, removed the duct tape from the spar-caps and wood blocks, but left it on the front of the spar, which will be glassed at a later date with layup #8.
 |
| Tape removed everywhere except the bottom. |
The usual sequence of events then unfolded. I wetted the cured fiberglass with pure epoxy, laid the cloth, poured more epoxy on it, then spread and repeat until the cows came home.
 |
| Hard fiberglass and wood insert wetted with pure epoxy |
 |
| Unrolling the previously cut UNI |
 |
| All three pieces on at once in the first layer, I would later change to one piece at a time. |
Besides flipping the cloth at every layer to achieve the ±45º bias, one noteworthy observation is that I also swapped the ends from which I started laying the cloth after the first two layers were down. I did this in order to stagger the place where the butting of the cloth ends would occur.
 |
| Starting layer #2 |
 |
| Pausing for the necessary FAA selfie next to the work in progress. 80F/27C in the shop, blizzard of 2016 outside. |
 |
| The table looks like a war zone! |
 |
| But all 4 plies are on at last! |
 |
| One more glamour shot |
Needless to say that by this time I was in some serious physical distress, it had already been 12 hours since I had started, and by this point anything that fell on the concrete floor just stayed on the floor.
I did make a half hearted attempt at floxing the LWA2 and 3 metal plates to the spar, but the weights I put over them caused the plates to slide down the wet spar, so I ripped the plates off, cussed a few times, cleaned up the mess, and spent another hour peel-plying everything in sight.
Aches and pains kept me up most of the night wishing I had started this project twenty years sooner.
 |
| That's it, I'm spent! |
 |
| Looking pretty good before going to bed |
While the night did get my spirits in a better mood, it didn’t do much for my knees, back, and other parts I would need to reuse, however I soldiered on and limped back into the shop for more of the same.
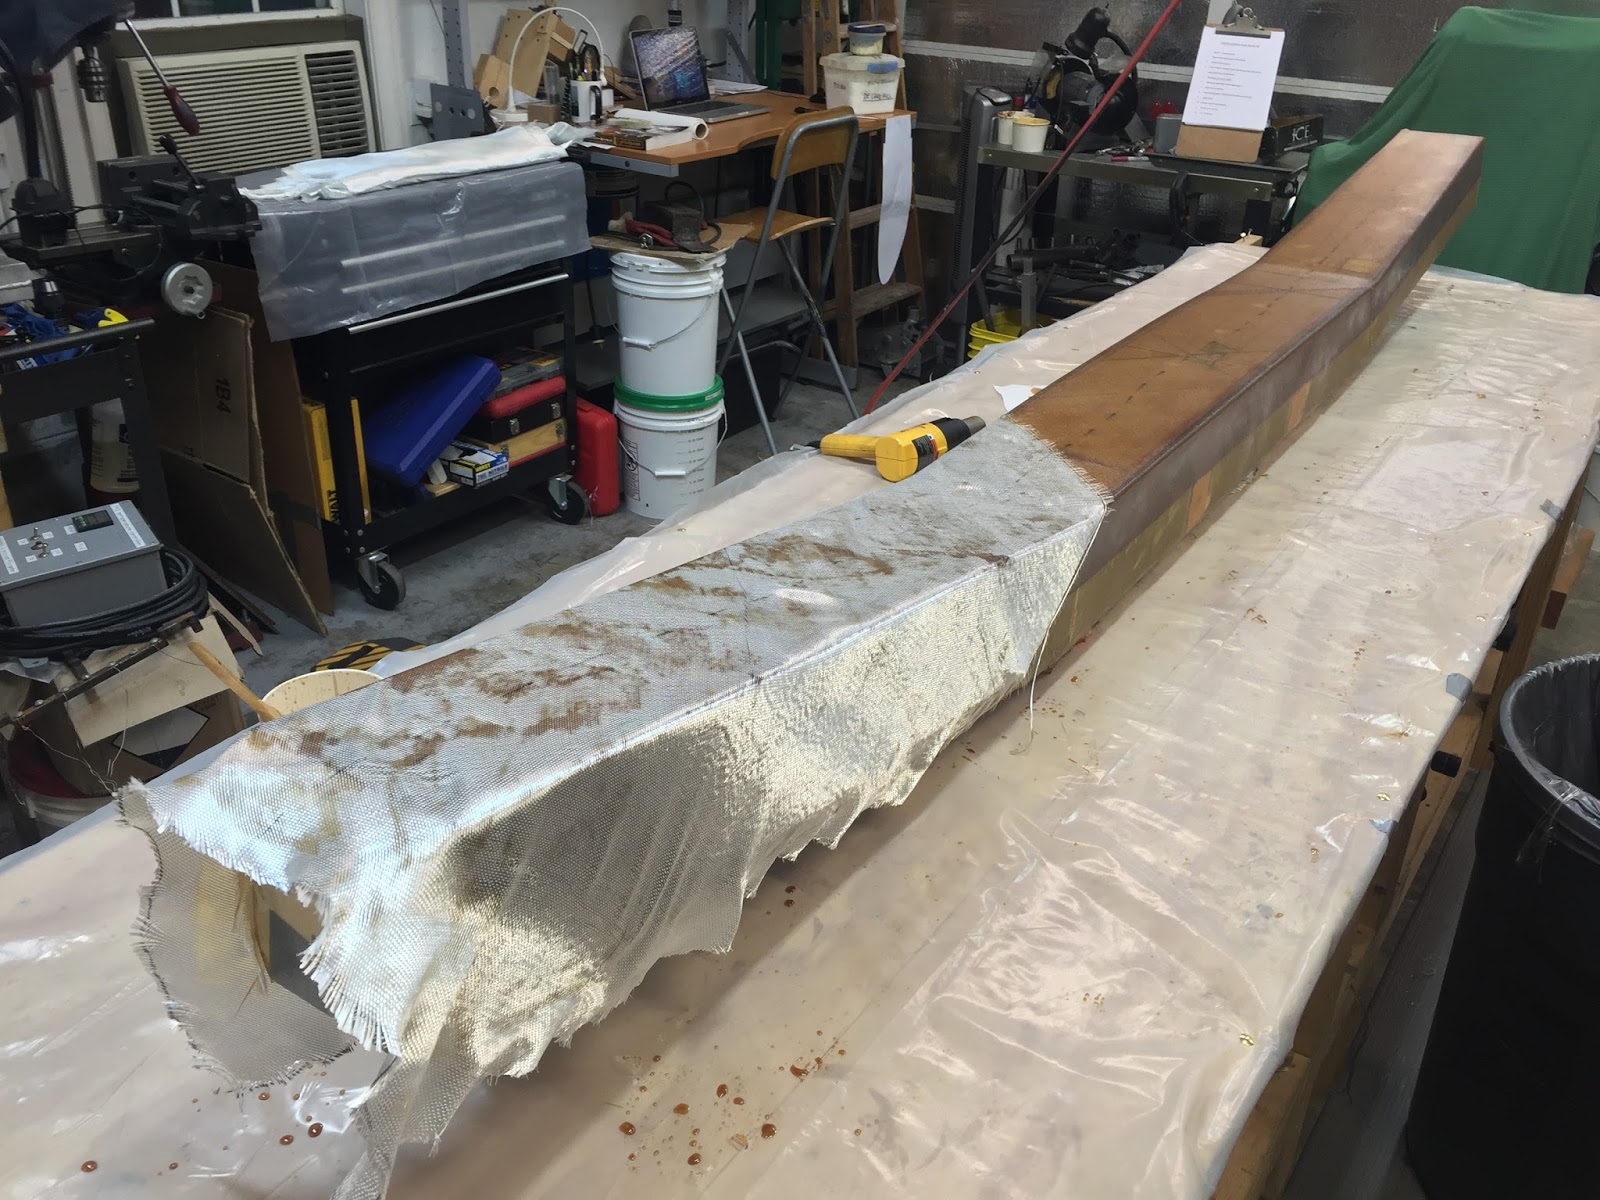
Of course I couldn’t wait to get the peel-ply off. After that I checked the spar’s entire surface for dry spots, air bubbles, de-laminations, etc.
I was happy to find no issues other that the ever present leftover peel-ply random dangling strands.
After flipping the spar front face up, I cut off the excess UNI, sanded the edges and the peel-ply leftover strands, removed the duct tape, and once again marked the locations for the aluminum plates.
 |
| Front of the spar facing up |
 |
| Trimming the excess with a vibratory cutting tool |
 |
| Sanding the peel-ply remnants off |
 |
| Left LWA3 position marked |
 |
| Left LWA2 aluminum plate spot |
 |
| Future position of the right LWA2 |
 |
| Right LWA3 position |
 |
| Duct tape removed from the front face of the spar |
 |
| A look from a different angle |
 |
| Other end |
This baby is getting finished soon!


No comments:
Post a Comment