Strut cover mod (7.0 hrs)
First order of business today was to rectify a minor binary mistake (as in up vs down, left vs right type of thing) I made when attaching the plate that secures NG-15 (nose wheel hinge casting) to the bottom of the gear leg.
 |
| This job is nearly fin-ished |
Being an aftermarket item, thus not in the plans, I didn’t realize it was an issue until the first time I took the fuselage out in the driveway on all three wheels, then tried to back it up. That’s when I realized that the wheel fork wouldn’t turn 360˚ because the backward fin impeded this movement.
Backing up with a castering wheel facing the wrong direction is not fun (try it with a shopping cart next time you are buying groceries), and I knew I would have to flip the fin sooner or later.
Luckily the process was not hard. It involved removing the plate, scuffing the original flox with sandpaper, trowel in more fresh flox to create a contour fitting base for the bottom plate, and lightly tighten it all down to expel the extra flox. A little cleanup, and it was off to curing.
 |
| Finned plate removed, hardened flox surface about to get sanded. |
 |
| New flox oozing out of the joint |
 |
| Joint cleaned up and curing |
The second order of business in store was to modify the fiberglass strut cover (SC) to suit the deeper recess I made in F22. I had deepened the recess in order to be able to retract the nose wheel all the way into the fuselage (see: Nose and nose gear - Part 9, Stashing the nose wheel).
 |
| Nose wheel sticking out using plan's dimensions |
 |
| Nose wheel fully enclosed after F22 surgery |
 |
| Showing how much deeper I had to cut F22 in order to retract the nose wheel fully |
As you will see, the standard strut cover is fairly shallow, and ended up negating the gains I had made because it limited the retraction range of the nose gear leg into the fuselage.
 |
| Test fitting the purchased standard strut cover |
 |
| Note the gear leg is beautifully flush with the bottom of the fuselage |
 |
| Unfortunately this geometry would let the nose wheel stick out of the fuselage all over again |
Now, SC needed to be only slightly deeper near the gear hinge point, but quite deeper near the wheel well, the important question being "how much". At first, I thought I could get away with slicing 95% of the way, stretching the loose parts, and fiberglassing over the top of it.
 |
| I picked a relatively flat place to cut |
 |
| Note that these cuts do not go all the way (yet) |
 |
| Gear leg now sinks well below the surface |
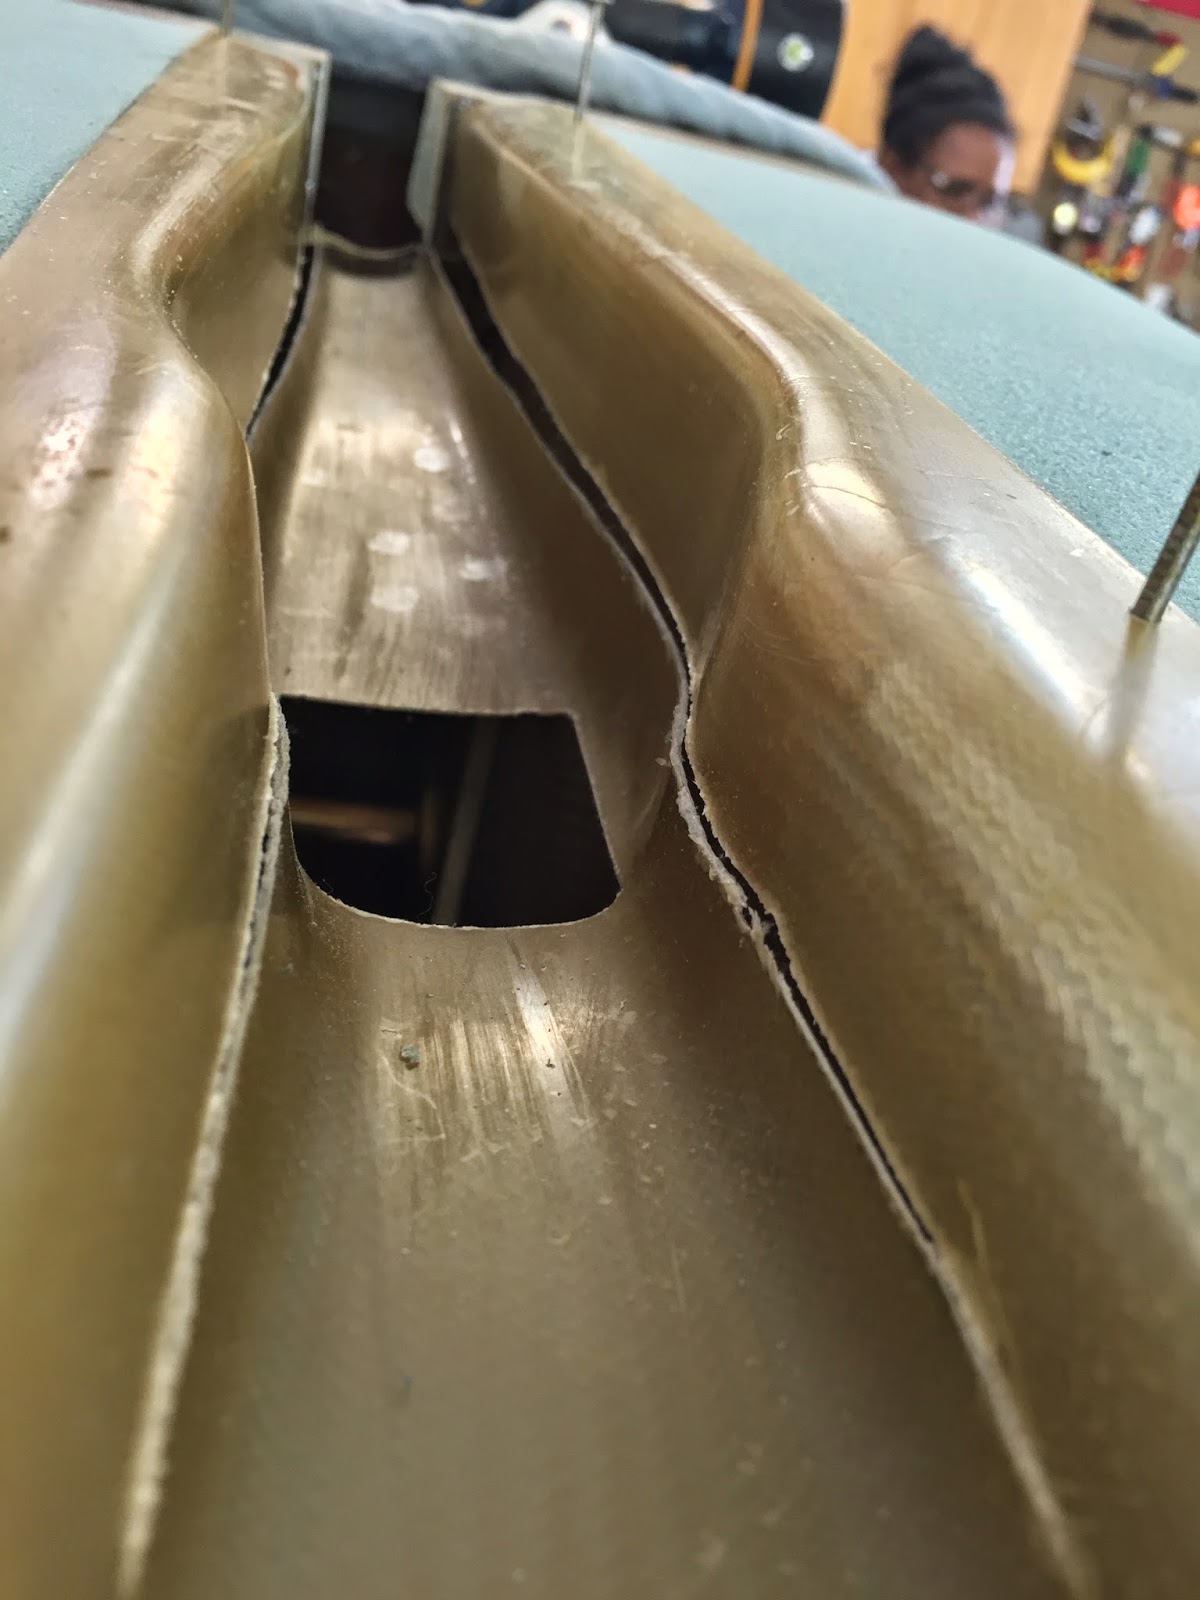
 |
| A look into the sliced up leg well |
 |
| The leg shaped its own new well |
That would have probably worked, if it hadn’t been for the fact that the SC’s sides nearer the hinge tended to bend as a result, modifying the part of the geometry I was trying to preserve. Because of this, I resolved to completely sever SC’s two vertical sides, and rebuild it from there.
 |
| Strut cover divided into three parts |
 |
| A different look at SC |
In order to prevent future contact between the strut and strut cover during actual operation, I used two small thin shims of foam under the central piece. The shims were held in place with tape.
With this new set of circumstances, the only problem now was how to determine the relative distances of the pieces from each other, and how to keep them in such positions until able to glass anew over them.
I used aluminum tape from the inside of the nose structure, to join together SC’s three parts, and lock in their relative positions.
 |
| Taping SC from the other side wasn't easy, and required removal of the electric actuator. |
 |
| Bingo! Geometry captured! |
 |
| Inside view of the new SC |
Because I didn’t want to reduce SC’s internal dimensions, I wanted to lay the actual fiberglass on the outer surface, except now it was all taped up. So, I used aluminum tape all over SC’s inside, generously covering up the cut, then removed the outside tape, thereby preserving the geometry I had been seeking. A basic slight of hand.
 |
| SC re-taped from the inside |
The next step was to scuff up SC with sandpaper to get it ready for glassing, then a couple of layers of BID scraps and epoxy.
 |
| Outer tape removed, fiberglass sanded, ready for glassing. |
 |
| SC glassed |
 |
| SC cured and trimmed |
Test fitting revealed no real issues, with the gear leg being able to retract all the way to the stop, and well into the fuselage.
 |
| Retesting the deeper and thicker strut cover |
 |
| Perfect fit! |
 |
| Leg buried in the fuselage as planned |


No comments:
Post a Comment