Fixing some minor annoyances
The mini-mill CNC conversion has been one of the most difficult builds I have ever done, with plenty of obstacles along the way that I have had to overcome to get it to where it is right now. The learning curve has been truly exponential in many areas, with much more learning yet to be realized.
I’d like to think that the complete exposure to the bowls of the machine, the planning, creation, and modification of my own parts from scratch using sometimes inaccurate plans, and the level of attention to details required, have made me a more knowledgable and careful operator of this magical piece of equipment.
There have been however things that I have hastily put together or bypassed, for the purpose of moving the project along, and that needed to be addressed. This time I will focus on three minor annoyances.
As I have been cutting more and more metal, a few hot spots for chips and cutting fluid accumulation have been identified:
#1 the completely exposed ways of the Z axis
#2 the unprotected electrical connections of the motors
#3 the motor to ball-screw couplings, including the motors themselves
Again, these have been minor issues so far, but they create a lot of cleanup work on a regular basis, and also have the potential to affect the functioning of the mill, if they end up in the wrong place.
I decided to begin with the most cleanup-work generating issue, the lack of a barrier between the cutting tool and the Z axis ways.
 |
| Metal chips are flung in all directions, and like to stick to the lubed Z axis ways. |
The X axis ways are naturally hidden, while the Y axis ways have two rubber chip guard bellows. So, why not the Z axis?
It involved drilling and tapping two holes into the lower flange of the mill’s head. The only difficulty here was getting the drill in position, since the spindle is in the way. I used a shaft extension to get around the spindle, and the tapping was done by hand the old fashioned way.
 |
| Tapping two holes in the mill's head. Note the bothersome spindle location. |
Doubling up on the existing lower baffle attachment point, and installing the top one, I was done in just a few minutes.
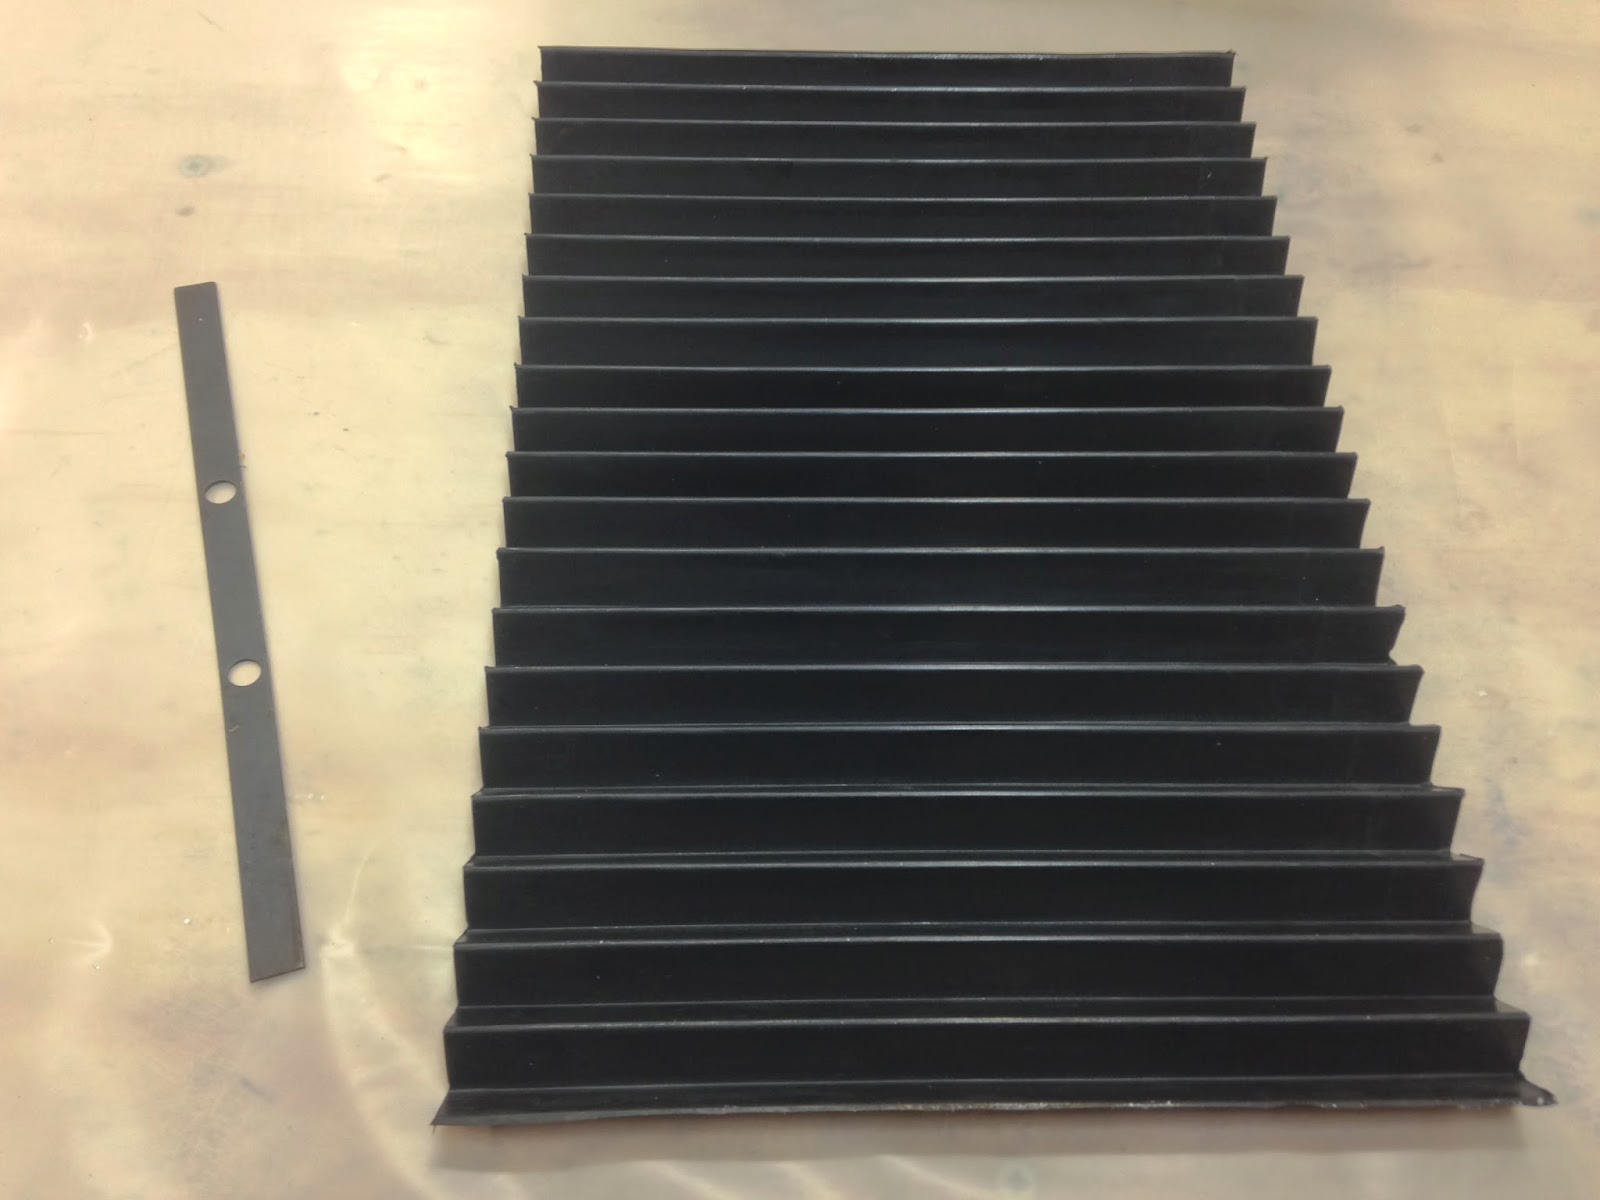
 |
| Z axis protection in place |
I might have to shorten the baffle by a few folds, time will tell. So far I think this is one of the quickest and easiest upgrades, and I will enjoy it with every machining operation to come.
Moving to issue #3, keeping the crud out of the motor coupling makes a lot of sense, especially when you have to get in there for maintenance. In the past I have relied on wide masking tape applied just before using the machine, but as I got lazier, I left it there to soak up all kinds of cutting oils, and cleaning fluids. It got pretty nasty.
 |
| Oil soaked tape protecting the Y axis coupling |
 |
| Same nastiness on the X axis. By the way, the tape is usually covered in metal chips as well as cutting fluids. |
Kicking the can down the road a bit, I decided to replace that tape with HVAC metal tape from Home Depot. I should get a little more milage out of it, until I finish working on a global solution that will completely enclose couplings and motors.
 |
| HVAC metal tape |
 |
| That should work for a little while |
 |
| I left the bottom is open for possible chip and/or coolant evacuation |
The cover I have in mind will be fashioned out of aluminum angles welded together. Hopefully it won’t be as ugly as I picture it in my mind, and should be a pretty good opportunity to practice some more advanced AC welding skills.
The complete enclosure of the motors (at least 3 sides) will also make it possible to use flood coolant down the road, if I chose to do so.
Obviously flood coolant and chips are not very friendly to exposed electrical connections…
 |
| These were supposed to be temporary motor connections |
 |
| Chips and cutting oil still clinging to the terminal blocks even after a good cleaning |
 |
| Z motor connections are mostly out of harm's way |
… and so I moved on to addressing issue #2 by waterproofing the connections.
 |
| McMaster delivery |
 |
| Wire seals (4 included in my kit) slipped over the wires |
 |
| Socket (4 included in my kit) getting crimped on the wire |
 |
| Socket crimped. Rear tangs closed slightly to hold the wire seals for secondary crimping. |
 |
| Rear tangs in crimping tool |
 |
| Rear tangs shaped over the wire seal |
 |
| What it looks like after crimping |
 |
| Four crimped sockets ready to be inserted in the plug |
 |
| Sockets need just a small push to lock into the plug |
 |
| Tab ready to close on the four sockets |
 |
| Tab closed, sockets locked in place. |
 |
| Business end of the waterproof plug |
I also purchased an interference shielding sleeve, to reduce the chances of interferences at the motors. The cables from the controller box are already shielded. The sleeve has a grounding cable woven in to dissipate any charges to ground, but I chose to not connect it at this time.
 |
| Wrap-around interference shielding sleeve |
One nice thing about this sleeve is that it is slotted, so inserting the wires is a piece of cake.
 |
| I used about 12" (30 cm) per motor |
 |
| Y motor plugs connected |
 |
| X motor plug getting the sleeve |
 |
| X cables protected from possible electrical interference |
The material the sleeve is made from seems like it would collect chips and oils, so I purchased some self-fusing high temperature tape, and wrapped the sleeves generously with it.
 |
| This tape is pretty cool |
 |
| Forming a waterproof outer shell |
 |
| Y motor cable sealing completed |
 |
| X motor cables sealed |
With two axes taken care of, I moved on to the Z axis.
 |
| Z motor cables were next |
 |
| Sockets |
 |
| Pins (4 included in my kit) crimped |
 |
| Plug and sleeve added |
 |
| Self-fusing tape used |
 |
| Male and female plugs before mating (1 of each included in the kit) |
The incremental improvements I have made to the mill have rendered it easier to clean now, and more durable, and that should make it even more fun to work with.
 |
| This little mill has come a long way |
No comments:
Post a Comment