Chronicling my Long EZ construction (and a few other things).
Disclaimer
This blog is for entertainment purposes only, and is not meant to teach you how to build anything. The author is not responsible for any accident, injury, or loss that occurs as a result of reading this blog. Read this blog at your own risk.
Wednesday, November 26, 2014
Brake/Rudder pedals - part 11
Ending the pedal saga (6.3 hrs)
Although it’s been looking like a “brake pedals only” website lately (past 4 months), I have finally reached the end of the R&D and fabrication phases, and moving on to installing them once and for all.
Note to self: I need to drastically reduce the number custom made parts if I want to finish this plane in one lifetime.
With the pedals looking as good as they were going to get, the next "most important thing" became where to put them, so I spent even more time in the saddle playing with them, as since I kept coming up with the same position over and over (same as in the last post), I decided that that was it, and to just go for it.
Remember, once the bases are attached to the structure, it would be easier to start building a new plane rather than getting them out! Ok, maybe not, but you get the idea.
The |____| marks the spot
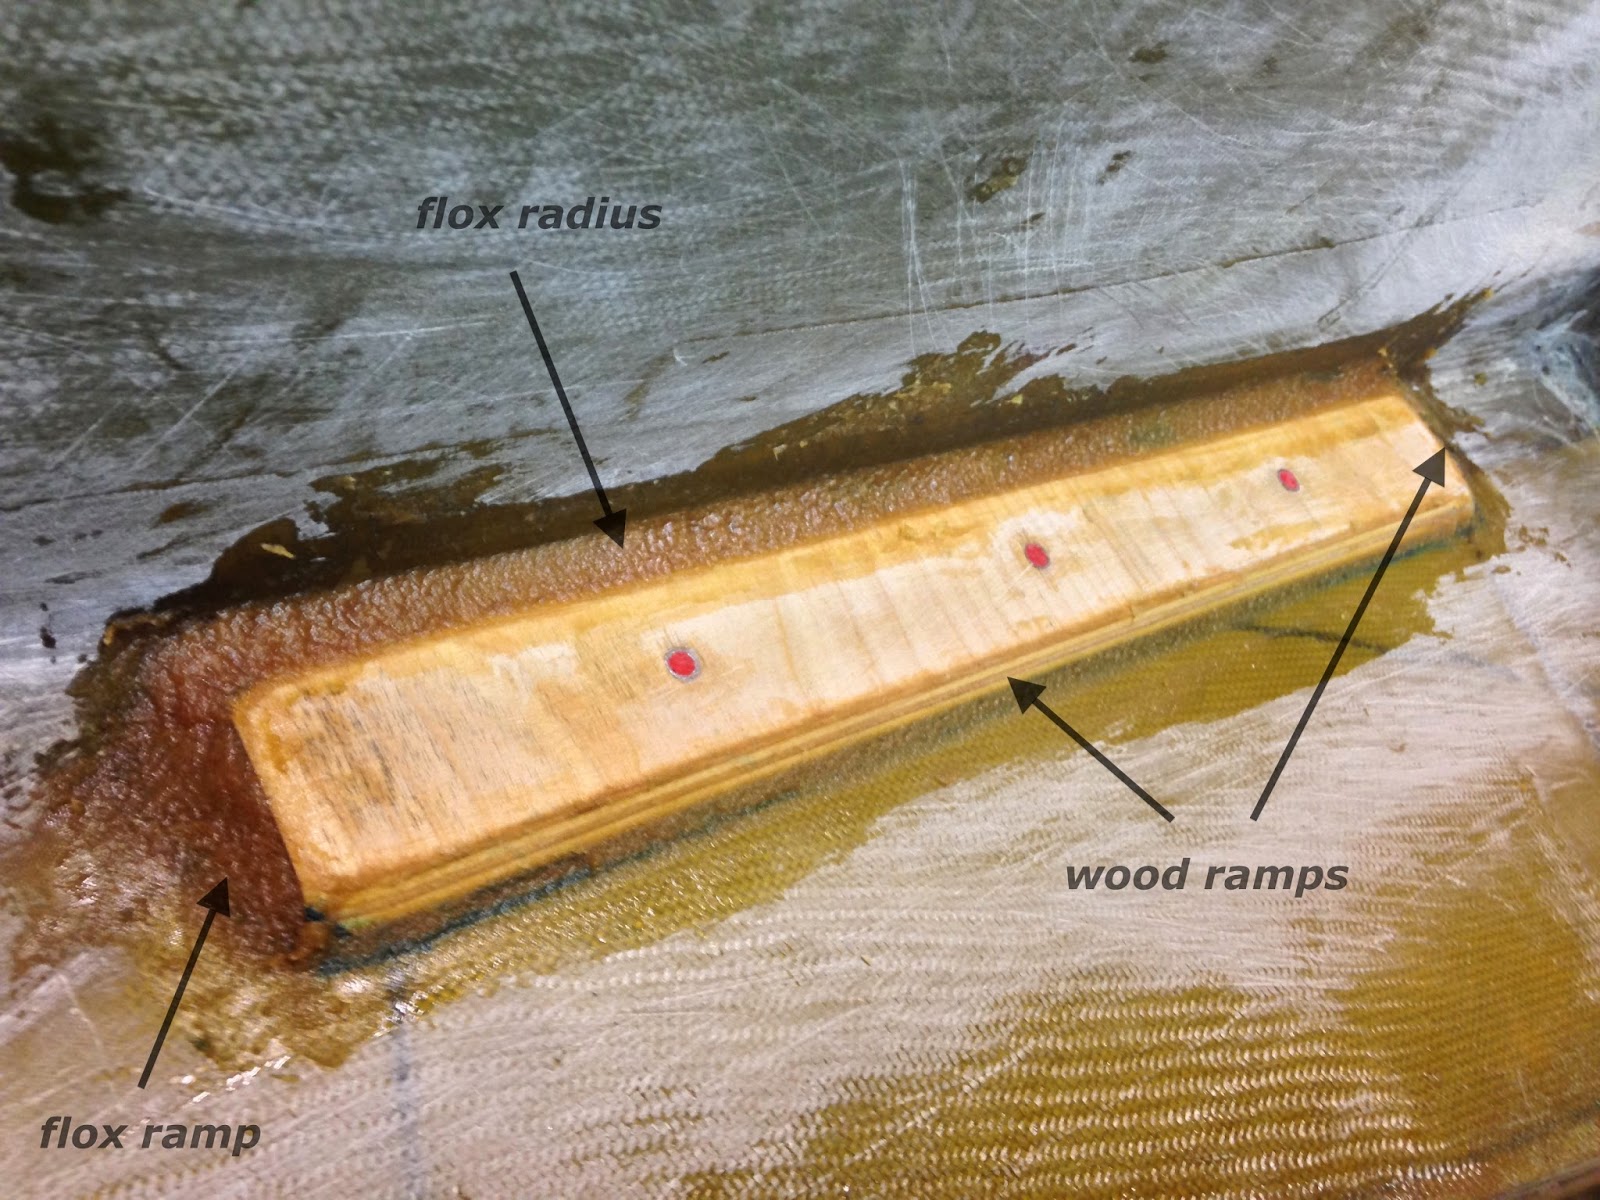
I started getting ready by cutting fiberglass plies, arranging them between plastic sheets, and wetting them with epoxy (aka pre-preg). I used 3 plies of BID each, and gave a generous 2.5” (6.4 cm) overlap on the existing floor and sidewalls.
Two 3 plies pre-preg cut, and stacked between plastic sheets.
Pre-preg ready for use after trimming the extra plastic
Using my Saran wrap trick, I plugged all the threaded holes, to prevent flox from rendering them unusable, and buttered the bottom of the plywood bases with it (after wetting them with epoxy).
Stuffing the holes with plastic wrap
One base bottom epoxied, the other epoxied and floxed.
Carefully, I laid the bases on the fuselage floor, pressing down on them to squeeze the excess flox out of all four sides. I then shaped this same flox to aid in transitioning the fiberglass onto the adjacent surfaces.
This part is aways fun
So many shapes in such a small part
Other base getting the same treatment
Talking about laying fiberglass, this time around I was plagued by lots of air bubbles, undoubtedly due to my lack of recent experience with it, and spent quite some time trying to get them all. Using an additional light source helped revealing them, however I still missed a quarter-sized one sitting over the back end of the right plywood base.
Left base with all the kinks worked out (pun intended)
Right base. Can you see the big air bubble? Neither could I!
Thinking I had gotten them all, I peel-plied over the glass, and went to bed.
Left base resting overnight
Right base peel-plied
The next morning I anxiously ripped the peel-ply, and was quite shocked by the size of air bubble I had missed.
Holy crap! How did I miss that air bubble?
Here is the offending air pocket, highlighted with a silver marker.
To fix something like that, you have to inject epoxy under the skin with a syringe (I added a very small amount of flocked cotton to my epoxy). But first, you have to drill an “entry hole” for the epoxy, and as many “exit holes” as necessary, depending on where you want the epoxy to go (epoxy needs to be able to displace air, or it won’t go there).
With my triangular shaped air pocket, I needed at least three holes, one per vertex, two of which would be exits.
Surgery in progress
"Relax, this won't hurt a bit!"
How to remove an air bubble
Getting the Saran wrap out of the threaded hardware proved to be a bit of a pain, but it was nevertheless straight forward… drill a small hole, enlarge it carefully, and try to get the recalcitrant wrap out with whatever tool you can stick in the hole. The smaller the threaded hardware, and the tighter packed the wrap, the harder will be to get it out.
I overpacked as usual!
Aiming for the center of the Saran wrap
Fun time digging plastic wrap out of threaded hardware
Finally, reaching the climax of this whole subproject, I bolted the pedals to the fuselage.
Left pedal of awesomeness!
I know... it brings tears to the eye (Aluminum tape will be removed later)


No comments:
Post a Comment