Shorter bracket (10.0 hrs)
My friend and fellow Long EZ builder Wade, came over to visit me this past weekend, and caught me right in the middle of machining the shorter version of the brake pedal bracket.
 |
| Left side of bracket machined out of a 1 ¼" (3.2 cm) U channel aluminum extrusion |
Since he had expressed an interest in CNC machining in the past, and the mill was not operational the last time he stopped by, I decided to seize the opportunity to bring him up to speed with a little "CNC boot camp".
I showed him the basics of CAD, CAM, Mach3, and G-code then gave him some hands on time on the CNC mill.
 |
| Wade changing the cutting bit in the spindle |
He’s such a quick learner, and did a fantastic job, so much so in-fact that he ended up machining the whole center section of the bracket on his own.
 |
| First half of the center section completed, Wade is about to machine the far half. |
I think he really enjoyed creating with metal in such a precise fashion, and the next day the little seed I planted showed signs of germination when he started inquiring about CNC machines, prices, etc.
 |
| New 9.5" bracket vs the older 12" one |
I mostly gave him the same advice I gave Phil from the west coast, don’t do as I did. Buy a more capable machine from the get-go, then add a pre-made CNC kit.
I am coaching Phil right now in setting up his own hobby CNC shop.
Phil, a former Boeing 737 Captain that now manufactures high fidelity flight simulators, took my advice and returned his new Harbor Freight mill, purchased a much better quality Little Machine Shop one, and will end up modifying it with a CNCfusion kit later on. That’s the way I’d do it, short of getting a Vertical Machining Center already made.
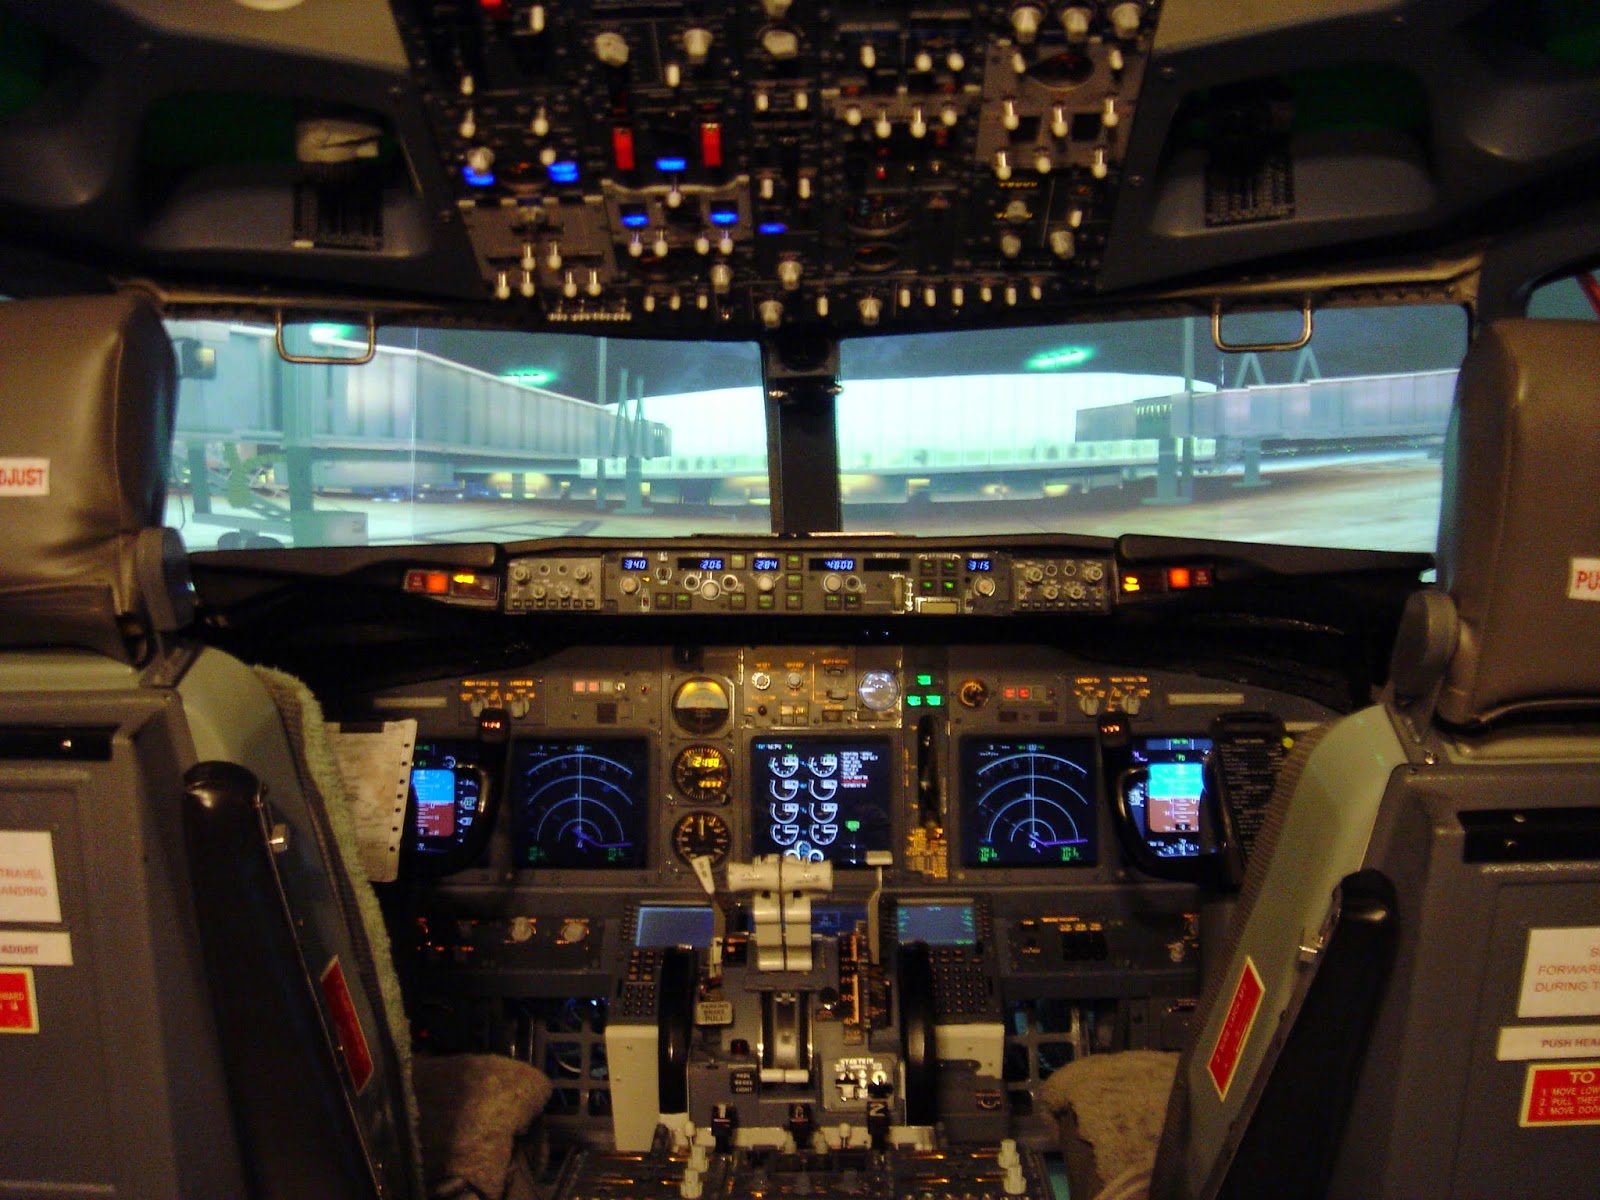 |
| Phil's handy work, a fully functional Boeing 737 simulator (with visuals)... amazing! "I want to fly it!" |
The new bracket came out really well, and the smaller size of the track will allow for more flexibility in mounting it in the confined spaces of the Long EZ's nose.
 |
| The shorter bracket makes it an easier fit in the nose |
The geometry of the pedal assembly also worked great in all the positions for which I had drilled holes in the flange. Which position I will choose will have to be determined by sitting in the fuselage, and playing with it a bit.
 |
| Pedal fully aft in the middle hole position |
 |
| Pedal fully aft in the bottom hole position |
 |
| Pedal fully aft in the top hole position |
Adjustability was a major driving factor in my design, and I think I will have plenty of it in the form of track holes selection (5 positions to choose from), flange hole selection (5 options there), and rotation of the piston rod extension (fine adjustment with at least 5 or more usable options).
That’s at least 125 combinations to choose from! Even a picky guy like me ought to find more than one suitable position.
No comments:
Post a Comment