Chronicling my Long EZ construction (and a few other things).
Disclaimer
This blog is for entertainment purposes only, and is not meant to teach you how to build anything. The author is not responsible for any accident, injury, or loss that occurs as a result of reading this blog. Read this blog at your own risk.
Sunday, October 06, 2013
Main landing gear - part 5
Lower tabs (28.6 hrs)
When the time came to build the fiberglass tabs, Sam, a friend of my daughter's who lives in the neighborhood, stopped by the shop, curious about the weird brown thing growing ever larger on the bench. We hit it off pretty well, so I decided to offer him the opportunity to try working with composites.
Sam and me
Sam is a very talented kid, and a hard worker, and he quickly got up to speed on composites work. I enjoyed working with him over the span of a week, and certainly hope he comes over to get his hands dirty again.
Picking through UNI leftovers
BID squares for the inner side of the tabs
Because of my higher glass count (324 pieces of UNI and BID) we spent the best part of an afternoon cutting fiberglass. Sam did a great job, and time flew by while in good company.
More squares, more cutting...
Sam hard at work
Sam's first pre-preg
The patient was immobilized
Pure epoxy over the sanded fiberglass
Peeling the back plastic off
First 13 layers of fiberglass applied to the gear bow
Remaining plastic being removed
Looking good after all air bubbles were removed
Second 14 layers of UNI being applied over the first
27 additional layers of BID laid over the 27 layers of UNI on the vertical sections only
The BID kept sliding off, so I used peel-ply to tie the BID to the UNI layer of the center section
Work's finally over for the day
Plywood tabs in conjunction with the peel-ply kept the BID layers from sliding off overnight
A few days later I trimmed and drilled the new outer tabs, then I shaped the contour with a sanding block.
Drilling an access hole for the boring tool shaft to pass through
I know it looks weird, but this is what it takes to drill holes that line up.
Boring tool business end
Boring the fiberglass tabs
The holes needed to be enlarged slightly since this boring tool cut 0.020" undersize
Making the outer tabs pretty and round
Well, this tab actually is pretty nice!
Plywood and Bondo will have to be removed next
Later, I got rid of the plywood tabs and the Bondo, and I sanded the inner surfaces to get them ready for when the inner part of the tabs will be built.
"Thank you for your service, but we are downsizing the operation! You understand..."
A shot of the inner tab surface after sanding
Other side will get the same "Corporate justice"
And there she goes...
The alignment foam reference is kept a little bit longer
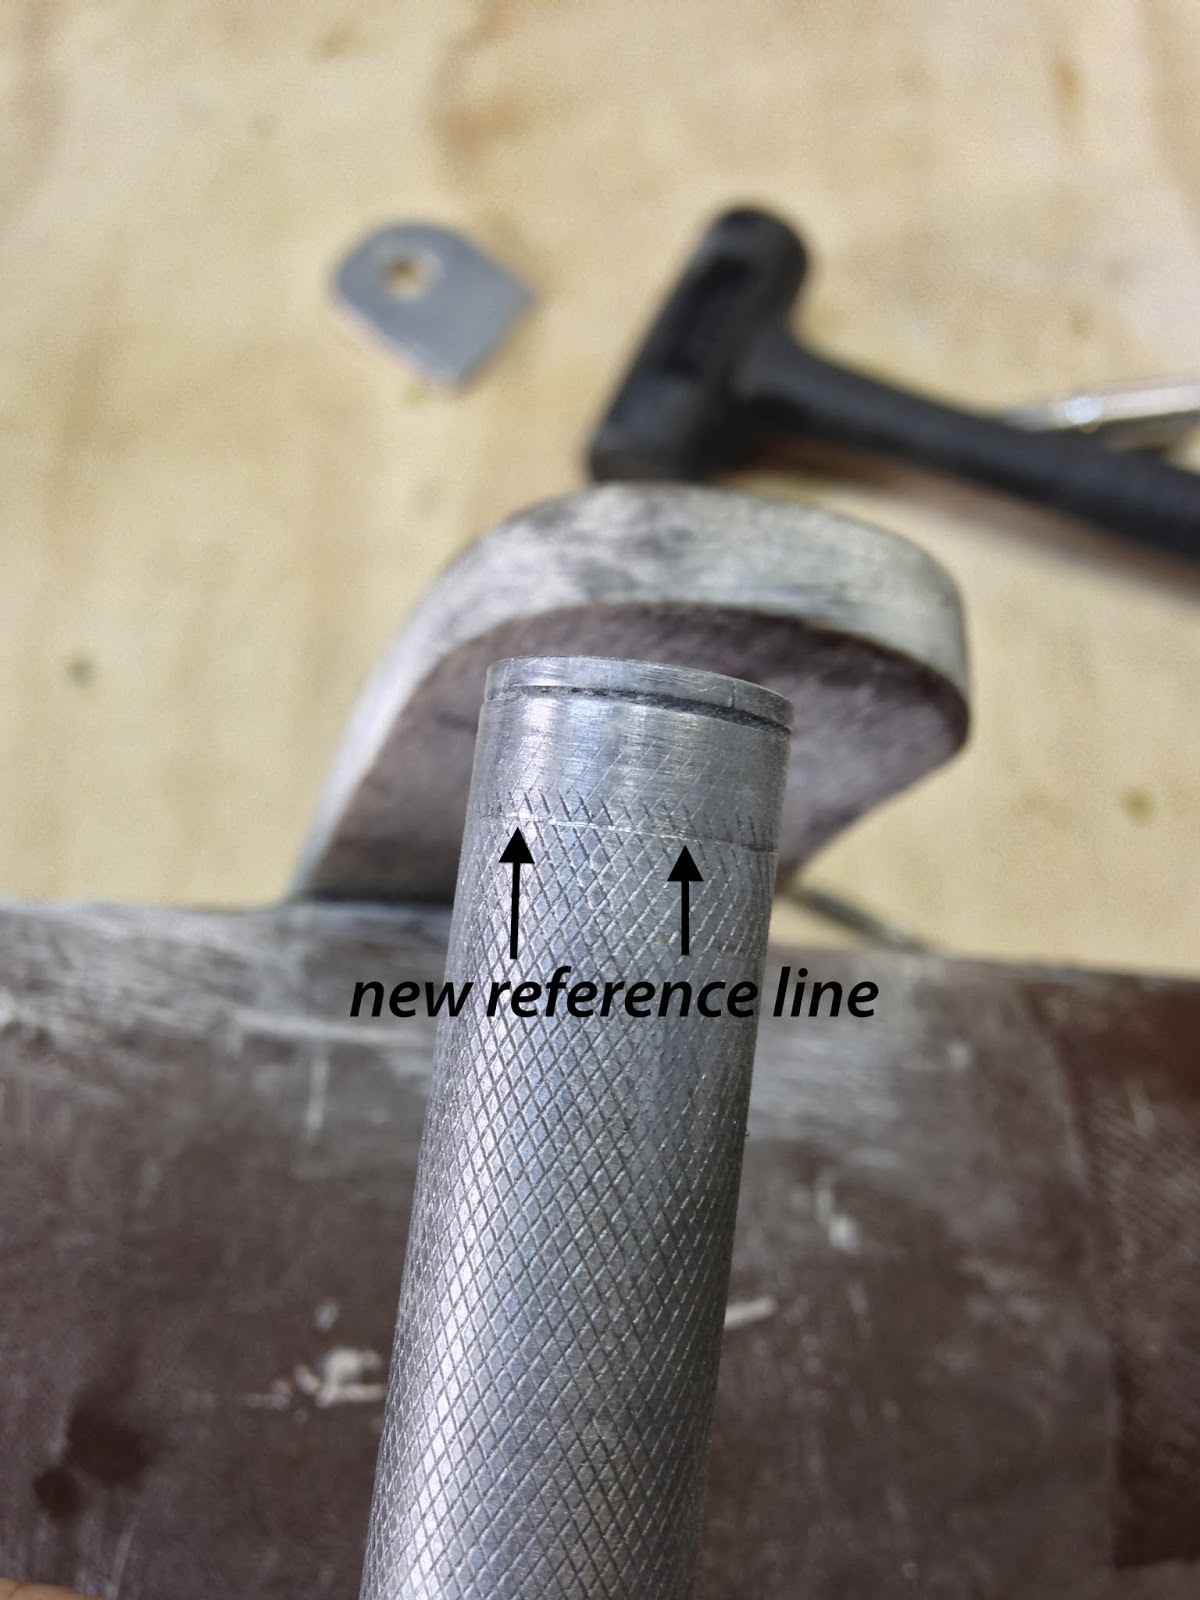
I replaced the steel tubes, and realigned the markings I had previously made. I then scribed new markings on the tubes, outside of the tabs, and knocked off the old foam references.
Steel tubes back in the exact original position
New reference line scribed from the outside surface of the fiberglass tab
The right set of inner tabs was done the same way a few days later, but Sam was not around to help, so I had to do them on my own.
Pure epoxy over the seat of the new tabs
13 + 14 plies applied
Same thing with the plastic removed
27 BID layers added to the outer tabs curing overnight
Morning ritual of peel-ply removal
These tabs are pretty massive!
Plywood tabs are still wrapped with duct tape
Duct tape in the foreground trimmed off with a razor
Same thing, different tab.
Using my vibrating cutter to trim the excess glass
One tab sanded to size, sporting a brand new access hole
Both tabs sanded, and access hole being used.
Mounting hole bored to 5/8" (1.58 cm)
Opposite side view
Eventually both tabs got bored...
... and the plywood and Bondo was chiseled off
With the outer tabs completed, I couldn’t resist putting the gear back on the fuselage to see how it fit, and I was happy to see that the gear bow was solid.
Here are the finished inner tabs (another nearly identical layup will be done on the inside surfaces)


No comments:
Post a Comment