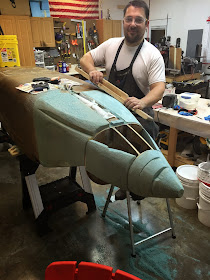
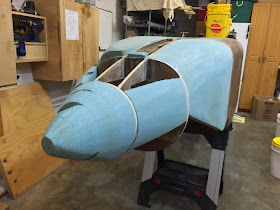
The endless nose (6.7 hrs)
She has been looking at me with those sad puppy eyes for sometime now, promising a relaxing break from the hard work and long hours I have not spent with her. I just fell for it, and went back to the her side. Nothing fancy this time, just a whole lot of rhythmic grunt work, and the pleasure of a deep body exercise.
Hey, wait a minute there! I was talking about sanding the Long EZ!
All right now, back from The Far Side...
First order of the day was to flip the fuselage. This is easier said than done. So, I decided to remove the main gear to lighten up the load.
 |
| Getting her ready to go belly up |
 |
| This thing is a lot heavier than one would imagine |
I swore I’d never take that off again, but I had to concede that I could no longer handle it all by myself, so the gear had to come off.
The reason I hate doing that is that the gear was basically fitted in place, and it is very tight (as it should be) in its brackets. Removing it causes the steel bushings in the gear to scrape the aluminum bracket as the gear gets ever so slightly out of square. I really don’t know what to do about that, other than not removing it.
 |
| This just breaks my heart |
 |
| More scraping on the right side |
With the fuselage finally upside down, I could attend to some overdue matters. One thing I wanted to work on was to reduce the gap from the top end of the nose gear leg to the nose bulkhead just in front of it.
 |
| I know there are bigger holes in the nose, but today we are working on the small one. |
 |
| The gap is a little over an inch (2.5 cm) |
This gap could provide a lot of unwanted ventilation to my legs on those cold winter days, and had to be made smaller.
I cut a piece of foam the size of the opening, and whittled it down to a shape that did not obstruct the nose gear movement.
 |
| When it's foam cutting time, it's hard to beat a table saw. |
 |
| Any questions? |
 |
| I used pins as depth gauges |
 |
| Here the pins are holding the foam at the proper height |
In order to proceed any further, the nose gear had to go, Luckily this time, working upside down turned out to be quite relaxing.
 |
| I wish this was always the case |
I prepared some slurry for the foam, and some dry micro to take up small gaps, and bonded the foam piece to the bulkhead.
 |
| NG30 cam |
 |
| Foam block glued to the bulkhead |
 |
| Same thing, but viewed from the nose. |
This piece of foam really hated its position, so I loosely reinstalled the nose gear, and stuck another foam wedge in the now smaller gap, to keep the former from wandering around.
 |
| Convincing the foam to stay in place |
Because of the looseness of the setup, I chose to glass this foam piece after it was securely bonded to the bulkhead, to minimize fiberglassing drama.
While I waited on the cure, I decided to do a few more housekeeping chores. First on the list was to shape the walls of the battery compartment to be a little more concave. This took a lot longer than I thought it would have.
 |
| It looks a bit coarse at this stage, but it did smooth out in the end. |
I neglected taking a shot after smoothing the surface, because the light didn’t allow for much depth perception, and it just looked flat, but you’ll be able to tell after I glass the foam.
Bored with the still loose foam wedge, I started picking my nose.
 |
| The foam dust on the ground should fill a multi-hour hourglass |
Not that it needed to be shaped right then, but I figured I’d keep the back pain to a manageable level if I did a little every now and then. So, I sanded, and sanded, and sanded, and… you get the picture.
At the cost of sounding repetitive, I have to say that the blue PVC foam is a lot tougher to go through than the original Urethane foam the designer called for in the plans, but just as I did with the speedbrake, I changed to the blue foam because of strength and delamination issues with the Urethane.
As a matter of fact I still have a stack of Urethane foam in the shop (I bought it when I was young and naive) that will never go in the plane.
Anyway, many hours later, one side of the nose started to look more like it should, though a lot more shaping is in the cards for it.
 |
| Still moving forward |
No comments:
Post a Comment