Adjustable mill’s head attachment
I was never comfortable with the way the Z axis ball-screw attached to the head of the mill. The main reason for this was my inability to mark the exact location of the bolt holes with the accuracy they deserved.
I wanted to be able to compensate for the slight positioning errors I was sure to make while determining where to drill in the cramped quarters of the mill’s head.
To this effect the plans I purchased were of no help, since they merely showed a plate with holes in all the right places, and left you to find out where those would be on the mill.
 |
| Original plans provide no adjustability |
I spent quite some time mulling this over, then decided to do it my own way. My design would allow for X and Y adjustability of the ball-screw plate attachment points, or so I hoped.
 |
| Bottom plate adjusts in Y direction, and connects to the mill's head. |
 |
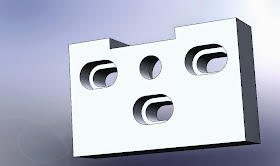
| Top plate adjusts in X direction, and connects to the ball-screw. |
In between fiberglass curing cycles, I started work on my new plates design.
 |
| Milling the slots (with 2D CNC of course) |
 |
| Top and bottom plates finished |
 |
| Checking fit on bottom plate slots |
 |
| Bottom bolts are covered up by the top plate (not so good). |
Testing the adjustable design in X
I also took my most precise estimates of where I should drill the bolt holes, in order to increase the adjustability potential.
 |
| Best estimate for the 3 bolt holes |
Disassembling the head of the mill is not something you want to do very often, especially now with all that CNC jazz on top of it, but I had already been putting this task off for as long as I could have, and now it was finally time.
The head could just barely fit in my 6" (15 cm) vise on the drill press, and I set everything up very carefully.
 |
| Aligning everything up |
I was just about ready to drill, when I finally realized there was a big problem.
You see, the mill’s head is made of 2 pieces bolted together with 4 big bolts, and they were going to be in the way of the ones I was planning on installing.
The big bolts are hidden when the head is installed, and I forgot these suckers were even there, but they didn’t, and couldn’t pass an opportunity to bite me in the ass as soon as I turned around.
 |
| Can you see the problem? |
Crap! Back to the drawing board.
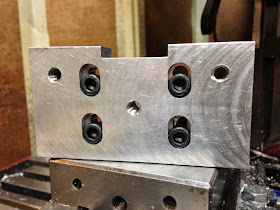
After more head scratching, I decided to swap bolt locations between the bottom plate and the top plate. This new setup would clear the “danger below the surface”, and would allow me to make the top plate even smaller, with the added benefit of uncovering the head of the lower bolts, making them adjustable without having to remove the top plate.
Bingo!
 |
| New and improved bottom plate |
 |
| Smaller top plate (looks like a square Napster) |
 |
| Smaller top plate does't cover the bottom bolts anymore |
 |
| Z axis lower assembly |
Machining resumed on two new aluminum pieces.
Using CNC you can cut any size hole with any size mill (as long as it fits in the hole), check it out...
Cutting the hole on top of the top plate
I guess I also won't be using my counterboring set very much anymore...
Counterboring the hole on the bottom of the top plate
 |
| Cutting the same slot on both plates |
With the head of the mill back in place, I was able to find some new bolt hole locations. Oddly a small shim was needed. I might end up trimming the bottom plate later on, and getting rid of the shim.
 |
| Assembly in position, looking for new bolt hole locations. |
 |
| Note the small shim? |
The holes were at last drilled and tapped, and the whole thing put back together for final testing.
 |
| Tapping new holes on the drill press |
 |
| Bottom plate in the fully aft Y position |
 |
| Bottom plate in the fully forward Y position |
 |
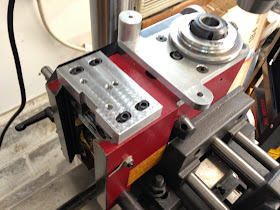
| Assembly bolted to the mill's head at last |
Testing the newly bolted together Z axis
"Air cutting" a 2" wide slot, down to .100" depth, in 4 passes.
That’s it folks, the CNC mill is done! It has taken excactly 1 year from start to finish.
There are a few small things left to do, like spindle control, limit switches, etc., but I’m calling those... improvements.
The CNC mill is here right now, it can do some real work, and I might just have a couple of things in mind to get me started making chips.
Stay tuned, the CNC cutting will begin soon!
No comments:
Post a Comment