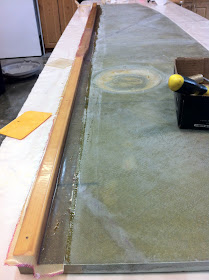
Glassing the top longeron (3.4 hrs)
Once again a longeron needs glassing, but this time I decided to "pre-preg" it to keep things clean. If you just joined us, this means that I added epoxy to the fiberglass strips once they were stacked, and within two sheets of plastic.
 |
| UNI cut the long way |
 |
| UNI stacked and within plastic |
 |
| Epoxy added to UNI sandwich |
 |
| Epoxy thoroughly squeegeed |
Since last time I had a little difficulty conforming the fiberglass to the 90˚ corner where the wood meets the sidewall, I decided create a flox fillet to ease the transition.
Because this fillet is 103” (2.6 m) long, and to automate somewhat the process, I put the flox paste in a ziplock bag...
... cut a corner...
... and used it the same way you garnish a cake.
Once the flox was in place, I went back with a tongue depressor to remove the excess.
With the stage set, it was time to use the pre-preg UNI to cover the longeron in correspondence of the doubler. It basically went on like a Band-Aid, just peel the backing plastic sheet off, and stick it to the longeron.
 |
| Pre-preg in position |
Using a squeegee, I gently contoured it to the longeron...
... then peel the backing plastic off...
Done!
At this point I repeated the process with two longer pieces of BID that would cover the entire longeron, overlapping in the middle.
 |
| This will be cut into two strips later |
 |
| Doing "my thing" |
 |
| BID ready to be cut and used |
 |
| Bid strip in place |
 |
| Peeling off the plastic backing |
Lastly as always, I used my 1” (2.54 cm) wide roll of peel-ply to straddle the edge of the fiberglass for smooth results.
 |
| Peel-ply straddling the fiberglass edge |
The fuselage side will cure overnight.
 |
| Right sidewall curing |


No comments:
Post a Comment