200a circuit braker panel & new tool preview
All the work I put forth in getting my garage updated has paid off many times over. I have been able to work during the most inclement of weather, from snow to high heat, in relative comfort.
After so many years of good service, I am starting to run against the limitations of my electrical system. I find myself in need of at least one new 220v 50a circuit, and my 150a panel has limited capacity left, and only room for one more 110v breaker.
I would have loved to being able to do the upgrade myself, but I didn’t feel comfortable removing the meter, and I had no ability to replace the tamperproof seal. Because there is no electrical shutoff switch outside (besides removing the meter), I would have had to replace the circuit breaker panel with live main wires.
Even I can see that that is not such a great idea!
So, I got the professionals to do it instead, and as you might have already guessed it wasn't cheap, but I didn't electrocute myself (a definite plus), and it was done right the first time.
I resolved to add the needed circuits myself at a later date.
Here are a few pictures of the install…
 |
| Original circuit breaker panel |
 |
| Only a single CB space is left (bottom left) |
 |
| This counter has to be pulled to shut off the electricity to the house. Wires on the right are always on. |
 |
| New code requires two 8' (2.4m) grounding rods |
 |
| New 200a panel |
 |
| New vs old |
 |
| New panel is taller |
 |
| This insulation has served me well |
 |
| Two grounding rods going in |
 |
| Old panel is out! |
 |
| New panel was a very tight fit |
 |
| Panel is in, rewiring next. |
 |
| Meter is out in this picture, grounding wire being installed on the rods. |
 |
| Copper wire is the new ground |
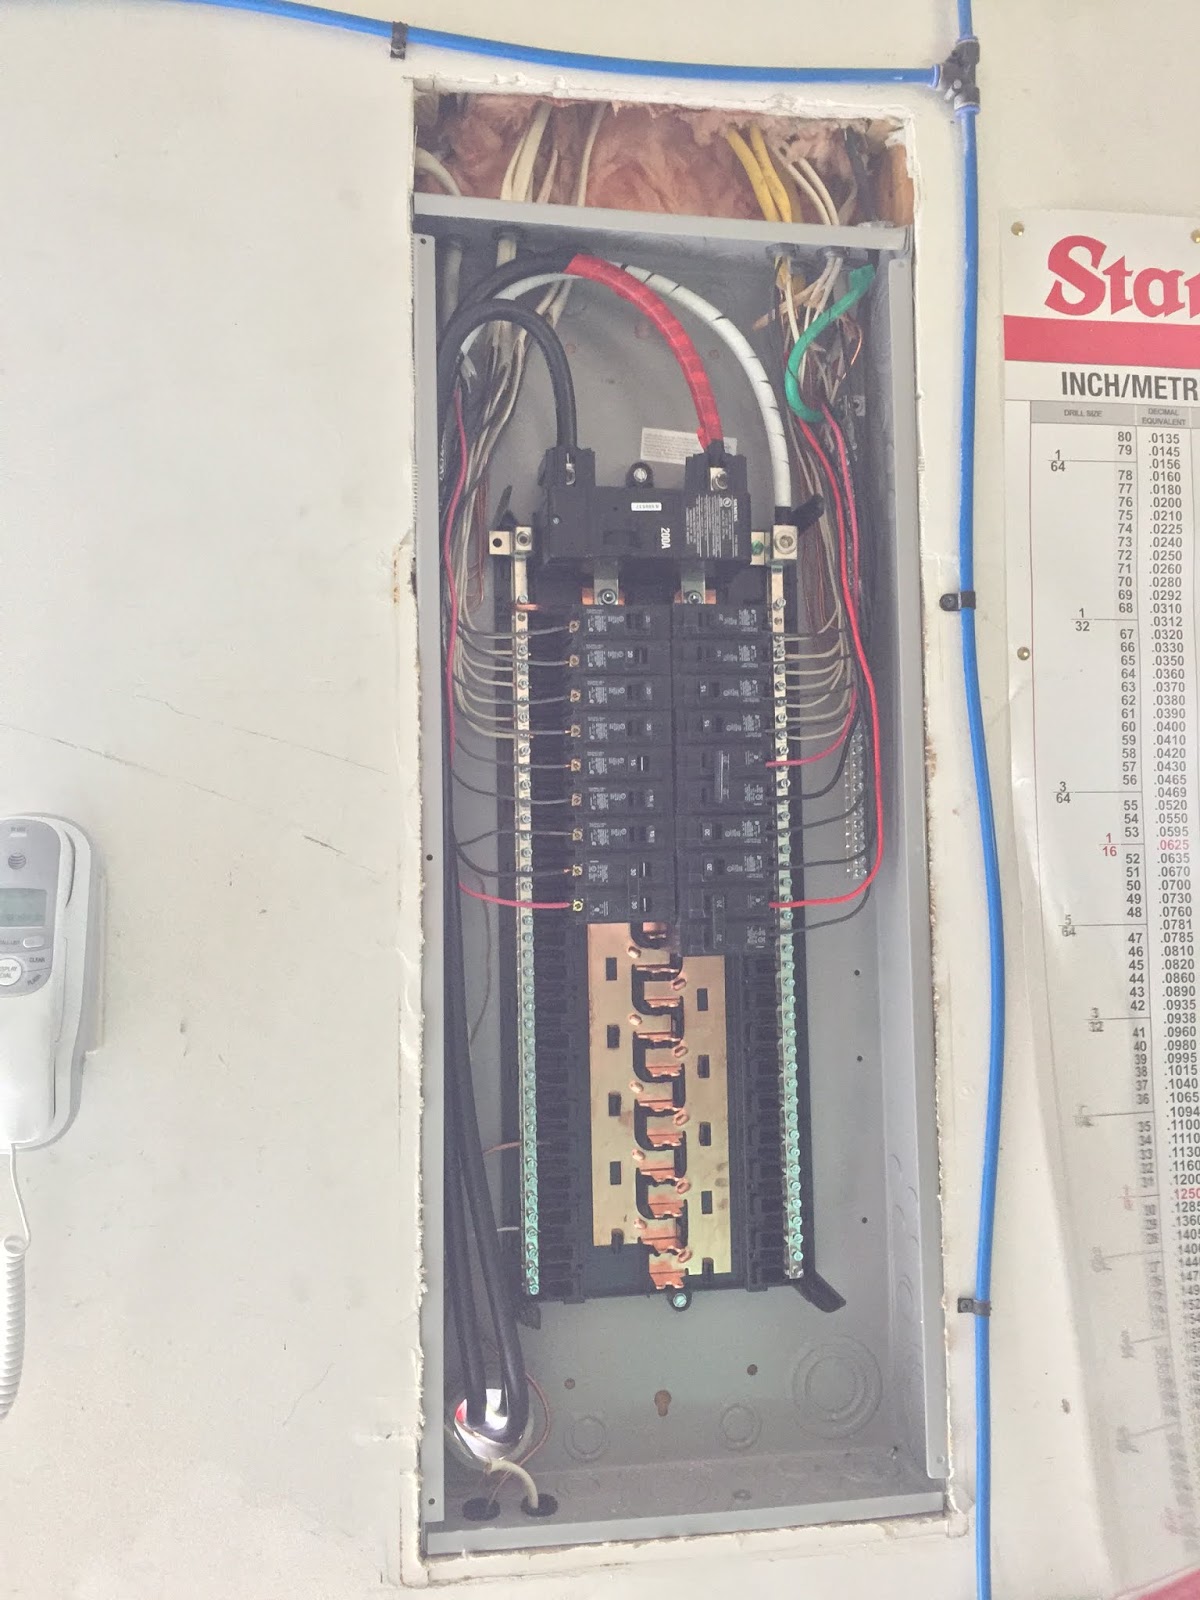 |
| All circuit connected to the new panel. I now have more room for new circuits. |
 |
| Cover over the new panel |
 |
| The finished project |
What do I need more panel space for? One might wonder.
First item to receive its dose of 220v 50a will be my dual voltage TIG welder. Yes of course, it's dual voltage, and I've been running it on 110v all this time. However, it won't reach full power on 110v, not that this has been a big issue so far.
The main reason for the upgrade is for items that won't work on 110v like... I suppose I might as well make it official now... I have put money down on a low cost 2x2 CNC plasma table.
There you go, "the cat is out of the bag" now!
 |
| The Crossfire by Langmuir Systems |
Check it out http://www.langmuirsystems.com!
Yes, I could have built my own. No, I didn't need another project at this time.
Much like with my 3D printer, I need something that would work right away, without spending months hunting down components, building it, then more time troubleshooting it. One still has to put it all together, but it doesn't look too complicated.
Why 2x2 (61x61cm)?
Lack of space.
Even that size will be hard to fit in my shop, with all the airplane stuff laying around. Langmuir has plans to be able to go 2x4 in the future, by just adding on to it, but I don't envision needing to anytime soon anyway.
I am betting my money on being able to cut newer versions of my instrument panel (and other stuff) in minutes, versus days.
It should be here in September/October 2018.
Stay tuned...