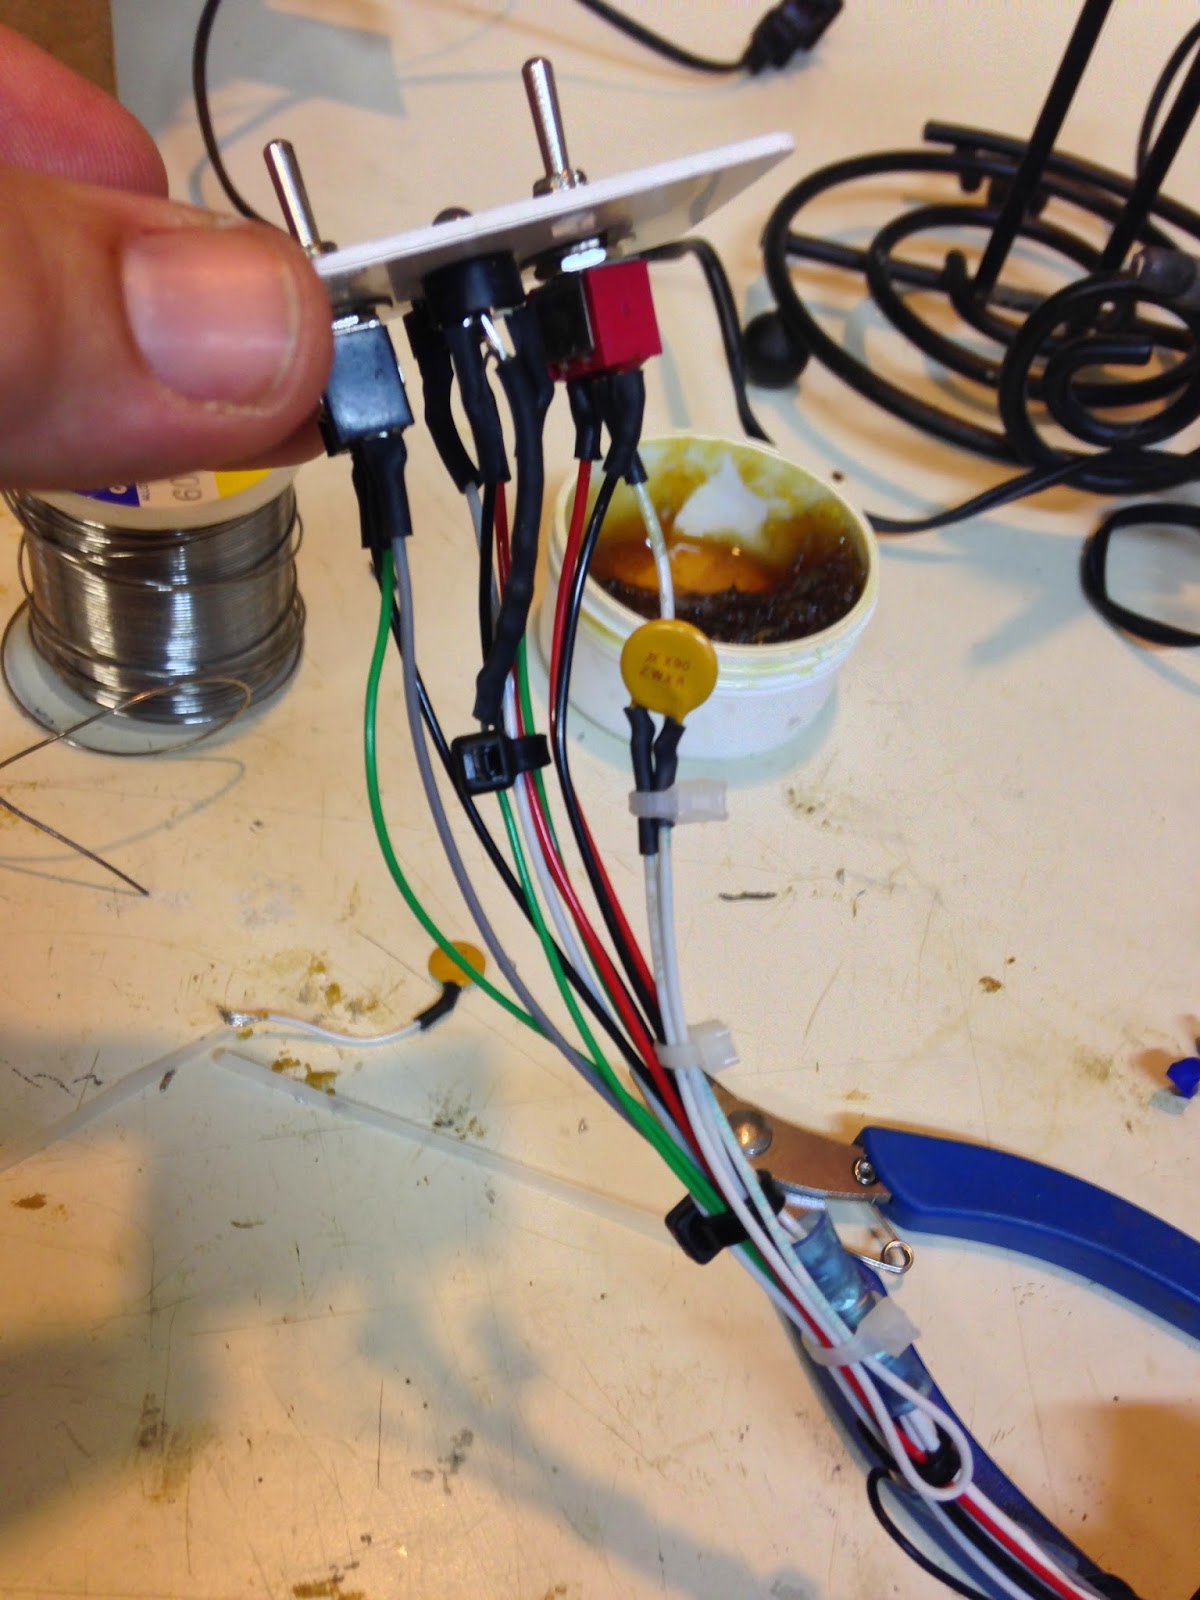
This time I'll show you the actuator I purchased from Jack Wilhelmson at eznoselift.com all wired up.
I made only one small wiring mistake, but finding it took 90% of the time I spent on the unit.
Introducing NL1-12E
It works quite well when everything is wired up correctly, doesn't it?
I'll have to resize and route the wires appropriately during final installation, but I'll leave them as they are for the time being.
UPDATE
After moving the wiring harness a few times in and out of the nose, a weak point has been identified, and corrected. The yellow condenser-like device near the control panel (actually a current limiting device) lost one of its legs due to the way it was strung out in the harness.
 |
| This is just not a good way to attach such a fragile component. |
 |
| Luckily, the replacements are cheap and plentiful. |
To relieve the stress on the component's "little legs", I replaced the short wire from the switch with a longer one.
 |
| No more tension in this guy's life. |
Then, I zip-tied it all back to the harness, leaving the component floating, and stress free.
 |
| Back on the job |
There are probably better ways to secure it, but I'm hoping this fix will be enough to prevent the issue from reoccurring.
One thing worth considering is that this component failure might also prevent the emergency gear extension using the battery backup (I should have tried it, but it didn't occur to me until now).
Excellent find my friend!
ReplyDelete