Disclaimer

This blog is for entertainment purposes only, and is not meant to teach you how to build anything. The author is not responsible for any accident, injury, or loss that occurs as a result of reading this blog. Read this blog at your own risk.

Wednesday, September 26, 2012

Ch. 6 - Fuselage assembly - Part 6


Taping the front side of the rear seat (3.0 hrs)  

I finally finished taping the rear seat today, even though one issue that I thought I had behind me, the squaring of the fuselage, reappeared to torment me again. 

It turns out that two bulkheads are not enough to keep “the box” from shifting shape slightly. So, I had to spend a bunch more time measuring, shimming, and so on, before finally getting down to business.


Pure epoxy brushed to area where BID tape will go


Flox fillet applied to the corner


BID tape ready to go

BID tape being added


BID tape with peel-plied edges

Wetting the other side with pure epoxy

Flox fillet in place

BID tape in place with peel-ply

Tomorrow Gina and I will be leaving for Rough River, Kentucky, for the annual CSA Canard get together, held Friday to Sunday. Rough River is such an excellent opportunity to see and talk to other Canard people, I have been waiting all year for it.

I’ll try to take lots of pictures with my iPhone, and maybe post a few of them here when we get back.


Tuesday, September 25, 2012

Ch. 6 - Fuselage assembly - Part 5


Taping the rear seat (2.3 hrs)  

Yesterday I floxed the rear seat to the back of the fuselage. Today I taped the back side of the rear seat.


Fresh flox to ease the BID tape transition

More fresh flox on the top side 

BID tape ready with centerline marked

BID tape in position

Plastic backing sheet removed

Same thing, top side.

BID tape with peel-ply on the edges

One thing I had not thought about, was how little room there is between the small gear tab and the back seat. 

There was just no way to get any BID tape in such a small gap, so I just left that alone.

Next, I will glass the front side, and at last the rear seat will be done.


Monday, September 24, 2012

Ch. 6 - Fuselage assembly - Part 4


Taping the front seat (3.3 hrs)  

Today the front seat was taped to the left sidewall, and the rear seat was floxed in place.


Flox in sandwich bag, ready for dispensing

Initial flox application. Tongue depressor was later used to smooth and radius the corner

BID tape being prepped

Bid tape ready

BID tape in place, with back plastic being removed.

Peel-ply added to edges of BID tape

Flox added to the rear seat/gear buildup juncture, and rear seat screwed back in place 

Clamps added to even the pressure on the seat edges, while the flox cure


Overall, today’s tasks were pretty simple. With these two bulkheads locked in place, the fuselage should finally stop squirming around on me every time I touch it, and working on the remaining ones will be less stressful.


Saturday, September 15, 2012

Ch. 6 - Fuselage assembly - Part 3


Fuselage alignment and taping (14.0)  

Wow, this has been a pretty frustrating experience! 

In my mind, I would just put everything together and be done. Except for one little detail... everything need to be plumb, and square.


Front view of fuselage alignment goals


Top view of fuselage squaring procedure


Come on! How difficult could that be? 

I knew I had used my very best effort to be as precise as possible, so I reasoned this cross-check would be pro-forma.

Little did I know that I’d be fiddling with this fuselage on and off for two weeks. No CNC matched hole technology here! 

Things got so bad in-fact, that I eventually broke down and asked Eagle-eye Walter (of previous fame), to make a house call and help straighten my mess.


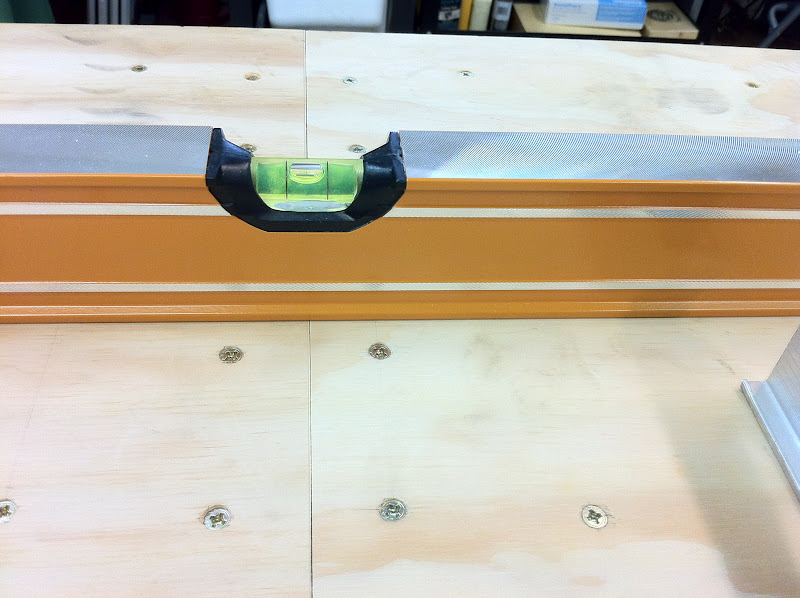
Note the black shim in front of F-22 (right side)


Increasing stiffness while measuring the fuselage


Eventually the fuselage came out pretty straight, but it took a lot of work, mostly because I couldn't figure out how to adjust it.

I still had a little more sanding to do at the bottom left of the front, and rear seats, to get a closer fit, but I couldn't get neither F-22 nor the firewall squared.

Also, the sidewalls by the front seat were out of plumb by half an inch or more.

Man, I just wanted to burn the darn thing!

I tried using pressure from both sides to change the shape slightly, by nailing blocks of wood to my table and shimming ever which way. Nothing!

Eventually, out of desperation, I started sliding one sidewall relative to the other, measuring again, and did get movement in the right direction. Still, I was shimming and measuring, over and over, for hours.

By the time Walter arrived the next day, his presence alone seemed enough to scare the fuselage straight, and even the sidewalls by the front seat became nearly perfectly plumb.

Sometime you just have to relinquish control to a higher authority.

I was very happy that my good friend Walter found the fuselage ready for “taping”, and that’s exactly what I did next.

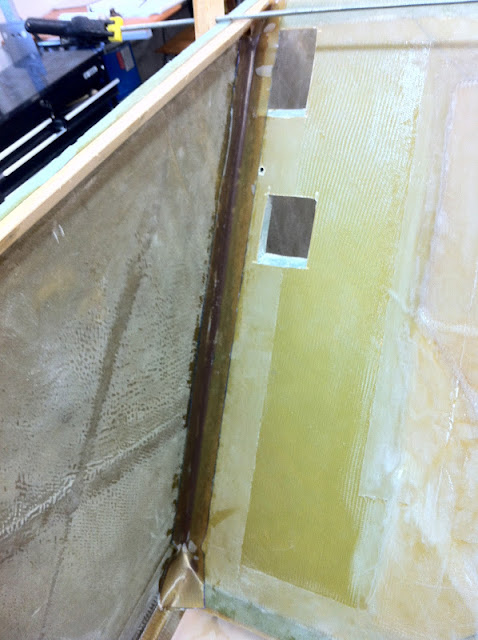
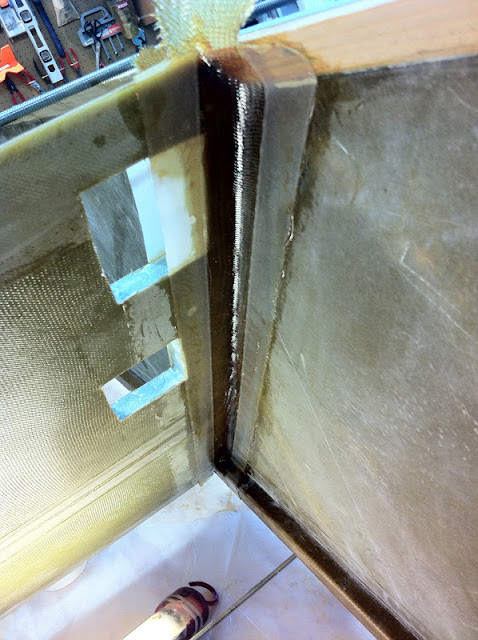
First, I loosened up the apparatus holding the middle of the fuselage tight, then I mixed up some flox, put it in a ziplock bag, cut one of the corners, and used it as a pastry bag to deliver its load between the front seat and the sidewall. After tightening the contraption back up, some of the flox squeezed out the front and back. Using the made-up pastry bag, I squirted a long bead of flox in the long corner, then used a tongue depressor to shape it like a rounded corner.


Flox added to the intersection


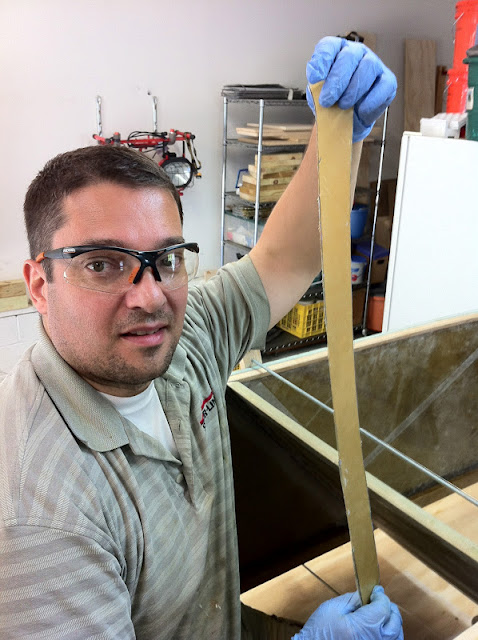
Flox alone is not enough to structurally join the bulkhead to the sidewall, fiberglass is needed to span the corner, and transfer the loads. As I’ve done in the past, I made some pre-preg strips of fiberglass to help reduce the mess, and make the job easier. This time I used two layers of 2” wide BID (5 cm) cut at 45˚. These are actually used so often during construction, that they have their own name: “BID tape” or “corner tape”.


I used two 29" long BID tapes 


BID tapes are applied to the structure like a giant band-aid. Remove one sheet of plastic, attach it in place, then peel the back sheet.


BID tape in place, before peeling the back plastic sheet.


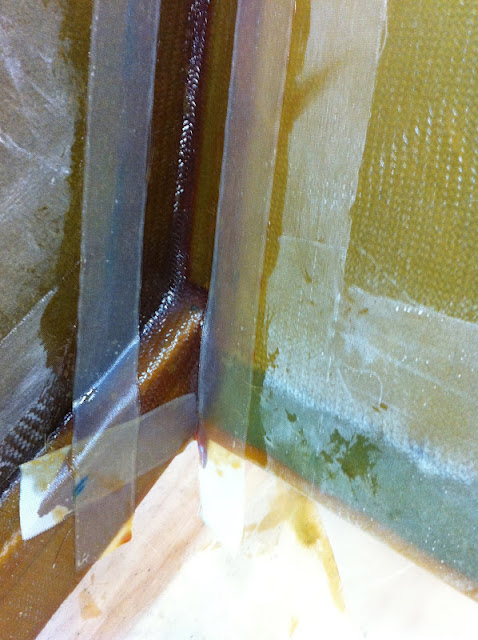
I was a bit apprehensive about this step because of all the compound curves involved. Bid tape will bend around corners somewhat, but after reading a Canard forum post, I knew how difficult it could become. In spite of that, it turned out to be one of the easiest things I’ve done so far. I just used a brush to stipple the BID tape in a few spots, and went right on to applying peel-ply.


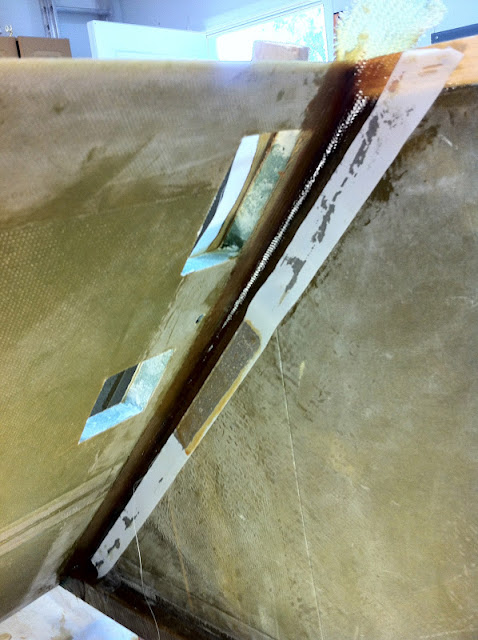
Plastic backing removed, and peel-ply being added.


Peel-ply applied


Detail of lower compound corner


Right back-side of front seat, taped. Fuselage is upside down, remember?


Right front-side of front seat, taped.


Because, I underestimated the amount of time it would take to finish the job, I barely had enough to finish one side before leaving on another trip.


Thursday, September 06, 2012

Ch. 6 - Fuselage assembly - Part 2


Initial fitting (8.0 hrs)  

More than half of this time was spent measuring, sanding, removing peel ply, trial fitting, more sanding, more fitting, power-sanding, going too deep with the power-sander, cussing, patching the brand new low spot with fiberglass, going back to hand-sanding...

In a moment of weakness I have to admit to wishing I was building a metal plane.

Who knew that composite airplane building was such a contact-sport? The next morning  I couldn’t even clench a fist, let alone raise my arms.


Checking the fit of the front seat

Finalizing the front seat location

No, I did not make this up! This ensures the seat goes back in the same place, later. Nails will be removed.

Fitting F-22

Same thing from the opposite side

Screws help locate the bulkhead. They will be removed later on as well.

Rear seat fitted and screwed to the right sidewall.

Same thing on left sidewall.


Finally, everything seemed to fit just right, so I put the 3D jigsaw puzzle together. 

Having someone to help support the parts while the structure took shape, would have helped, but given the late hour, I was flying solo on this one.


Upside-down fuselage on carefully shaped and leveled wooden blocks.

Front view

More frontal nudity!

Ok! Let's keep it clean...

I might need to reposition a few of the clamps.

The only negative G this bird will ever pull.


One word of caution if you choose to use the same threaded studs as I did: 

WEAR SAFETY GLASSES!!!

Although I am very careful around those studs, and I tie bright lines to them to enhance their presence, last night I had one  of them go straight for my left eye, as I raised my head after tightening the bottom bolt.

Had it not been for my safety glasses, this would have been the last construction post.

They might not be pretty, and you might look like a dork with them on, but you'll be a two-eyed dork!

As a matter of fact, wear them anytime you are in the shop.

I'm sure glad I did!


Shop preparation - Part 5


Leveling the big table  

Once I start assembling the fuselage, I will need to level the structure as precisely as possible, and it would help to start with a leveled table to begin with.

I am sure everyone knows that garage floors are NOT level on purpose. But if you don’t have a garage, this little fact might come as a surprise. The very good reason for slanting the garage floor toward the door, is to promote water exiting the structure, should it ever get in it in the first place.

A common slant is 1” drop (2.5 cm) for every 10’ (3 m). Since my table is 11’ long, I would have to raise the low end 1.1” or so.

I started out with shims, and quickly realized that it was not such a good idea. It takes about 5 shims to arrive to 1.1”, a shaky proposition at best.

Wanting a solid platform for my critical assemblies, I decided to carefully measure and cut some risers, then glued them underneath the legs of the table.


Two 1.17" risers

Risers getting smaller further away from the garage doors


Once I started cutting, I couldn’t stop until the table was level in every direction.


Middle of the table - across

Middle of the table - long way

Right side of the table - across

Left side of the table - across

Middle of the table - diagonal


This process consumed almost half a day, and I even ended  up power-sanding the tip of my left index finger (painful picture mercifully withheld).

I think the new leveled table will be a great help in the future, since most of what I’ll be working on from now on will require to be perfectly horizontal.