Disclaimer

This blog is for entertainment purposes only, and is not meant to teach you how to build anything. The author is not responsible for any accident, injury, or loss that occurs as a result of reading this blog. Read this blog at your own risk.

Monday, October 31, 2011

Composites for dummies!

Composite is a bit of a generic word, that encompasses all kinds of different materials bonded together by an agent. These materials could be fiberglass, carbon fiber, kevlar, wood, or sometimes a combination of them, depending on the specific recipe the designer cooked up for the part. The most common bonding agent is SuperGlue... ok, I was kidding! Mainly epoxy, though some very strong glues are indeed utilized in newer constructions.
Because the Long EZ uses epoxy, we will limit our discussion to it, or... should I say them, since there is an incredible variety of epoxies, and some are better suited to airplane building than others.
First of all, epoxy is made up of two parts, a resin and a hardener. So, technically, epoxy is not really epoxy until it is correctly and thoroughly mixed, usually in an 8 or 16 oz. paper cup. This is also known as "pure epoxy", as nothing else has been added to it (more on that later). The mixture ratio is specific to the brand being used, and can be measured by volume, or by weight. An electronic kitchen scale works well when mixing by weight, but a calibrated epoxy pump can be a real time saver. 
Oh yeah, epoxy pumps are pretty expensive, I paid nearly $300 for this adjustable model. You can see the hardener on the left, and the resin on the right of the pump.


Because mixing of the ingredients is absolutely critical to the development of the rated strength, it is imperative that the pump be calibrated for accuracy every so often. The process might take half an hour or so, depending on how far off your pump is, but it is a pretty straight forward job. The bolts on the hardener side (left) of the pump are loosened, then the hardener canister is free to slide left or right in the slot on the frame, and along the pump lever (visible above). This process is repeated until the right spot is reached, for which pumping the lever yields the correct quantity of hardener and resin.

Epoxy pump calibration in action

As you can see during the calibration, the hardener and the resin are not mixed. This is so they can be weighed, and dumped back in their containers to be reused.

Back when, the Long EZ used an epoxy called Safe-T-Poxy, which turned out to be a misnomer, as it was found to be conducive to cancer due to one of the components in it, and ended up being discontinued around 1996. E-Z-Poxy was introduced as a replacement to Safe-T-Poxy, and was formulated without some of the carcinogenic agent, making it somewhat safer. 
This is still far from safe though, and generally speaking, there are no safe epoxies, all of them are toxic, and there is a real risk of sensitization due to overexposure. Gloves  are mandatory when working with epoxy, ventilation is essential, and a respirator should be used when working in enclosed spaces. 

(E-Z Poxy) Read the label!!!

(MGS) Did you get the message yet?

So technically, E-Z-Poxy is the epoxy that should be used on the Long EZ but, in the intervening 30 years, other epoxies were developed with similar, and sometimes better qualities. The bottom line is that Long EZs are being built with a variety of bonding agents, depending on the preference of the builder.

Rear seat built using E-Z-Poxy
Rear seat built using MGS-285
Rear seat built using Aero-Poxy
Working on a practice piece using West System epoxy


Obviously, you couldn't have a composite construction without a second (or third) material. In our case this material is fiberglass, but not just any fiberglass, two specific types of it in particular, woven into a cloth-like form, and chosen by the designer for their specific qualities.


From top to bottom: kevlar, bi-directional fiberglass, uni-directional fiberglass


While the job of the epoxy is bonding the fiberglass strands together, the fiberglass is the actual structural material, along which the load stresses are carried, and transferred. 
It might help to think of the fiberglass filaments as tiny rubberband-like materials, that can carry a load when pulled at both ends (with one difference: fiberglass does not stretch). Similarly to how a rubber-band opposes being elongated (tension), and is weak when both ends are pushed toward each other (compression), so does the fiberglass react, with excellent tension qualities, but poor compression resistance.
Once again, the epoxy is there only to bond the fibers to each other, so that the tension loads are resisted to, and more epoxy will not produce a stronger bond, just a heavier part. Quality control on the builder’s part is important to ensure the epoxy to fiberglass ratio is as  low as possible without the part being too dry (50/50 is normal without vacuum bagging), and that all the fibers are laid as straight as possible (no waviness) to permit the strength of the part to develop without stretching under load. 

That’s good and all, but how do these multiple layers of epoxy-impregnated fiberglass, become airplane parts, and ultimately an airplane?

Back in the day, while every other designer used the same old  sheet metal, or fabric, instead of innovating aviation, Burt Rutan broke all conventions by pioneering the “moldless composite construction method” for aircraft building, now an industry standard.

Burt Rutan and me (sort of)


That simply means, the fiberglass is laid over another material with the shape of the part to be produced. In our case, this material is foam! Yes, foam! No, this time it's not a joke! This foam is very light (about 2 lbs per cubic foot), easily shaped with simple tools, and provides the framework for the part. The foam is somewhat similar to the blue foam used in the construction business for thermal insulation, but it is specific for airplane construction, of course.

To be precise, there are at least three to four different types of foam used in the Long EZ building, but you get the idea. The key to this system is the relative ease in shaping the parts, with nothing more than a kitchen knife and a sanding block, things most anyone would already own.


... or you could buy some new fancy tool to do the same thing!

It is important to note that while the foam lends the shape to the structure, it is not a structural material, fiberglass is, but the foam provides other benefits, like resistance to "oil canning", and displaces air that would expand and contract within the part, possibly creating condensation and freezing of moisture, and perhaps cracking of the piece.
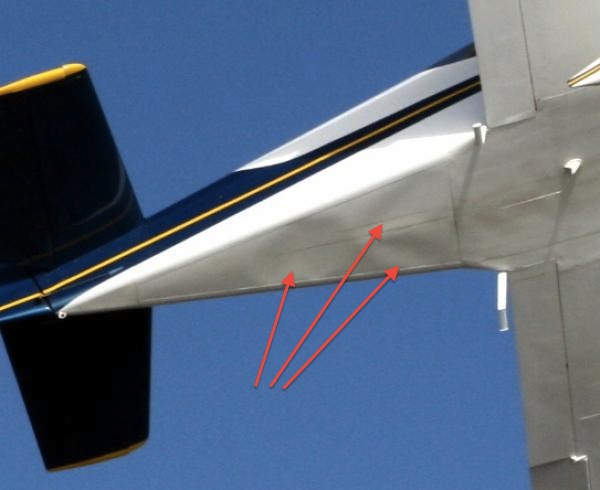
"Oil canning" of sheet metal surface

Probably one of the greatest advantages of this construction method is the ability to create rivet-free compound shapes, that would be nearly impossible to reproduce with any other material. 

Compound shape example


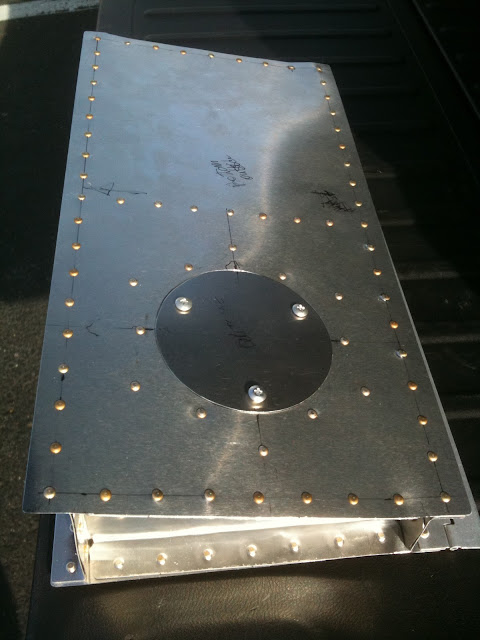
Strength, resistance to corrosion, and light weight, are also composite traits that endear this construction method to the aircraft industry.


Friday, October 28, 2011

Necessary skills

If you have followed the story so far, you might be curious to find out how a Long EZ is put together. 
There are 3 principal ways of building airplanes, and the majority of airplane constructions embrace at least two of them. Probably the most popular is the aluminum alloy sheet metal construction, followed by the tubes/wood and fabric method of old. Lastly and most “recent”, is the development of the composite building process, and by “recent” I mean "in the last 30 years". 
But let’s proceed in order.
Aluminum construction consists in bonding, usually by way of riveting, aluminum sheets of various shapes and sizes, to create aircraft components, and eventually the airplane itself.

Before...

... after.
Most general aviation airplanes produced in the past 50 years, all commercial jets, and the majority of military planes (stealth excluded), fit into this category. 
It is a proven construction method that require some specialized tools and techniques, but can be mastered in time. 

Wing section


In 2010 I attended a two day sheet metal workshop, put together by the Experimental Aviation Association (EAA), and I fabricated the wing section depicted above. I absolutely enjoyed the class, and would highly recommend it.
As you can see, just about anyone can produce acceptable results with the proper coaching, but the skill to master the art of riveting requires time, and mistakes are unavoidable. It is critical this errors not be made on the actual airplane, as the repairs can be time consuming, and sometimes more difficult to accomplish than the original task.


I declare my complete ignorance of the tube/wood and fabric construction method. I took a few pictures of people learning such skills at my last workshop.


It just looked like a lot of work and, to tell you the truth, I have never been fond of thread and needles. 


Moving on!

We finally arrived at the composite camp. 


Because the 2010 sheet metal workshop turned out to be such a great experience, I decided to part with another $300, to attend another EAA workshop, this time on a composites. 


Scott Vanderveen was our instructor, and we couldn't have asked for a more knowledgable mentor. You see Scott is the owner of Pro-Composites, Inc., and produces a handful of different aircraft designs, all composites of course, and is a walking encyclopedia of anything composite.


Scott teaching class


After the theory session in the morning, we moved on to the practical applications in the shop, where everyone had their chance of success.


Practice session


Once again the experience turned out to be a fantastic learning opportunity, and I would encourage anyone to attend any EAA workshop, as they are taught by knowledgable people who love to share their craft.
At the end of the second day I had worked enough at it to produce three different pieces, all representative of different composite techniques, a T-joint, a fiberglass-over-foam canard section, and a fiberglass-over-clay fairing.

What $300 and a weekend will buy you

If you look closely at the transparent piece, you can see that I purposely left some fiberglass dry at the top corner, to highlight the difference in the state of the material, before and after adding the epoxy. Naturally this part would be trimmed before using it, but this was just an exercise.


Thursday, October 27, 2011

The plans - Part 1

So, just how does one go about building one of these things?

As it turns out it is a journey of discovery, more akin to an archaeological dig, than just blindly following the directions of a CAD drawn blueprint.

Indeed nowadays there are many airplane kits on the market for which the builder simply lines up CNC pre-drilled holes in the skin, and rivets the parts together. There is nothing wrong with that, the success ratio is pretty high, and the airplane quality very consistent. But the builder is more of an assembler of pre-made parts, rather than being able to start from the ground up. There is still a lot of work left to do, make no mistakes, but it's like the difference between building a sand castle, and a Lego one. You can have fun with both but, while you put together a Lego construction, you actually create the sand castle.

The Long EZ is a plans-built aircraft. This means that you start your project with ... a bunch of paper, and nothing else. It is up to you to provide what separates your plans from a flying object.

At least theoretically, because it actually is a little more complicated than that. You see, the designer, Burt Rutan, developed the Long EZ around 1980, and sold the plans until around 1985. Back it the 80s, computers were just in their infancy, and played no role in the development of the airplane, and of its plans.

The plans are typewritten, and have occasional handwritten corrections on them, and the drawings are sometimes cartoonish. While probably state of the art in 1980, they are not so much today. What's worse is that the company who made them, RAF (Rutan Aircraft Company), no longer exists, so your technical support is ... zero.

The first hurdle in the process is getting your hands on an actual set of plans. These plans were trademarked, and required that the registration page be returned to RAF, for the issuance of a serial number. The trademark also stated that only one aircraft could be built from a set of plans.

Thirty years later it's pretty hard to come by an original, unused set of plans, with a registration number. I was lucky, thanks to a tip from a friend, I had the opportunity to purchase such a set, but I had to go to Oslo, Norway, to get them. That worked out well because I was able to trade my Stockholm trip for an Oslo one, and left for Norway the next morning to meet with the seller. 

Eyes closed ... jet lag, you know!

Before long I was on my way back to the U.S. with a pristine set in tow.


Bringing the plans home


Because RAF no longer exists, there is no one to enforce the trademark, so an underground market of fake manuals has sprung up. Many of these frauds are sold on eBay every year, most are copies of the original, but occasionally some already-used manuals pop up as well.

Personally, I was glad to have had the opportunity to own the original unused set of plans, and I think Mr Rutan would approve.

Of course these plans have been revised a few times during the past 30 years, and no set of plans can be considered complete without these revisions. To that end, RAF published a newsletter called "Canard Pusher" (CP), through which the revision to the plans would be distributed, and every plan holder was required to be a subscriber. The CP started in May 1974, and ended in October 2002; 109 issues in all, of which the April 1980 issue (#24), was the first to include the Long EZ.

The builder was (and is) expected to comb through all the CPs (1398 pages), find the plan changes that apply to his plane (CPs included many RAF designs), and transcribe them on the plans, at the specified page. Can you spell tedious?


Luckily someone (Marc Borom and a few others) went through the whole CP set and extracted the Long EZ changes. Here's a link to the condensed versionand here's one to the whole CP set.


As you can imagine, the process took many months, and innumerable pauses to complete; but now that it is done, the real work can begin.


Shop preparation - Part 1

Airplanes have been built in all kinds of environments, from heated hangars to hallway closets, which is a testament to the builder's courage, endurance, and determination. Then again, 90% of all plans-built projects are never finished, and end up being sold as parts, or worse, getting scrapped.

Building an airplane is a huge challenge in and of itself, so I decided to improve my chances of success by spending some time up front trying to better my logistical situation.

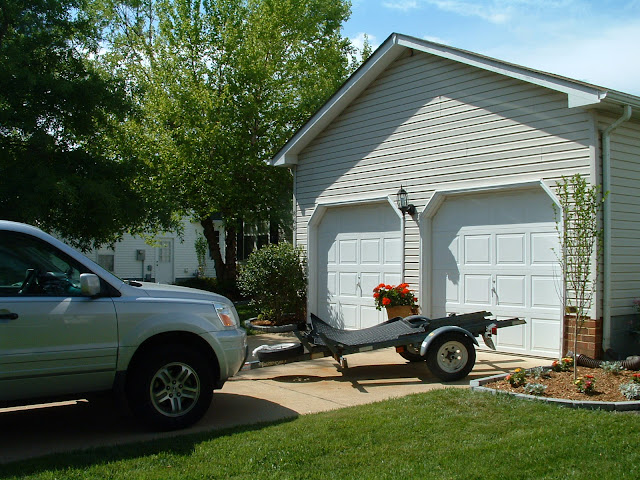
My two-car attached garage was always the primary target, ever since the building bug crossed my mind, but much work would be required to upgrade it, and transform it from a single lightbulb, one-outlet basic shell, to a properly insulated, lighted, and wired Long EZ factory.


The next few photos will actually go back in time to document the work I have done so far to create a comfortable cocoon for my aircraft (to-be), and myself.

I am fortunate that my domicile neither gets too cold in the winter, nor too hot in the summer, but these are relative terms. It turns out that epoxy constructions have their own idea of what constitutes a temperate climate, and do not like anything colder than 70F, or hotter than 90F, with a sweet spot around 80F. Now, I would love to move where Mr Epoxy comes from (Hawaii maybe), but for now the best alternative is to insulate, heat, and cool my workshop.

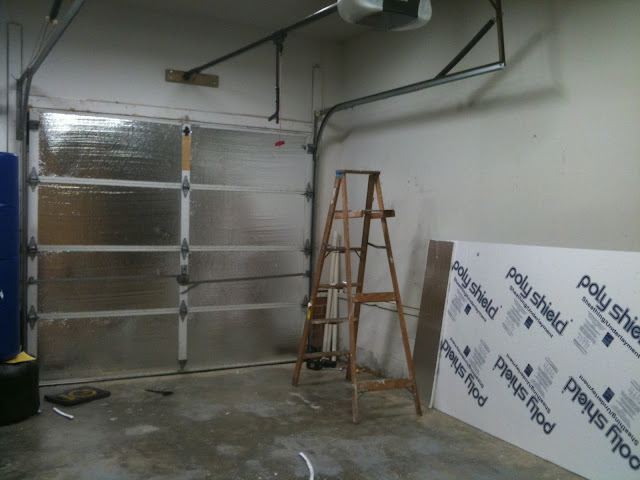
On Jan 2010, I started work on the garage doors, as they seemed to be the simplest task. I went to Lowes and purchased insulation.


I cut it up  with a regular razor knife, and stuffed it in all the empty panels of the doors.


This took about an afternoon, and by the time it was done the result was pretty good. I could not feel any cold coming from the door panels anymore.


It is now a year and a half later, and the insulation has proven itself in the heat as well as the cold, and turned out to be robust as well, as long as you don't place heavy objects against it.


The next place to insulate on my list was the ceiling. My garage has nothing above it but the roof,  so  I cut a hole in the ceiling, and insulated the upstair after all my wiring was complete. I decided to use batts of the pink stuff laid between the joists. Itchy job, but pretty straight forward.


No, the lights were not already there!


Because the summer was approaching, I needed to install an air conditioner pretty soon. So I took a break from insulation duties, to start working on the electrical side.


First I had to add two 110 Volts circuits.


Then I added a 220 Volts circuit under those. Next I cut the drywall, and run the wires through the walls and ceiling, to where I needed it.


12 gauge wire (20A) going in

3 additional outlets (middle one is 220V)


I like electrical work, but it took quite some time to complete, with many trips back and forth to Home Depot to get more supplies.


Checking for proper wiring


220V outlet for AC/heat


Electricity in the shop is important, but nothing is as essential as proper lighting, so I tackled that by installing six double-tube neon lights. Can you say BRIGHT!!!


It was like trying to take a picture of the sun!


This photo just doesn't do it justice, but you are going to have to trust me on this, it is like daylight in there anytime of day or night. Indeed I have had some building session since then, that continued uninterrupted into the AMs, with no lighting issues at all.
While I was at it, as you can see, I added a retractable electrical extension to the ceiling. When I bought it, I just thought it would be cool, but now I use it all the times, and wouldn't give it up for anything. It is by far my favorite way to bring power tools to the parts I'm working on.


Best addition to the shop so far


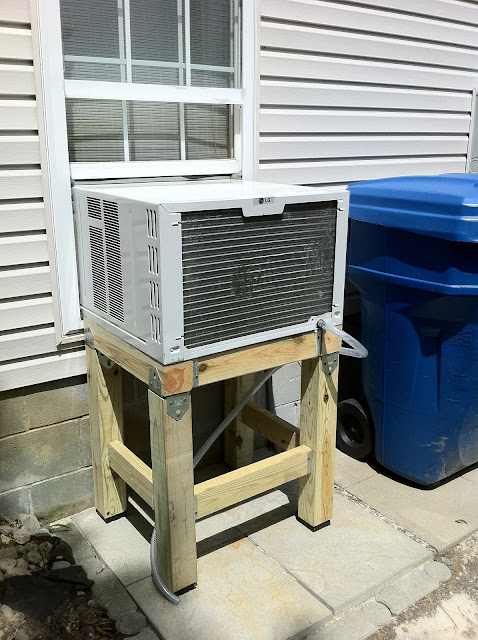
By the time July 2011 rolled around, I was ready to add the AC/Heat window unit for which I had installed the 220 Volts circuit. I found a reconditioned unit on eBay for about $500, and bought it.


For a moment I thought I'd have to cut into the window frame to get it in!


A bit pricey, but this baby is a true monster. It weights 160 lbs, I could barely fit it in the opening, and I ended up throwing away all the nic-nacs that came with it.


It is rated as 24'000 BTUs for air conditioning, more than enough for a space twice the size of my garage.


Perfect!


This stand has weathered one hurricane already


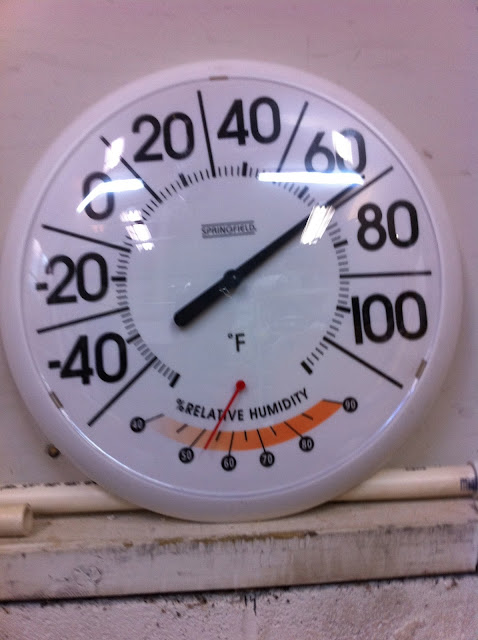
This unit has been working all summer long, and was able to chill my garage on the worst of days. Here's a photo of a summer day with an outside temperature close to 100F.


And that's before I insulated the walls!


I decided to go with the cellulose insulation (paper) from Home Depot, and I started cutting holes near the ceiling into which to blow the stuff.


I will later cover them up with trim similar to baseboard.


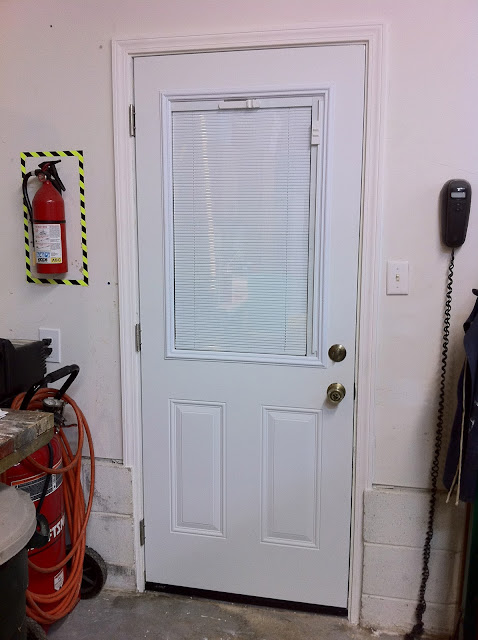
Last, but not least, I needed a new side entrance door. When the  bottom of the casing rotted away on the old door, the threshold came loose and rainwater would come in the shop. I also wanted a door with mini-blinds inside the window, to avoid all that dust and spiderwebs that like to gather on the exposed kind. 


New garage side door


Unfortunately I did not take any pictures of the installation, but since it was a one man project, I'd rather forget how much effort it took to get it there.


What's a Long EZ anyway?

I have been involved in aviation my entire life as a general aviation, military, and airline pilot, and have not had enough of it yet, but I have always wondered what I'd do about flying after I retire.


For many years I have been playing with the idea of building my own airplane, but the timing was never right. Either the money was tight, the children still young, the planets not perfectly aligned, ...


In hindsight, I should have started anyway, but now that I have, I will probably spend the next decade working on the construction. Yes, I am enrolled in the "slow-track" since my work keeps me away from home over half the month, but that is no longer what I consider a good excuse.


Which brings us to the Long EZ.


I spent a very long time trying to figure out which plane would best fit my needs. I wanted quick and economical long range capability first of all, with tandem seating for me and a passenger, better than General Aviation performance, and ease of construction, and it would have to look cool, of course.


My list of possible airplanes dwindled very quickly. In the end all it took was one ride and I was sold on the design. It was the most fun I had had in a long time, and I literally could not stop smiling for hours afterward. 


Well, I just had to give up on the ease of construction part.


So let me introduce you to the Long EZ...


Beautiful isn't she? Hopefully mine will look just like it in the not too distant future.


If you want to know more about it you can check out the Wikipedia post here, or the Smithsonian Air and Space museum.